

My Mum (Granty) made these amazing Bird Wings for my daughter last week – she knows how much Miss M loves to dress up and pretend play. ‘Granty’ was nice enough to take some photos and notes as she made them for us to share with our fellow fun mums…or their sewing fun grandmothers ;).
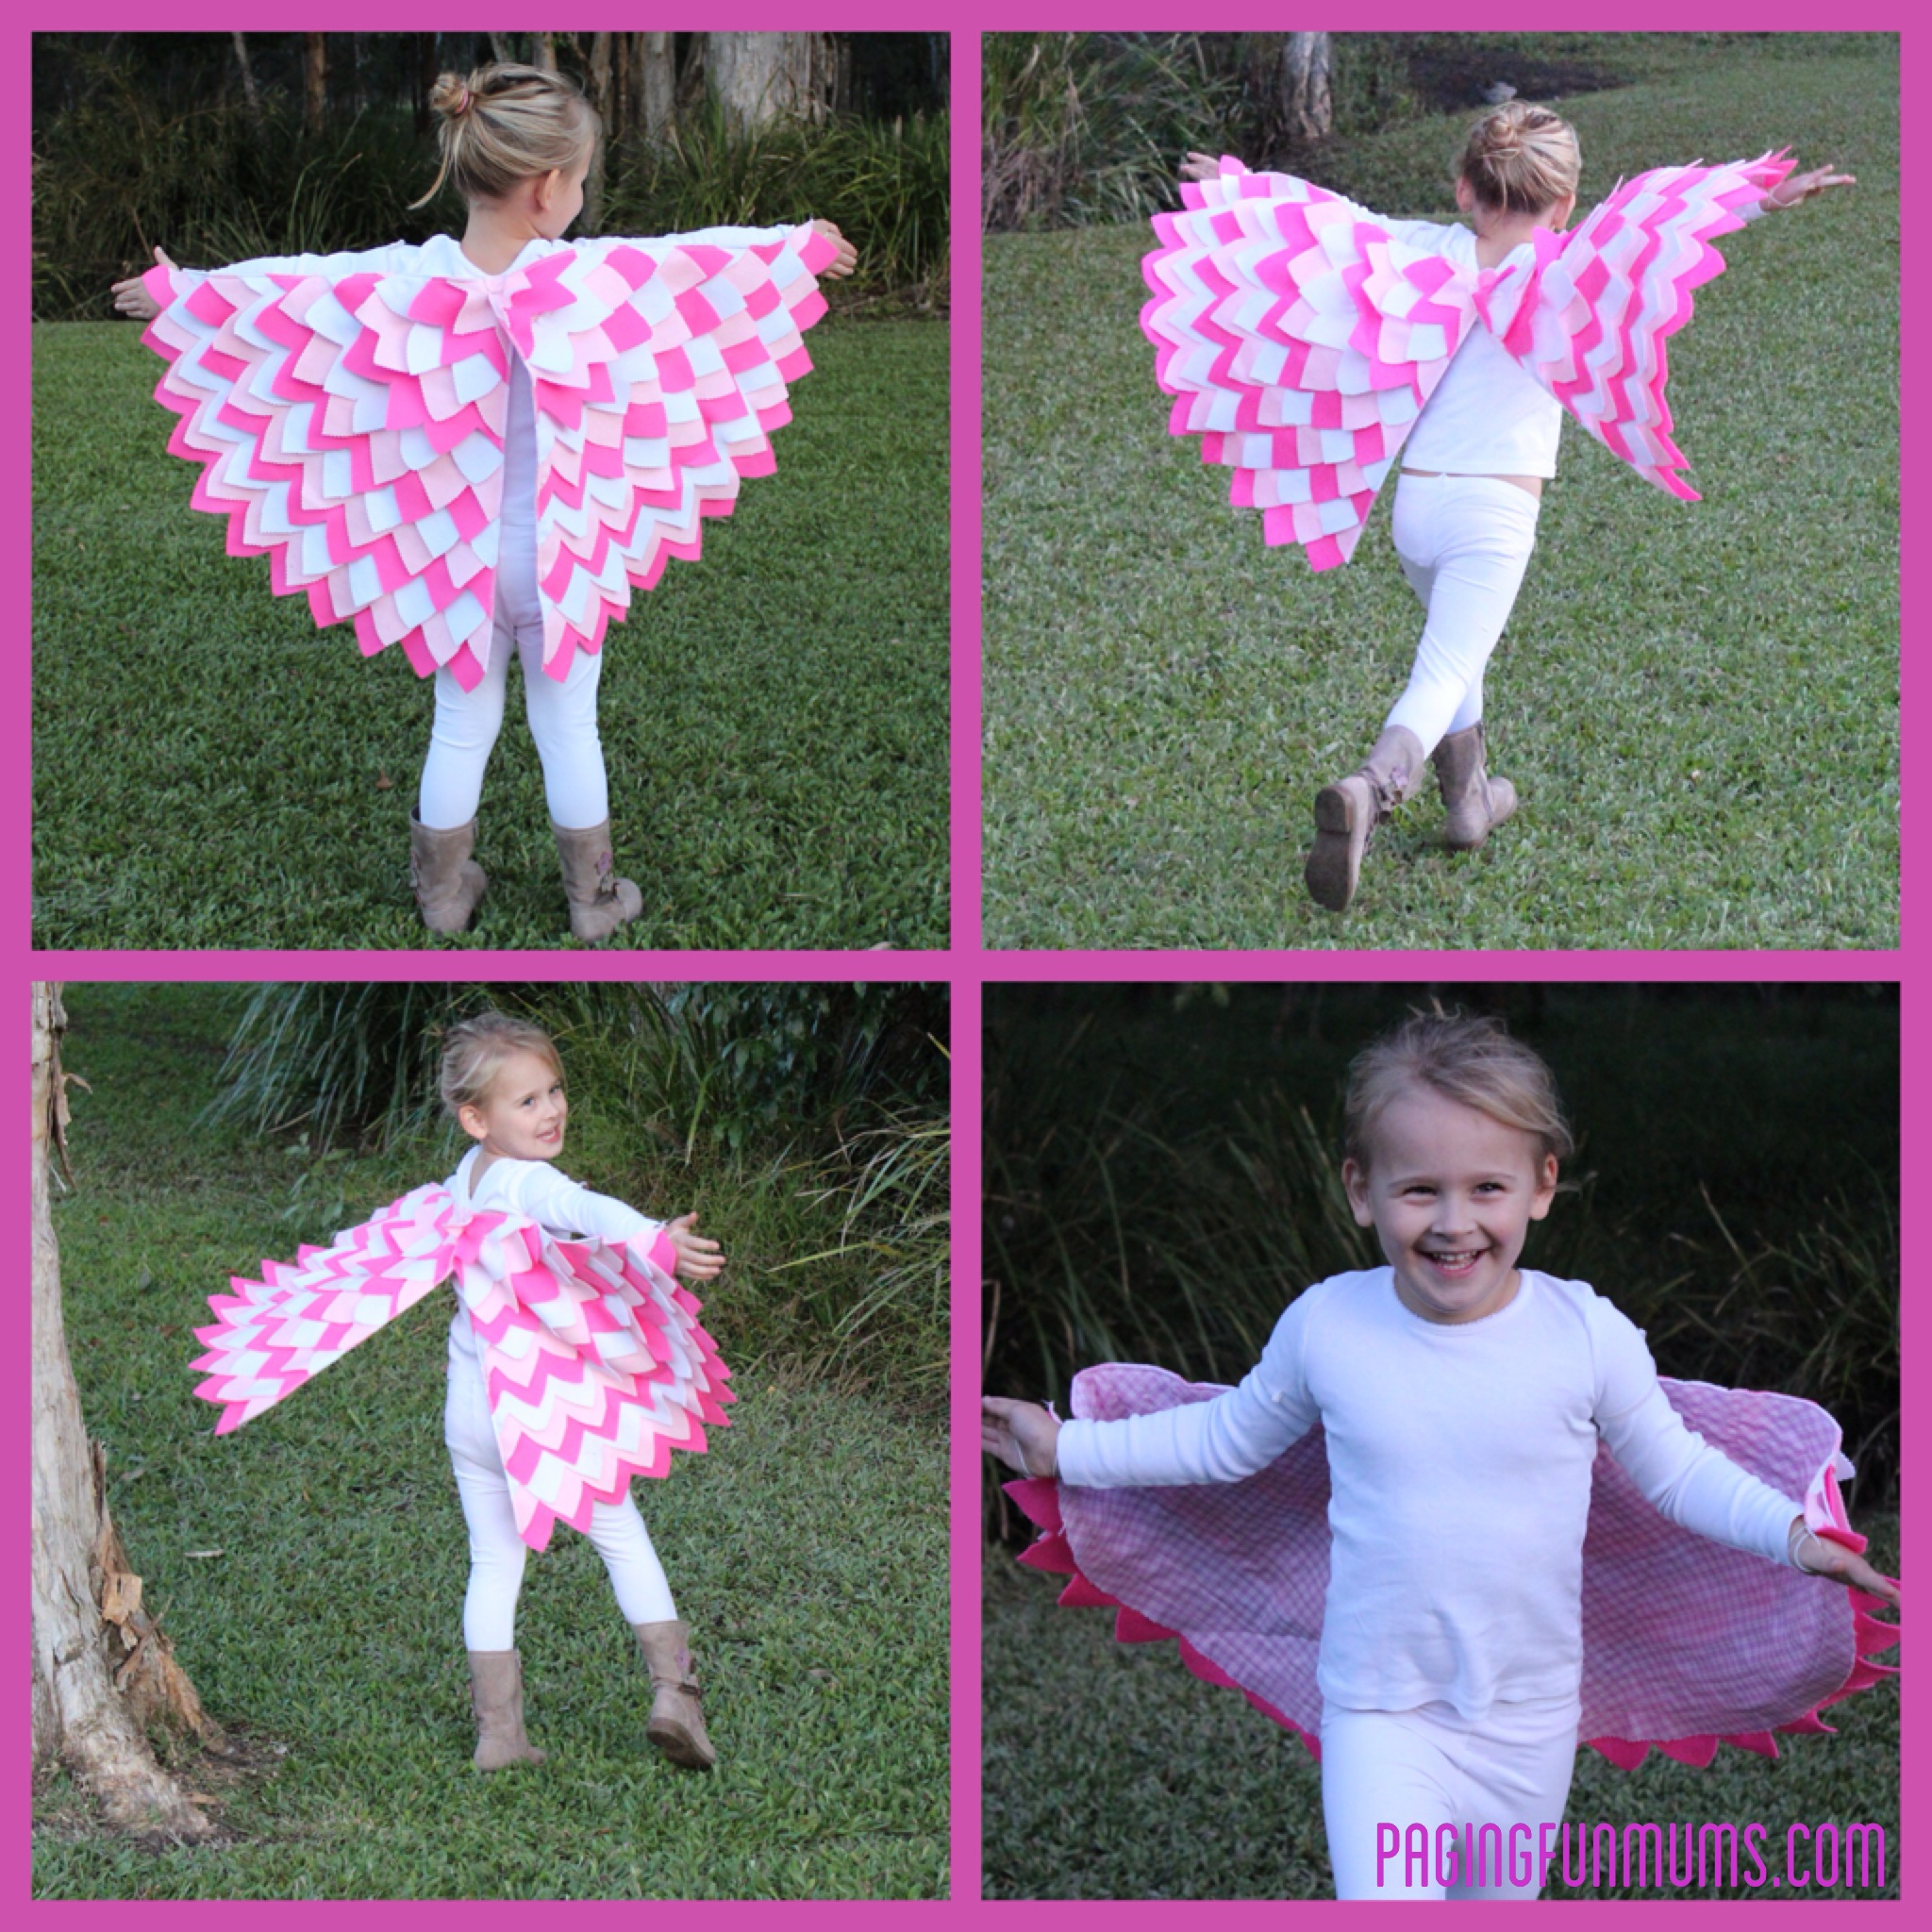
Miss M has spent hours flying all over the house and backyard in them.
How to make Felt Bird Wings
What you’ll need –
- Material for backing
- Felt material for ‘feathers’
- Pinking Shears
- Sewing Machine with cotton thread
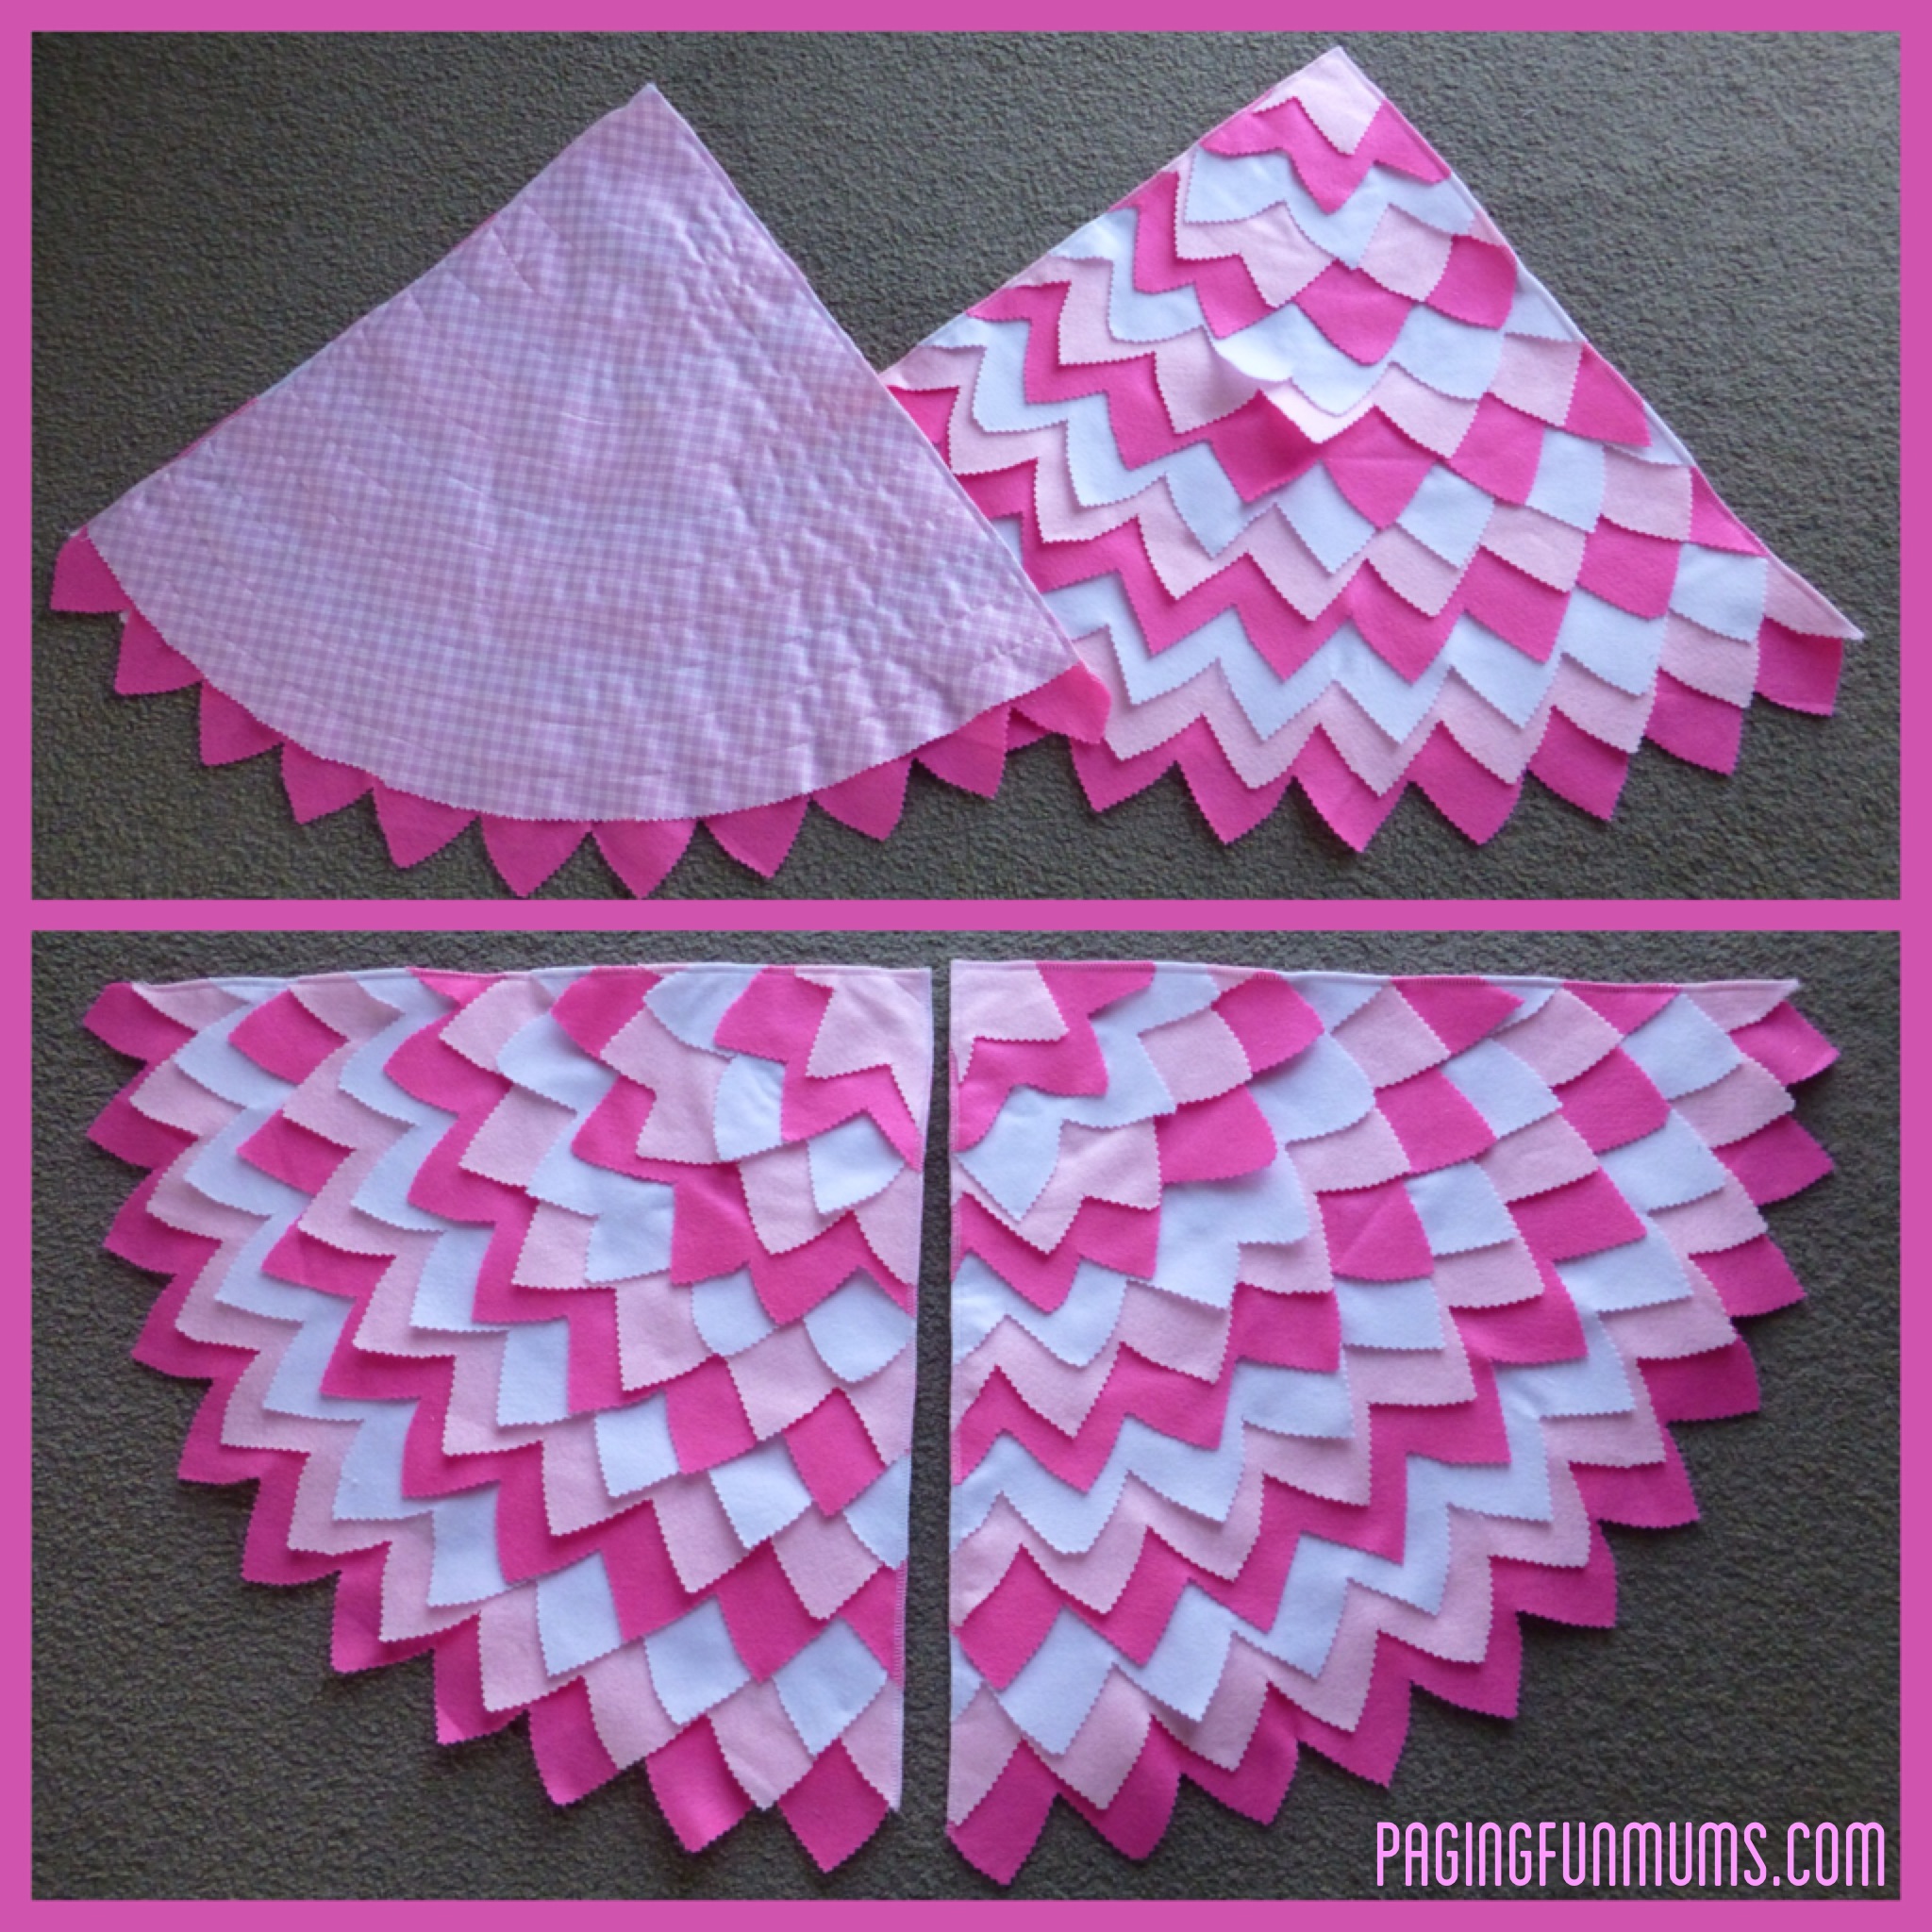
Measure your child from the center back (Just below neckline) to their wrist. Then measure from the center back (just below neckline) to their waist. Draw a semicircle from these two points, add three inches and make a secondary semicircle. Then cut off the outside three inch strip.
Cut the ‘backing’ fabric x 2 (twice) using the semicircle as your template and set aside for sewing the feathers on. ..
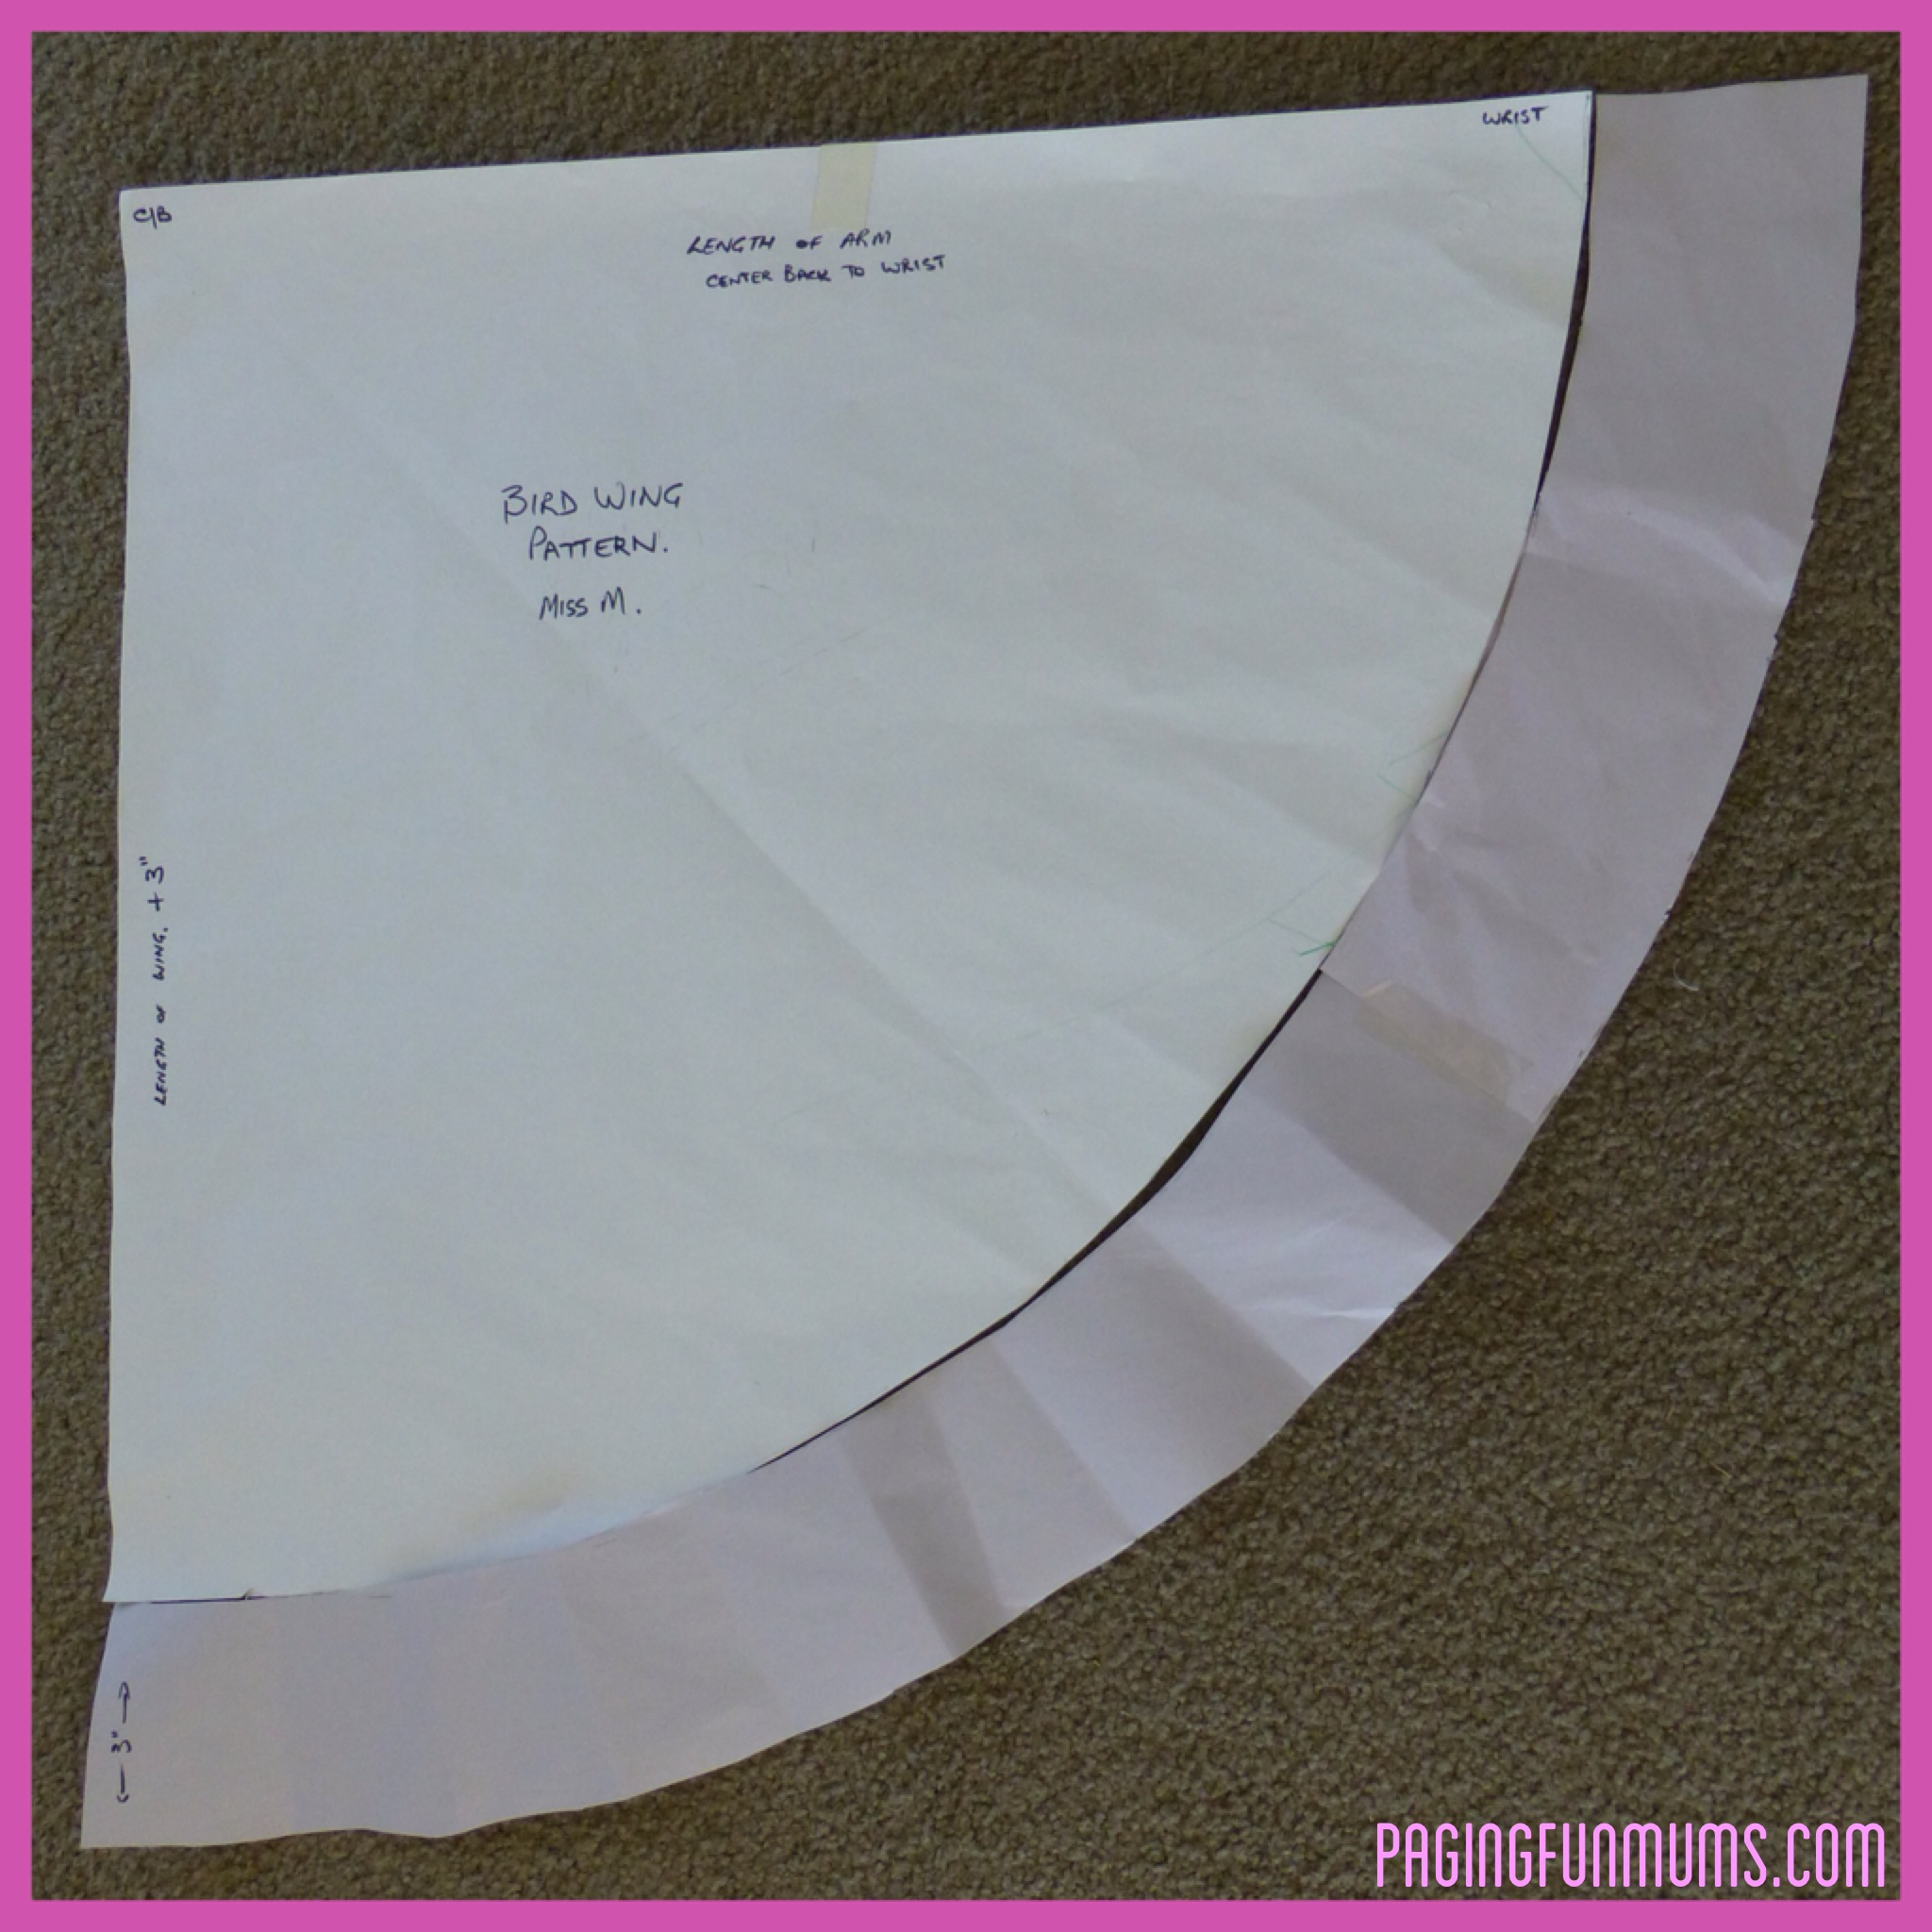
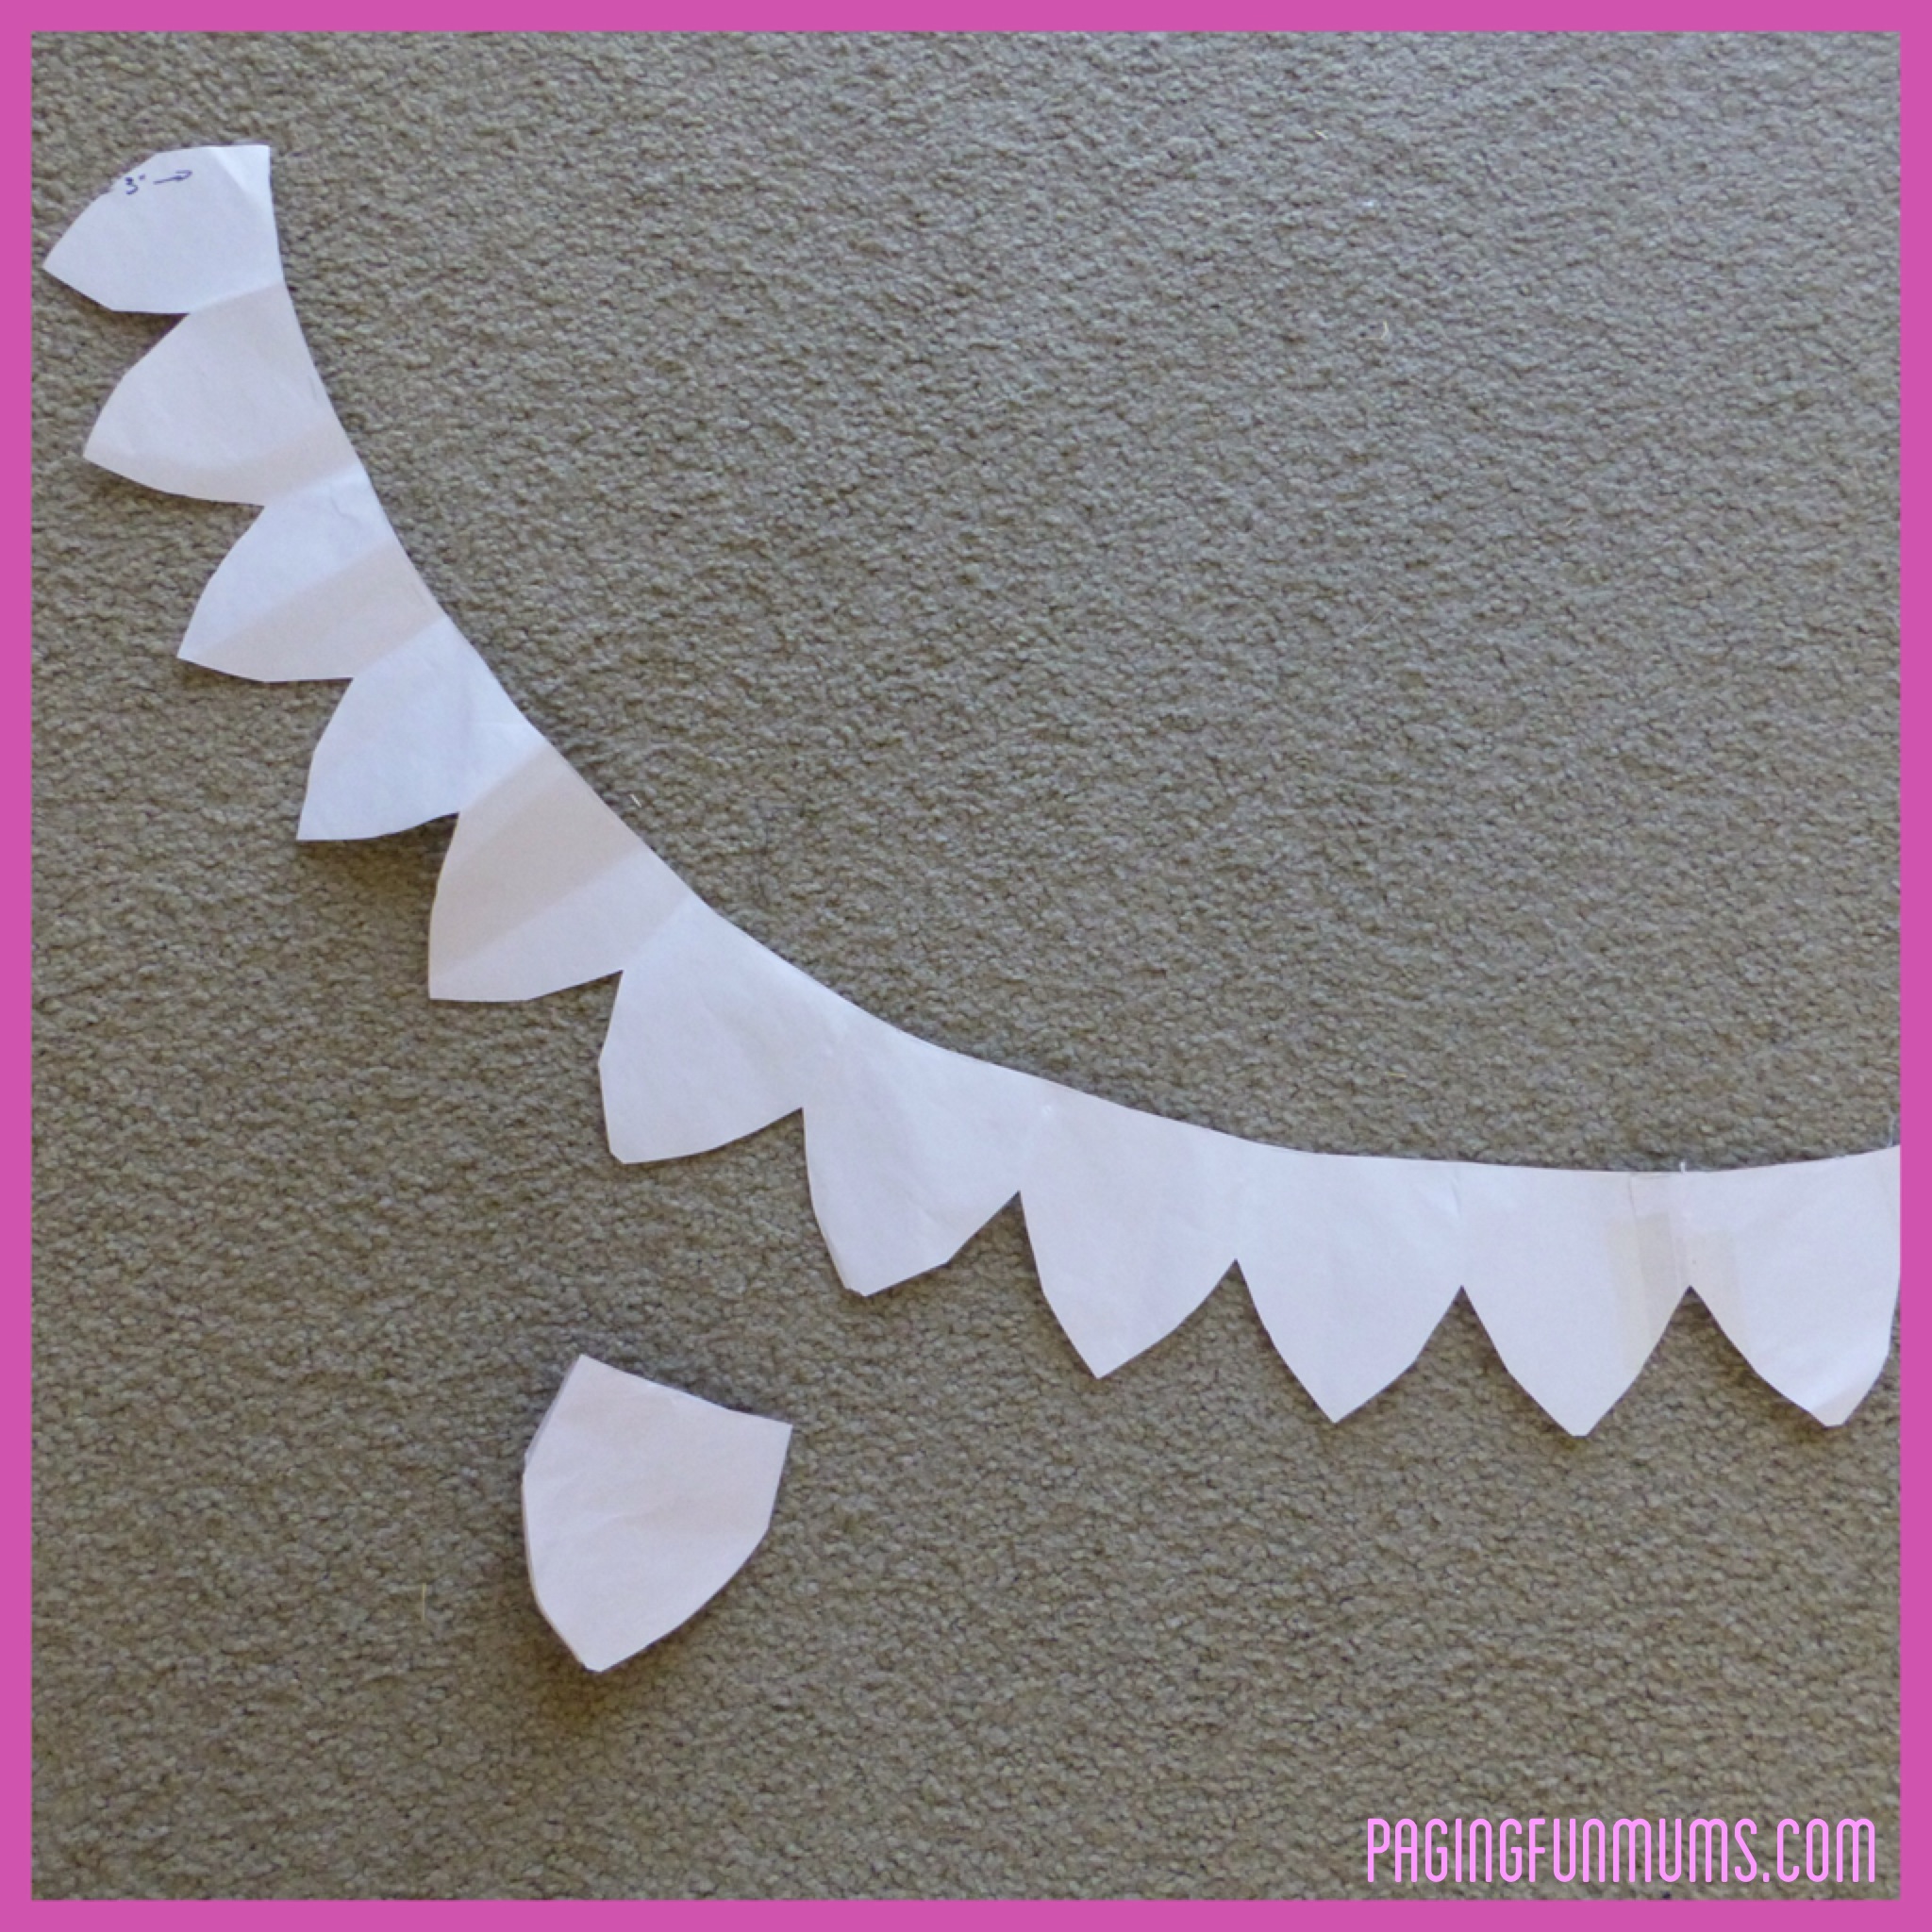
Fold the three inched strip like an accordion (as if making paperdolls) cut the folded paper into a scalloped shape and unfold – This will be your feathers template and will save you from having to gather the felt to stitch around the semicircle shape.
Using your feather template cut two sections of felt to make your first row. Then sew this row along the bottom of the wing shape backing (on the wrong side of the backing fabric).
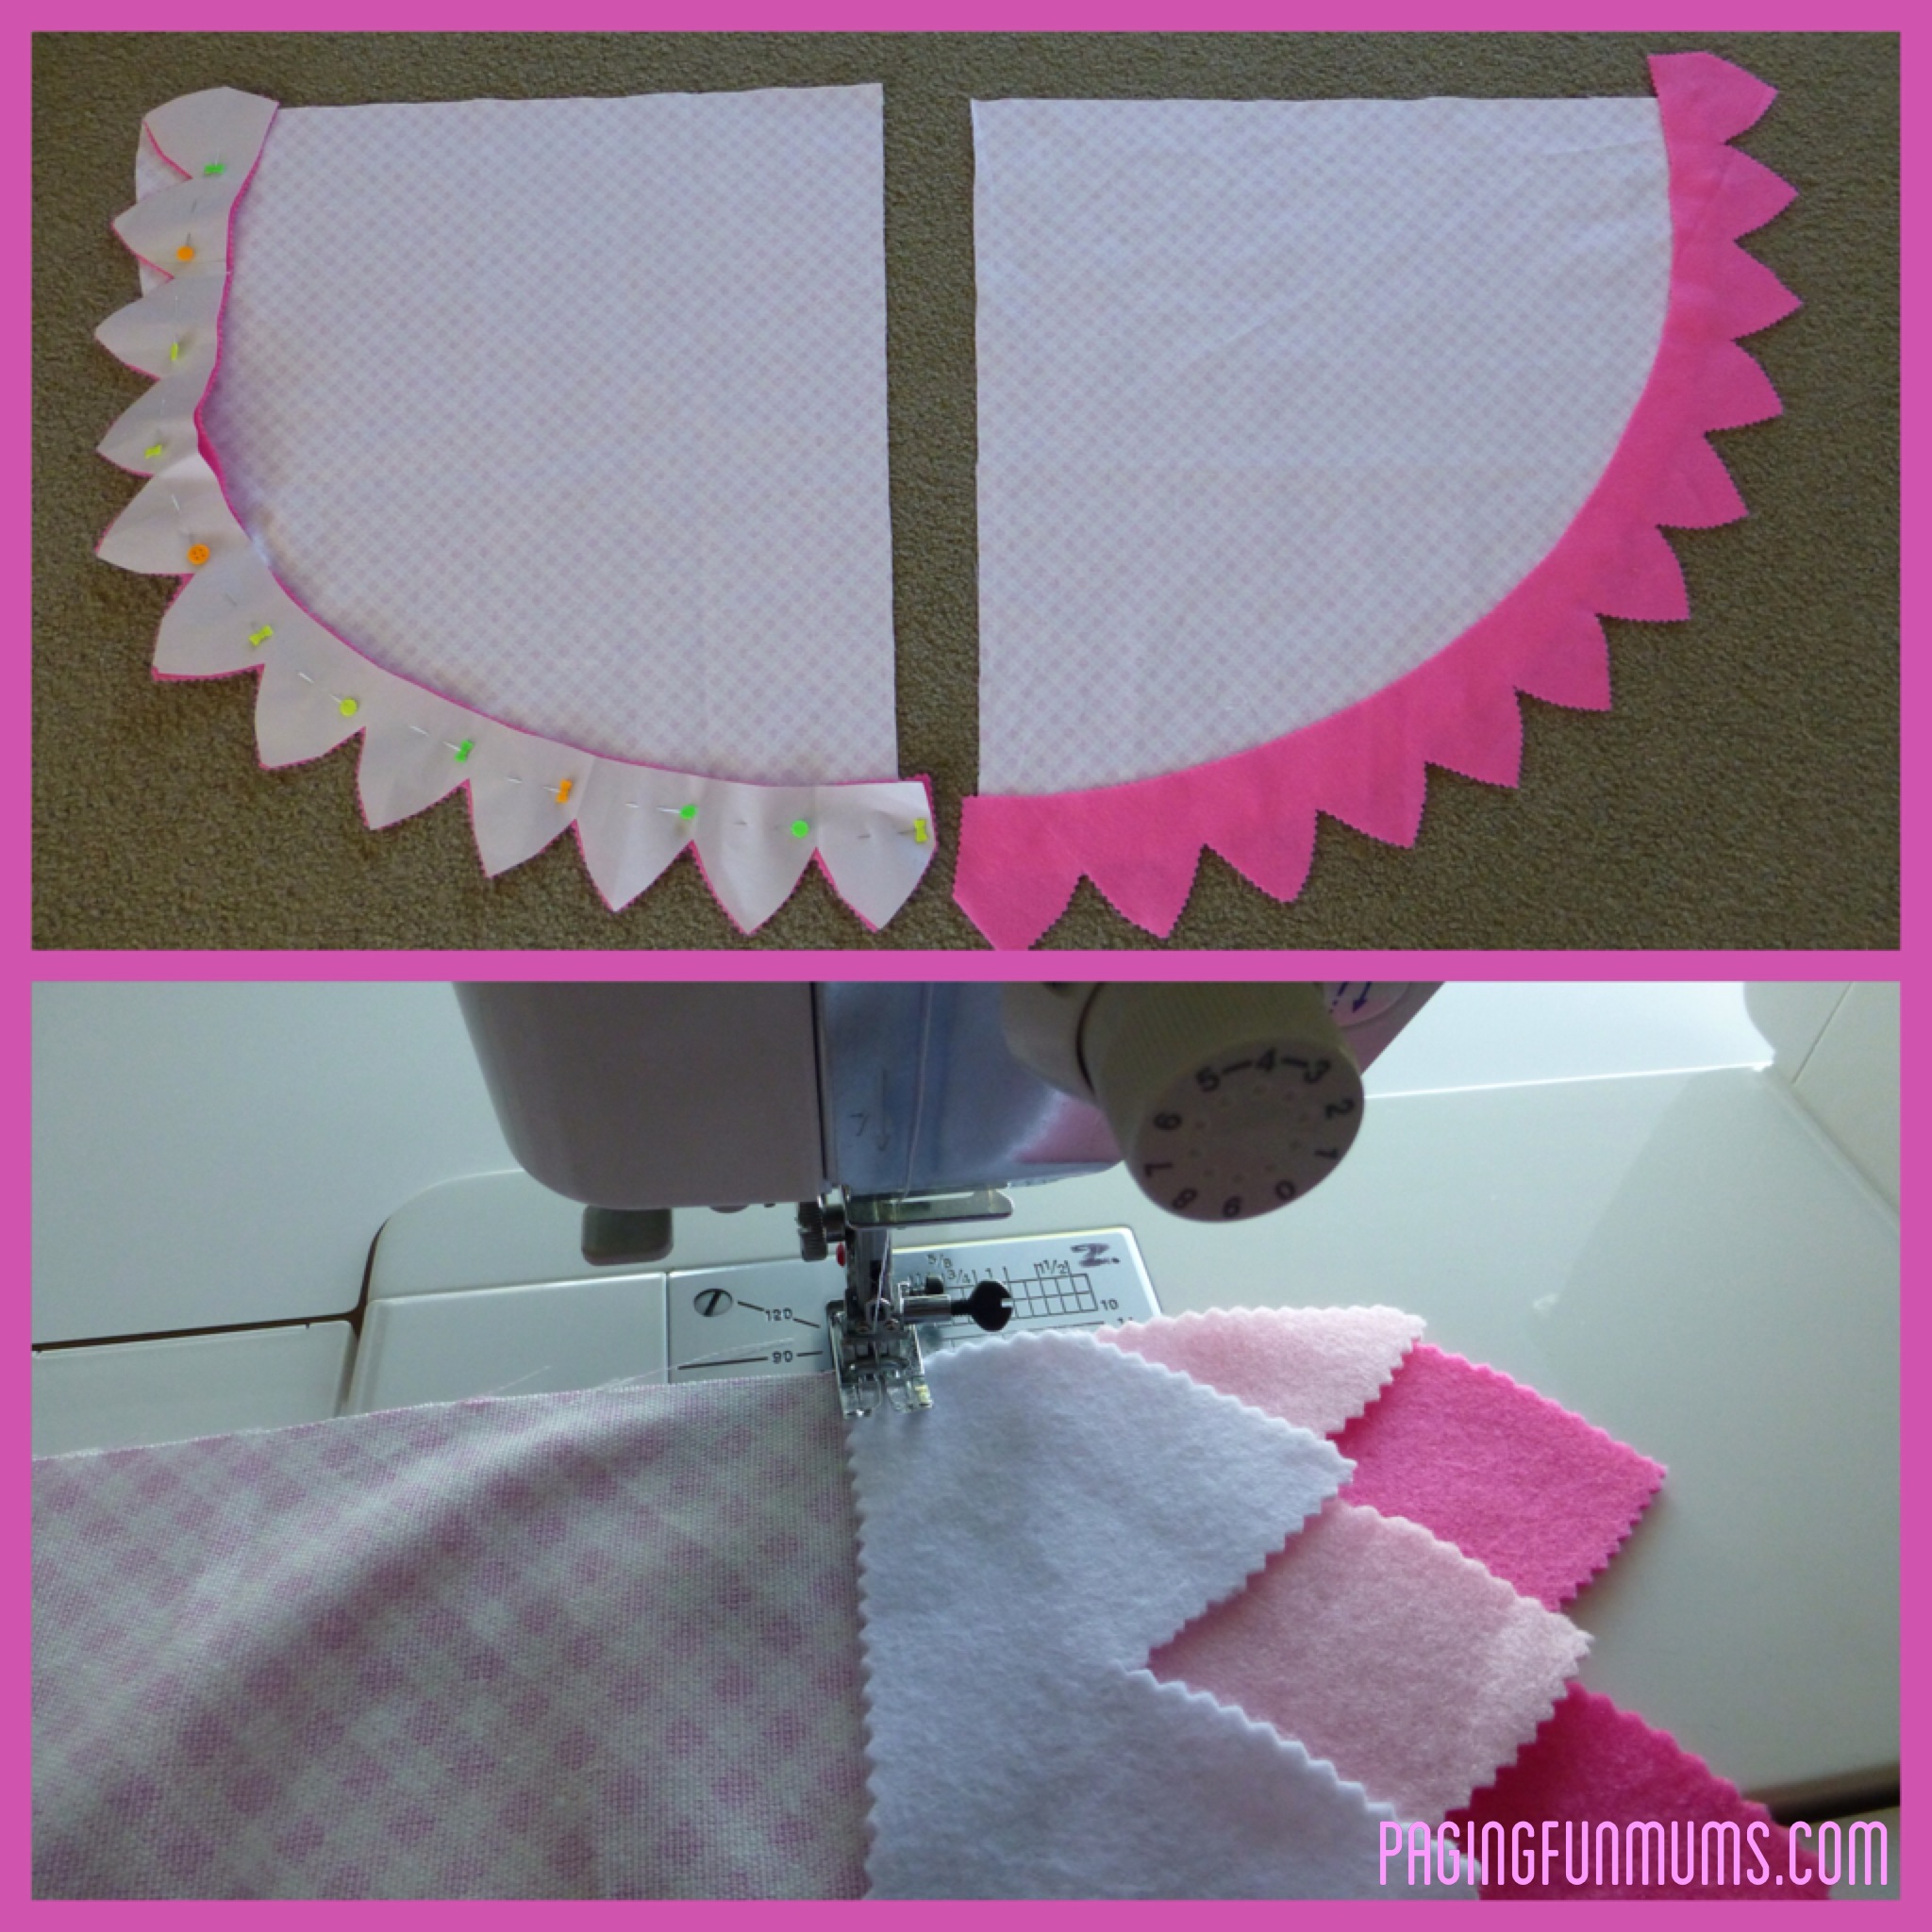
Cut two more ‘feather’ rows (in a different colour if you’re using multi coulours). Then align this so the scalloped/pointed edge is in-between the inward point along the feather rows. Then repeat this process until you reach the top of each wing. Your ‘feather’ rows will be getting shorter and shorter as you get closer to the top (you can adjust this on your pattern as you go). Don’t worry too much if the ‘feathers’ don’t match up perfectly when you get top the top.

When you have added all the feathers you can finish the sides with either an overlocker or just cut down them with the pinching shears to avoid fraying.
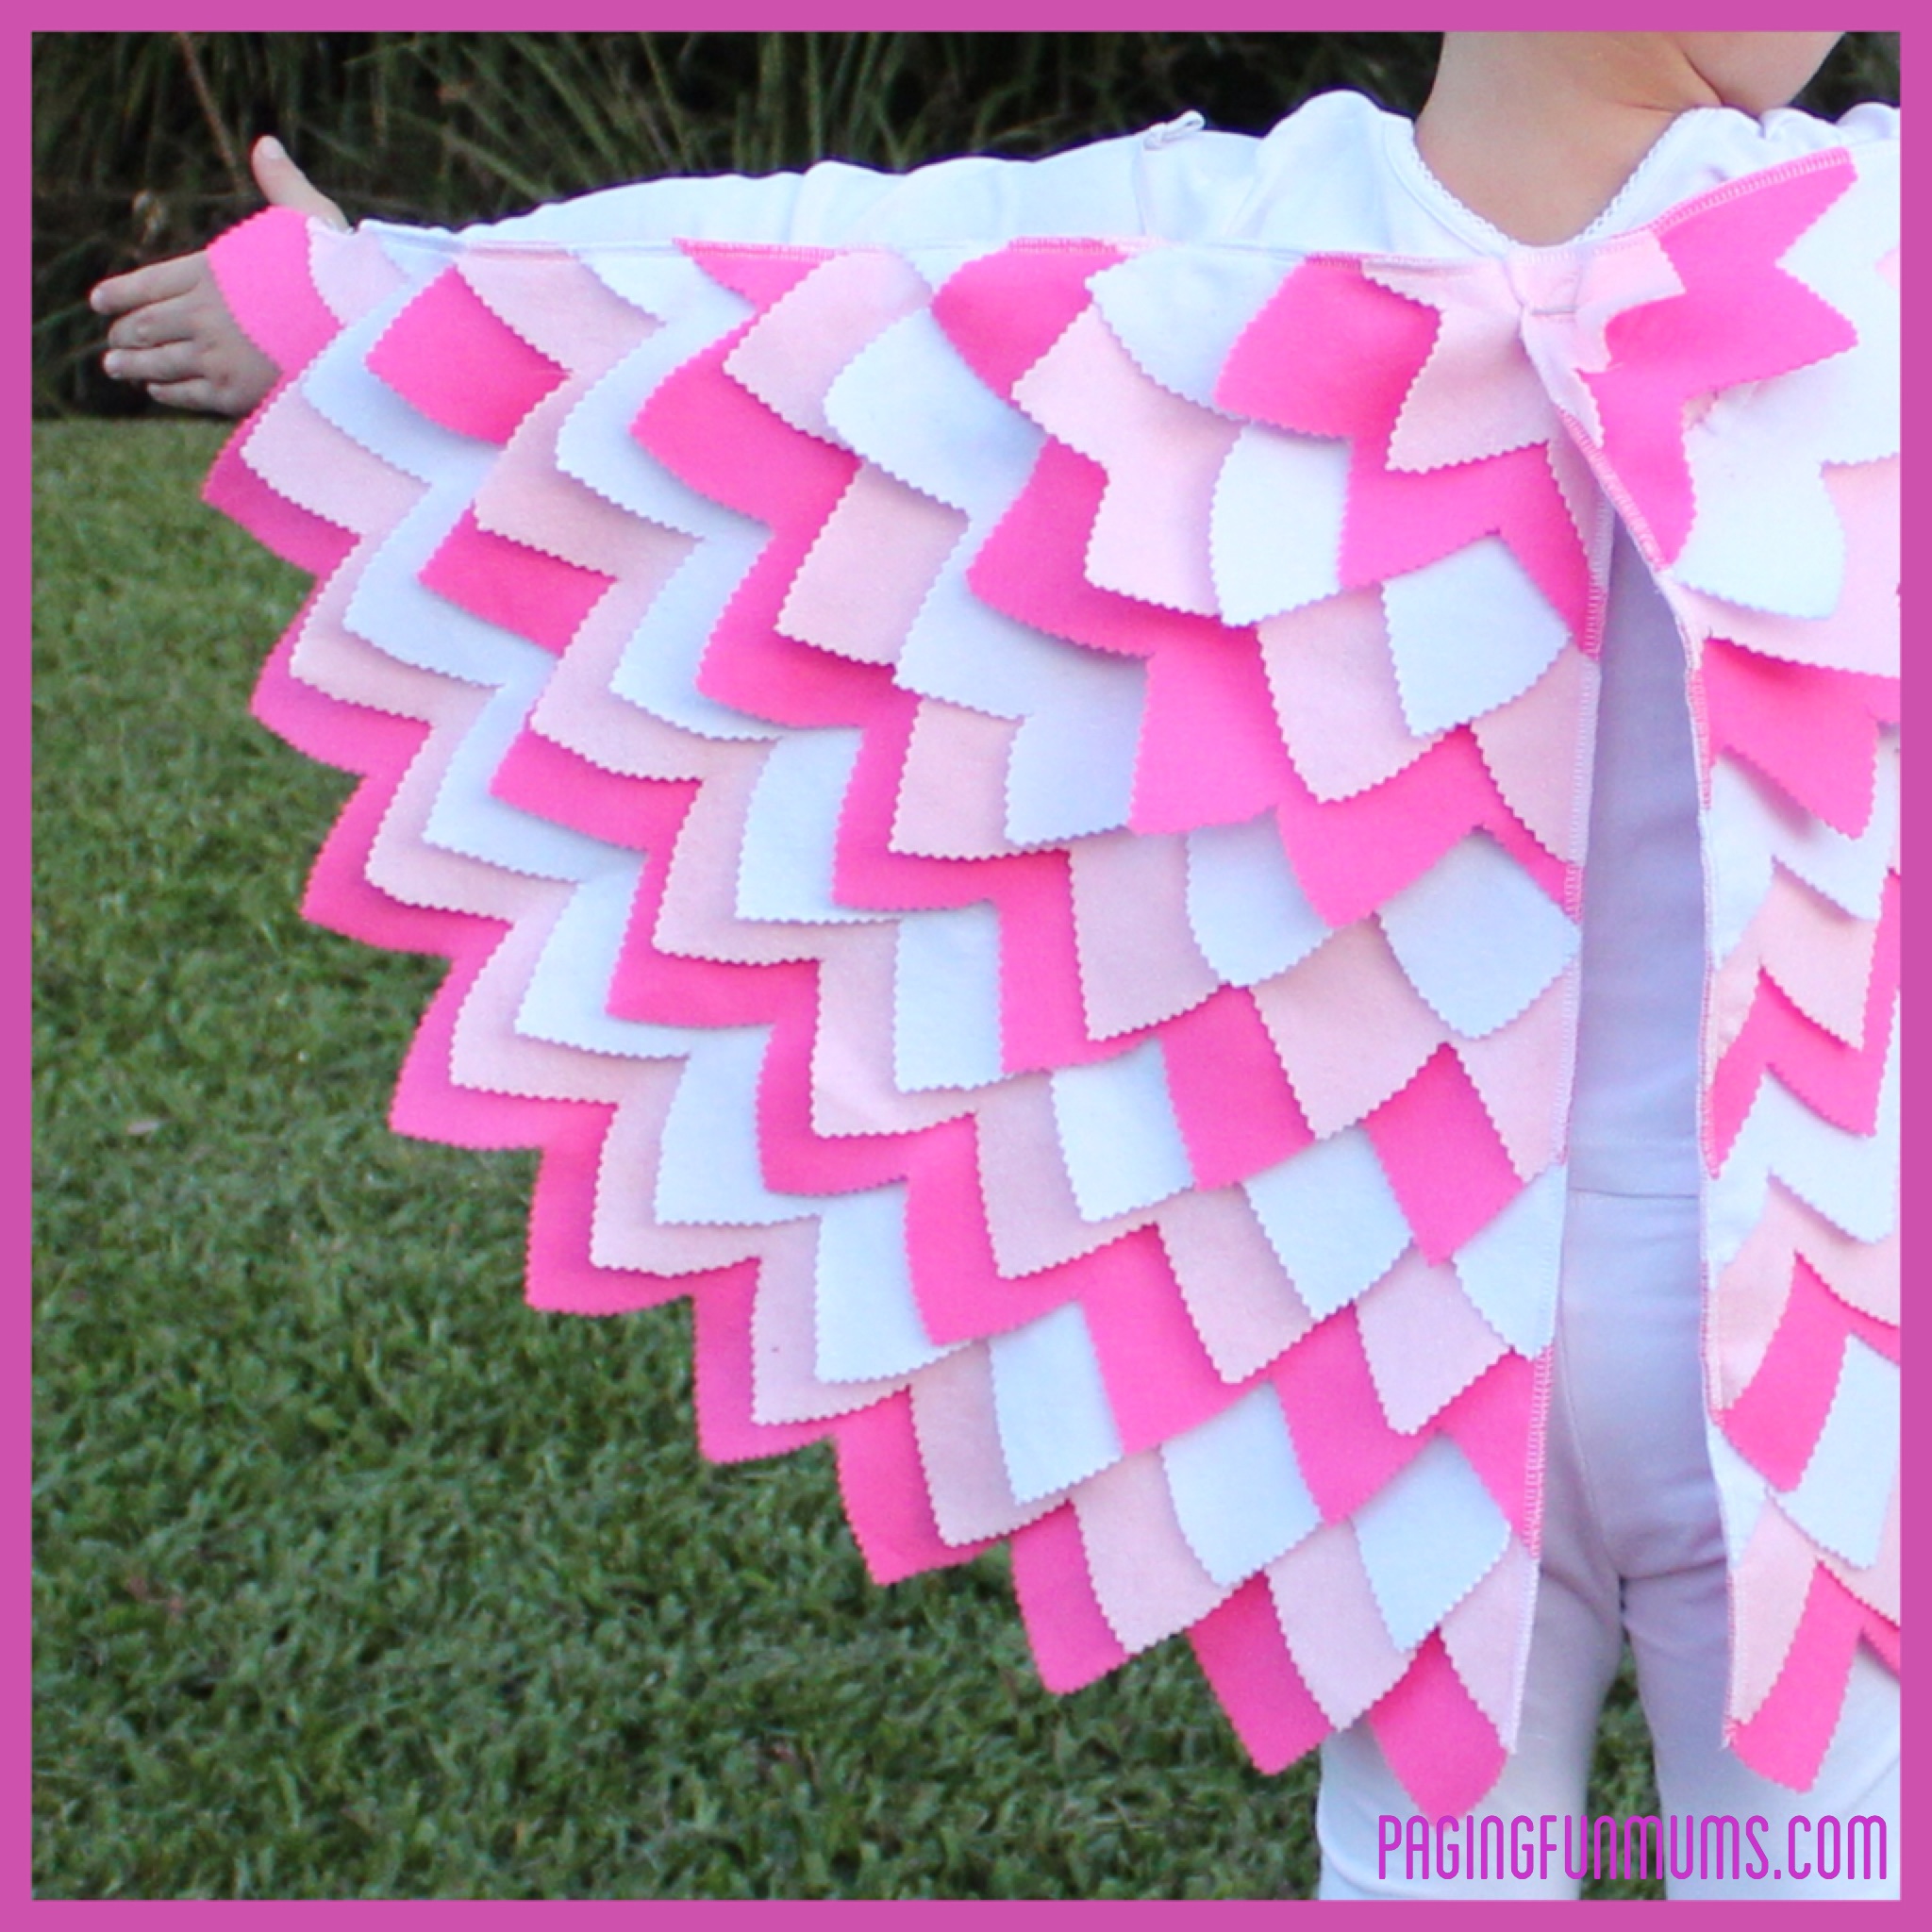
Sew an elastic loop either side about where the child’s armpits are, and a loop for each wrist.
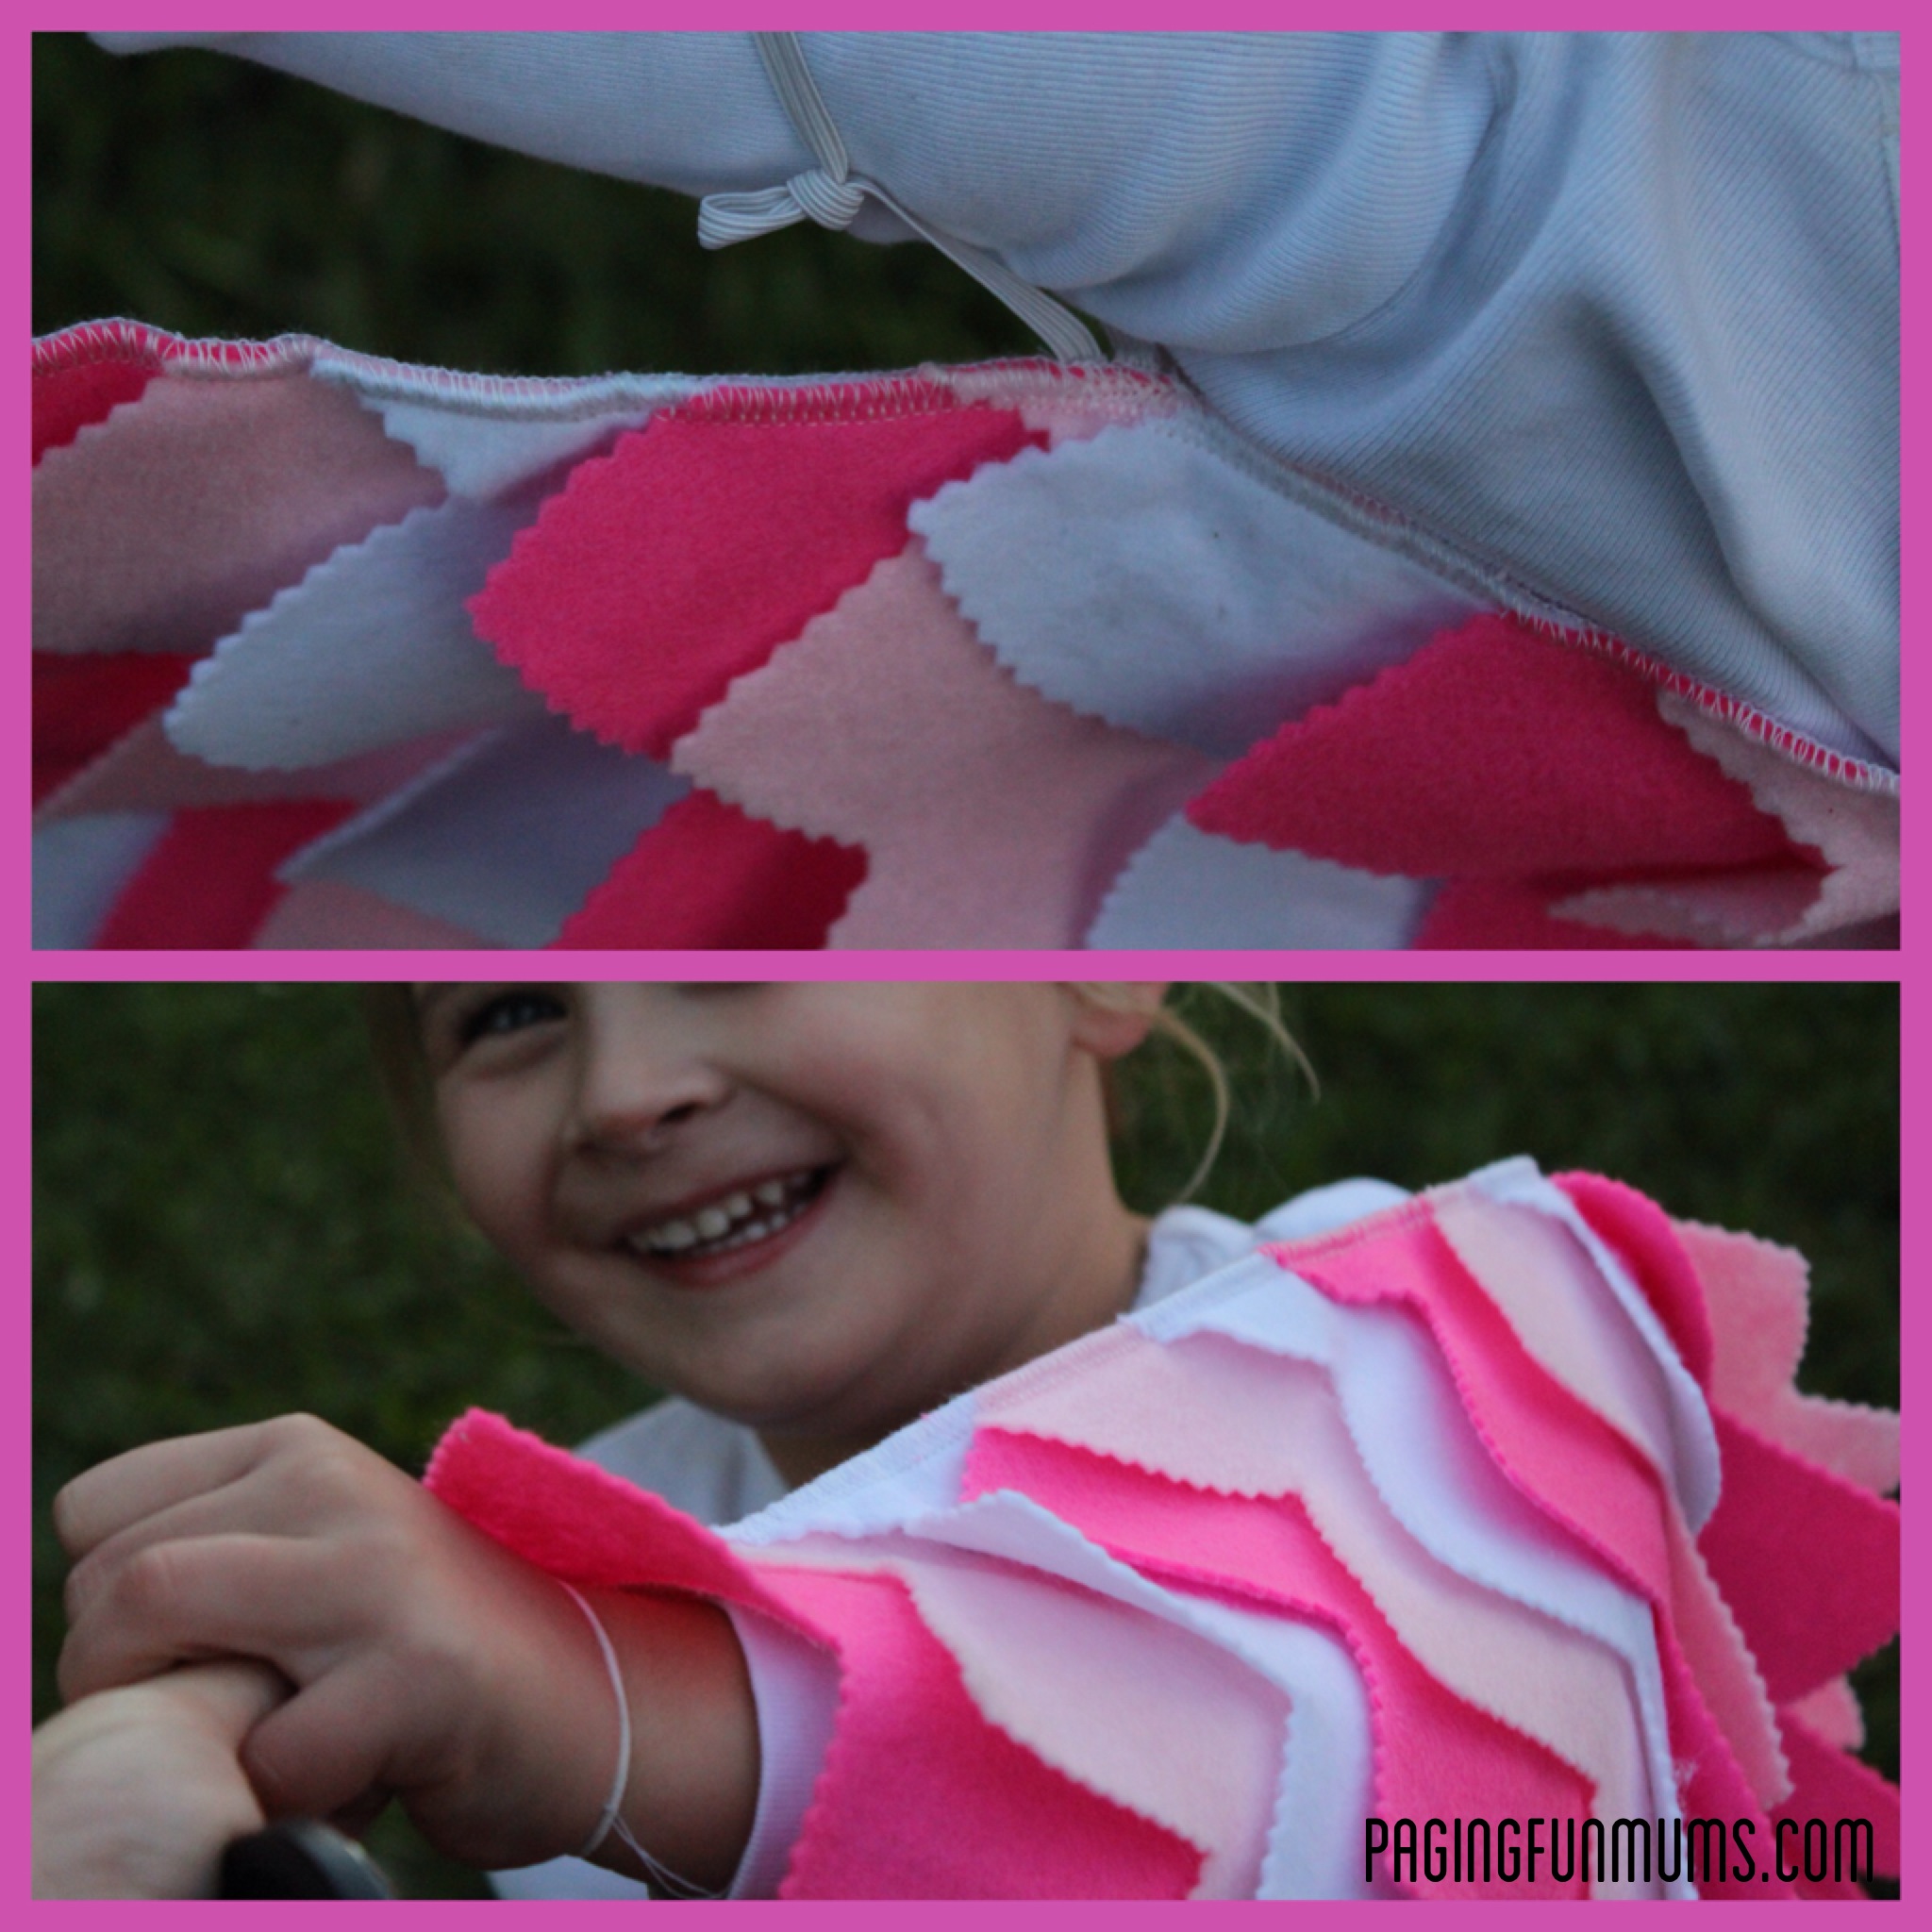
We then used a large safety pin to attach the center wings to the center of a plain pink top to keep the wings from falling down while she was running. Mum had originally used some Velcro but that wasn’t strong enough for my energetic flapper lol!
I hope these instructions are easy enough to follow – please feel free to comment below if you have any further questions and I can pass them onto my Mum 😉
If you liked this craft, you may also like our:

Looks absolutely gorgeous. Will definitely be making these for my daycare kiddies 🙂
Hi Stephanie,
Lucky kiddies :).
I hope the instructions are clear enough – let me know how you go and if you need anything further.
Louise x
Thanks for the tutorial. My son has decided that birds of prey are the coolest things ever and wants to be a peragrine falcon for Halloween. These wings will be perfect.
My 6 year old granddaughter will be a bird (in a cage) for Halloween. We worked this weekend on her bird costume. Although not yet finished…..she LOVES this.
That’s awesome Denise! We’d LOVE to see a pic of the end result! Jenni x
It looks amazing, well done 🙂 I’ve tried capes but little mr doesn’t like the feeling around his neck, this will be perfect! I’m going to try one in boy colours.
That sounds great Sherelle! We’d love it if you send us a pic of the finished product! We are starting up a ‘Fan Photos’ album in Facebook
G’day, is it possible for you to email the patterns so my wife can make some of these for our grandchildren please? Thankyou so very much. From Wayne
Hi Wayne,
Thank you for your comment – however we don’t have the pattern saved as a PDF – we have included all the instructions on how to make your own pattern in the post. I’m sure your wife will have no problem in making one :).
You are such a great Granddad to be looking for FUN things for your Granddaughters.
Louise x
Thank you for sharing this! I will be making an Ugly Duckling using this for the wings and coving a pillowcase dress for my daughters high school performance of Shrek the Musical. Thank you again.
Wow! That sounds like such a great costume! We would love you to share some photos of the finished product :). You can email them to us at pagingfunmums’at’gmail.com or post them on our Facebook wall :).
Louise x
Thank you so much for sharing this great idea, my Mum made this for Miss 4 & she just loves them, will share a pic with you soon xx
Hi Sash, Thank you for letting me know. We would love to see a photo :). Maybe you can post one to our Facebook Wall? Louise x
Hi what a great idea! Do you know approximately how much material of each colour you need as i have to buy on line. Thanks
What age is the child you are making it for? I will check with my Mum as to how much she used but I’m sure it would depend on their ‘wing’ span :). Louise x
Hello! What a fantastic tutorial…Thank you so much for sharing this! I am going to make this for my son who is 4 and I was wondering if you might be able to give me an estimate of how much felt to buy.Or if you could just tell me how much you guys used that would be great too! His measurements are: wingspan-21″, wing height-13 “. Thanks again…Jessie 🙂
Hi Jessica,
I’ve just spoken to my Mum and she said we used 20″ of each three colours (the fabric was 40″ wide). I hope that helps :).
Louise x