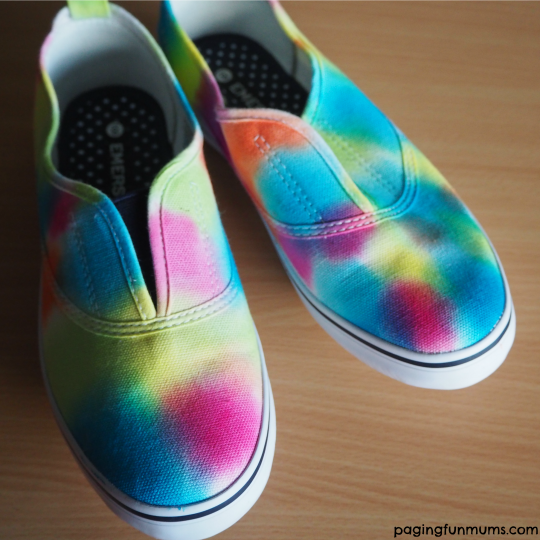
These Tie Dye Sneakers are so CUTE, Miss 8 and I had a lot of fun making them over the School Holidays. We love how the colours blended together to create a beautiful watercolour effect.
Here’s what you’ll need –
- Tie Dye kit
- Water
- Foam paint brush
- White canvas sneakers
Step by step instructions –
Step 1 – Cover your work space with plastic and some paper towel to soak up any drips before you mix the dyes as per the kit’s instructions (and don’t forget to wear gloves to protect your hands!).
Step 2 – Apply a small amount of clean water to a small section of the shoe, then use the foam brush to gently apply some dye to the wet section. You’ll see the colour spread across the water.
Step 3 – Repeat the process one section at a time. You’ll notice the colours bleed and mix with each other creating a really cool watercolour effect.
Step 4 – Place the shoes into a zip lock bag to try to slow the drying process (this will result in brighter colours), we left ours to soak overnight and then placed them in the sun to dry.
Optional step – We used some fabric protector spray to seal and protect the shoes afterwards. You don’t need to do this but I think it will help keep the colours bright and the shoes clean :).
You can watch the quick video tutorial below to watch the entire process.
Louise xx


One thought on “Tie Dye Sneakers using a Watercolour Technique”