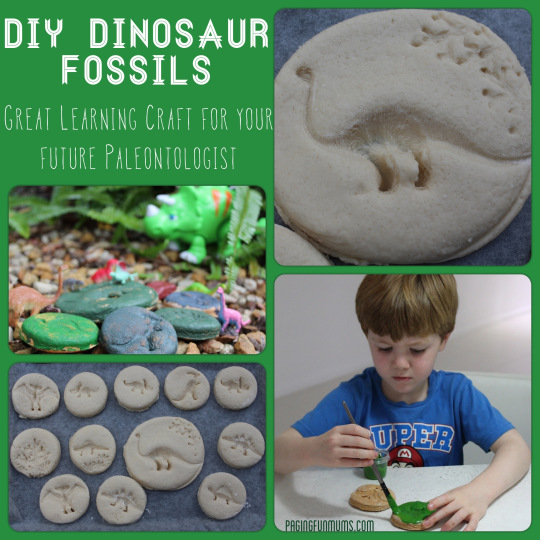
My little 4yo boy is obsessed with Dinosaurs and bones, so when I saw this brilliant idea at ‘That Artist Woman‘ we just had to give it a go! It’s the start of all things ‘Dinosaur’ at our place! We’ve also created these cool DIY Dinosaur Eggs which the kids were egg-cited about!
This craft requires a ‘salt dough’ recipe (below) which is then kneaded, cut into circle shapes, imprinted with DINOSAURS (bought at a $2 shop), then baked and painted to look like Dinosaur Fossils. There are so many elements to this craft that the kids enjoyed! This is also very inexpensive craft too (my husband loves those).
Ok, so first, you will need to make your Salt Dough. For this you will need:
4 cups flour
1 cup salt
2 cups water
Combine all of the ingredients – my little man liked this part (he considers himself a little bit of a ‘Master Chef’ ; )
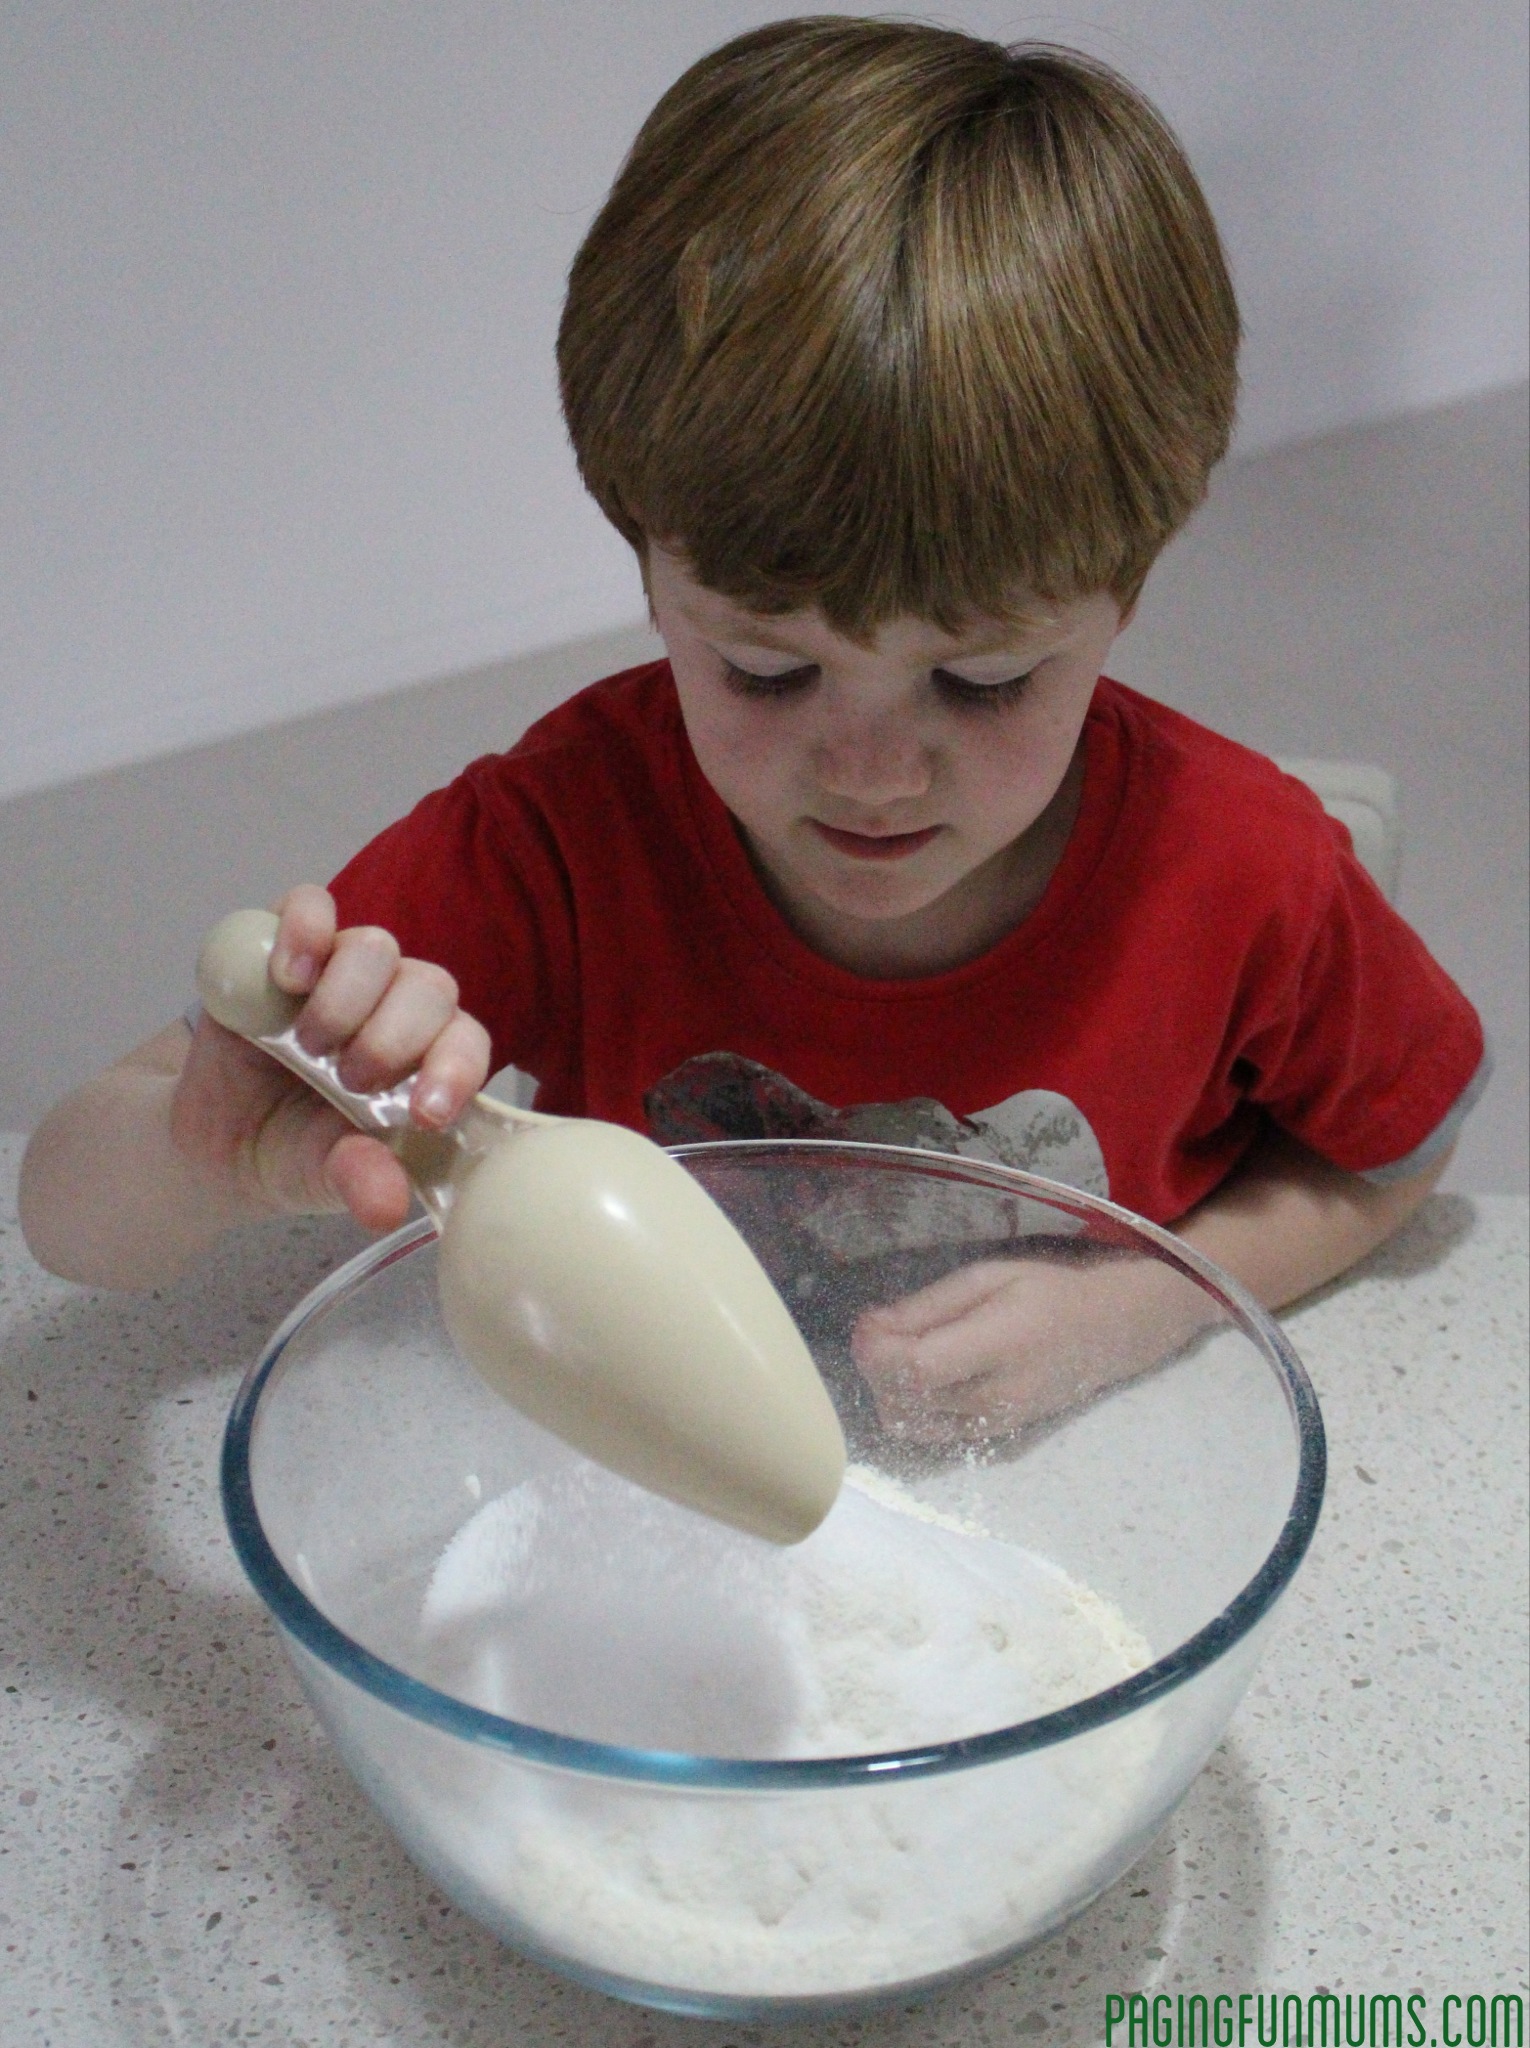
And Mix
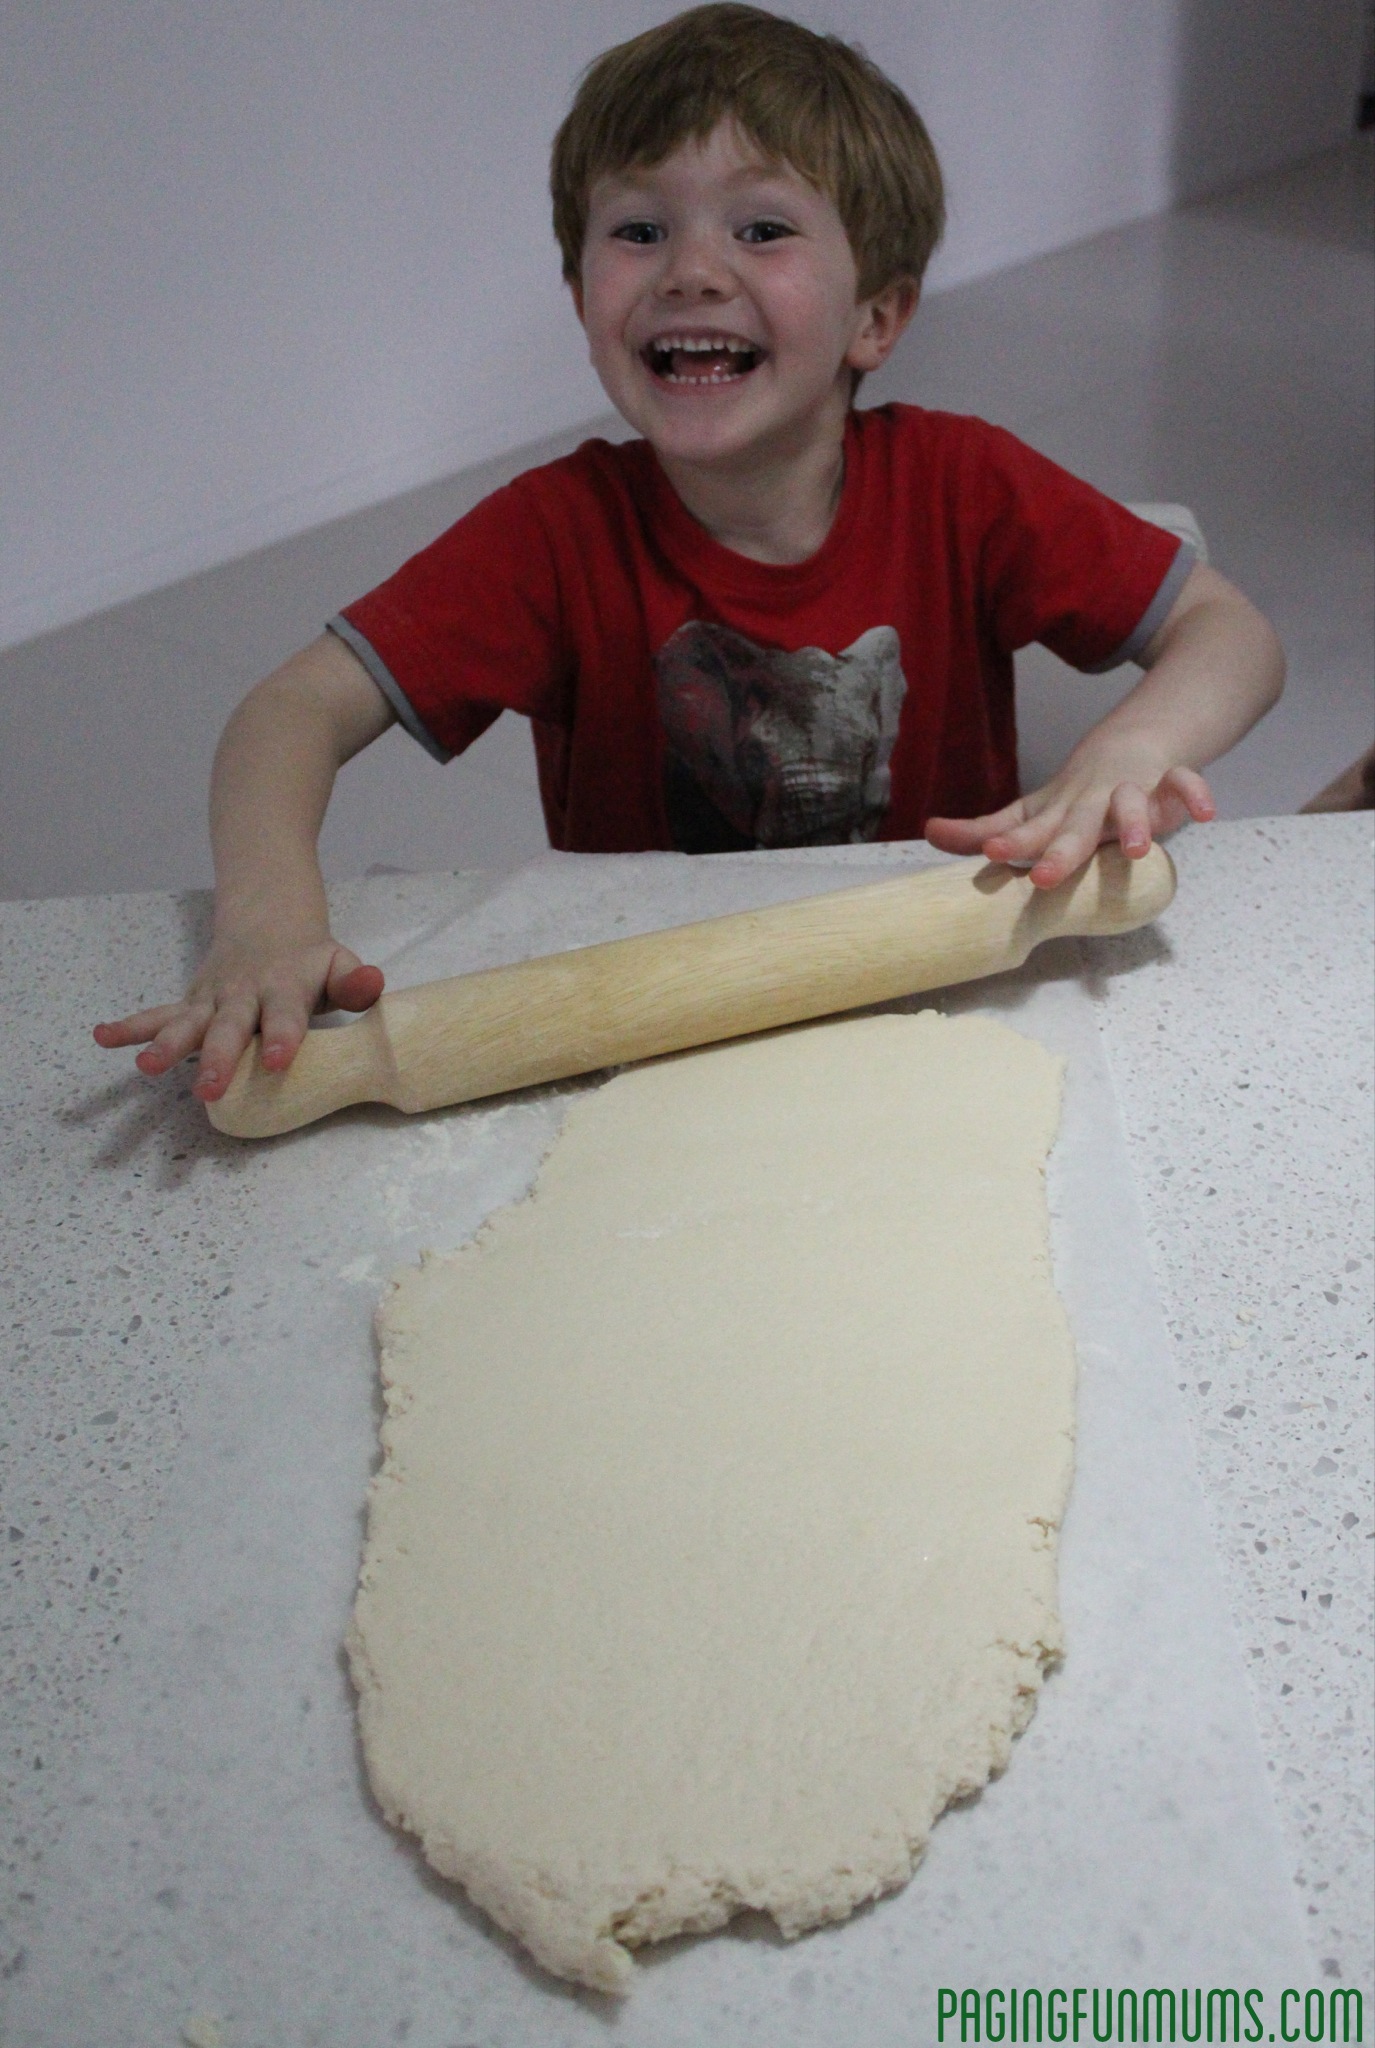
Then knead your dough and roll out with a rolling pin to make it flat and about 1cm thick.
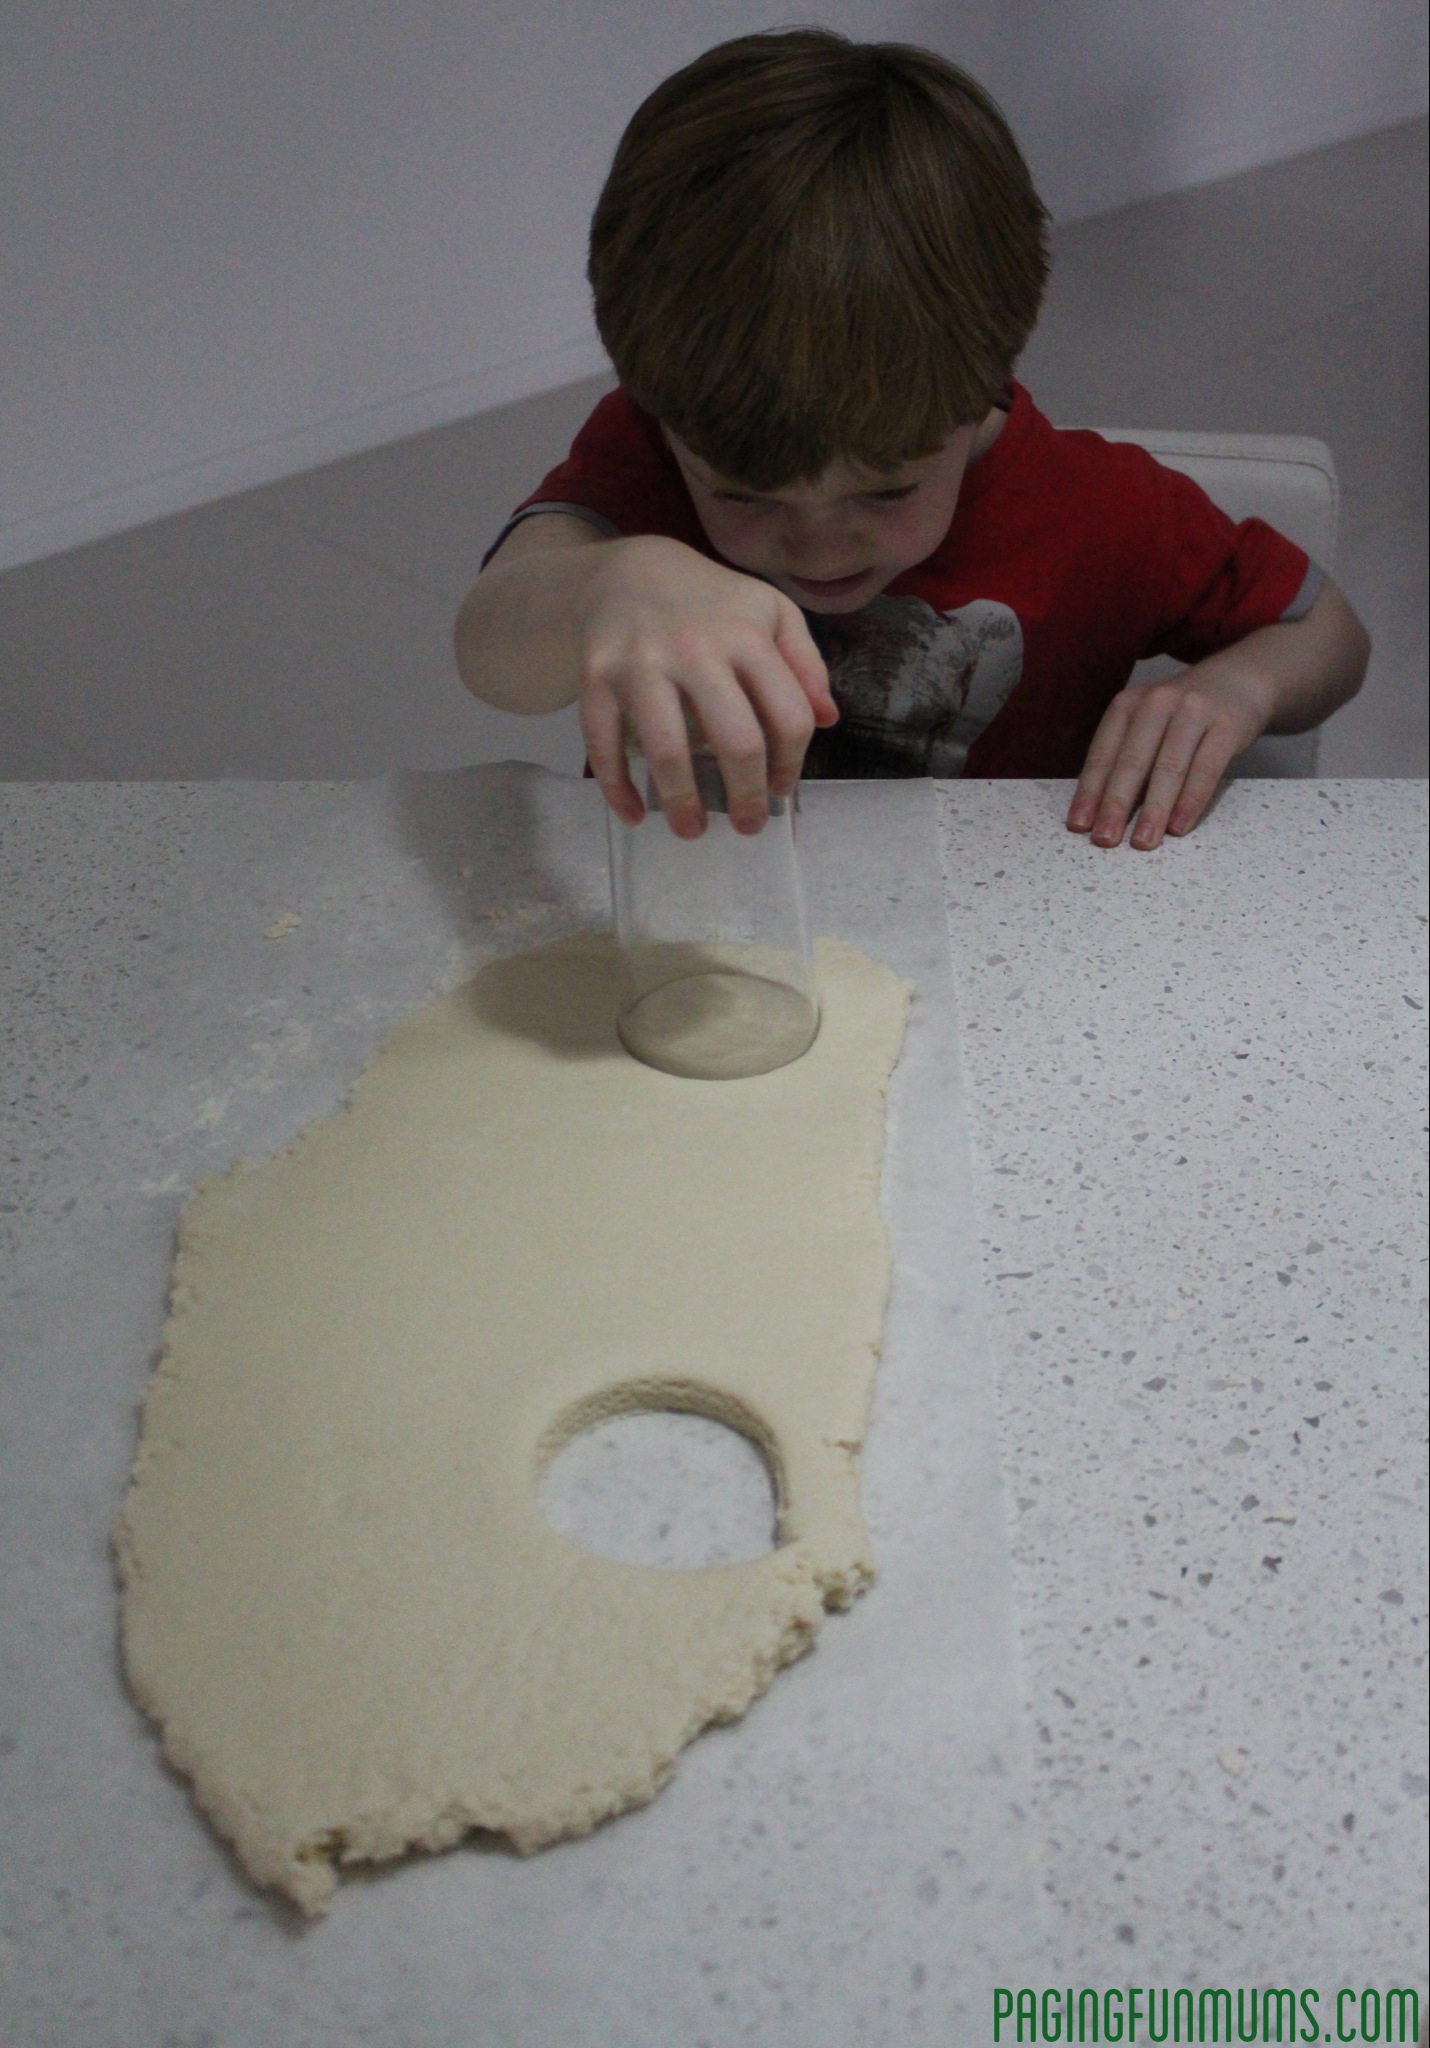
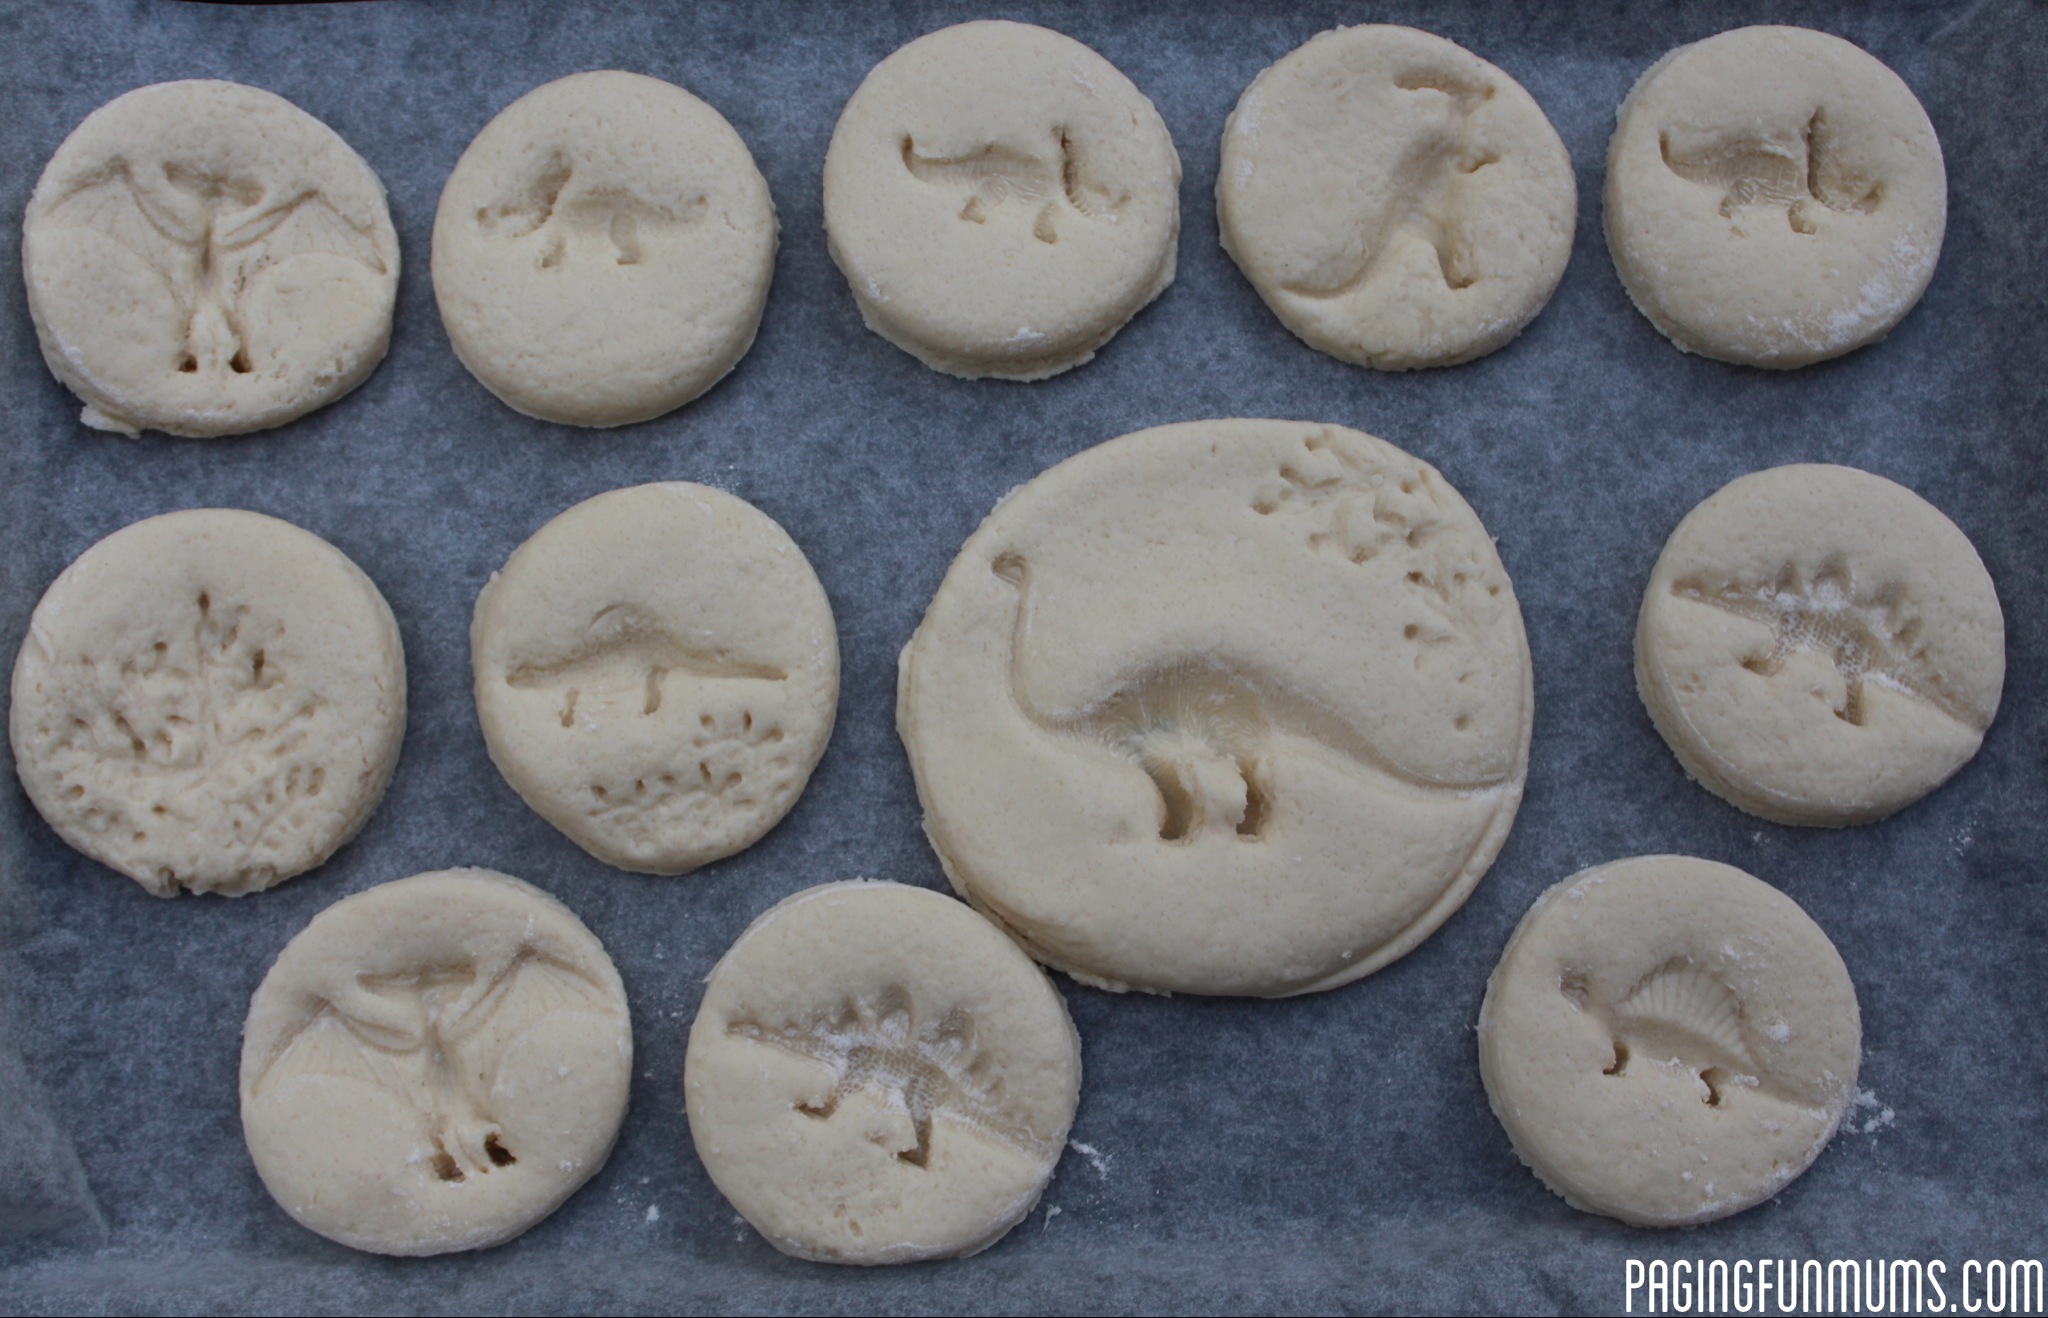
Then cut out your circle shapes – we used a glass for this (a good little tip is to dip your glass/cutting tool in flour first, this makes for easy removal).
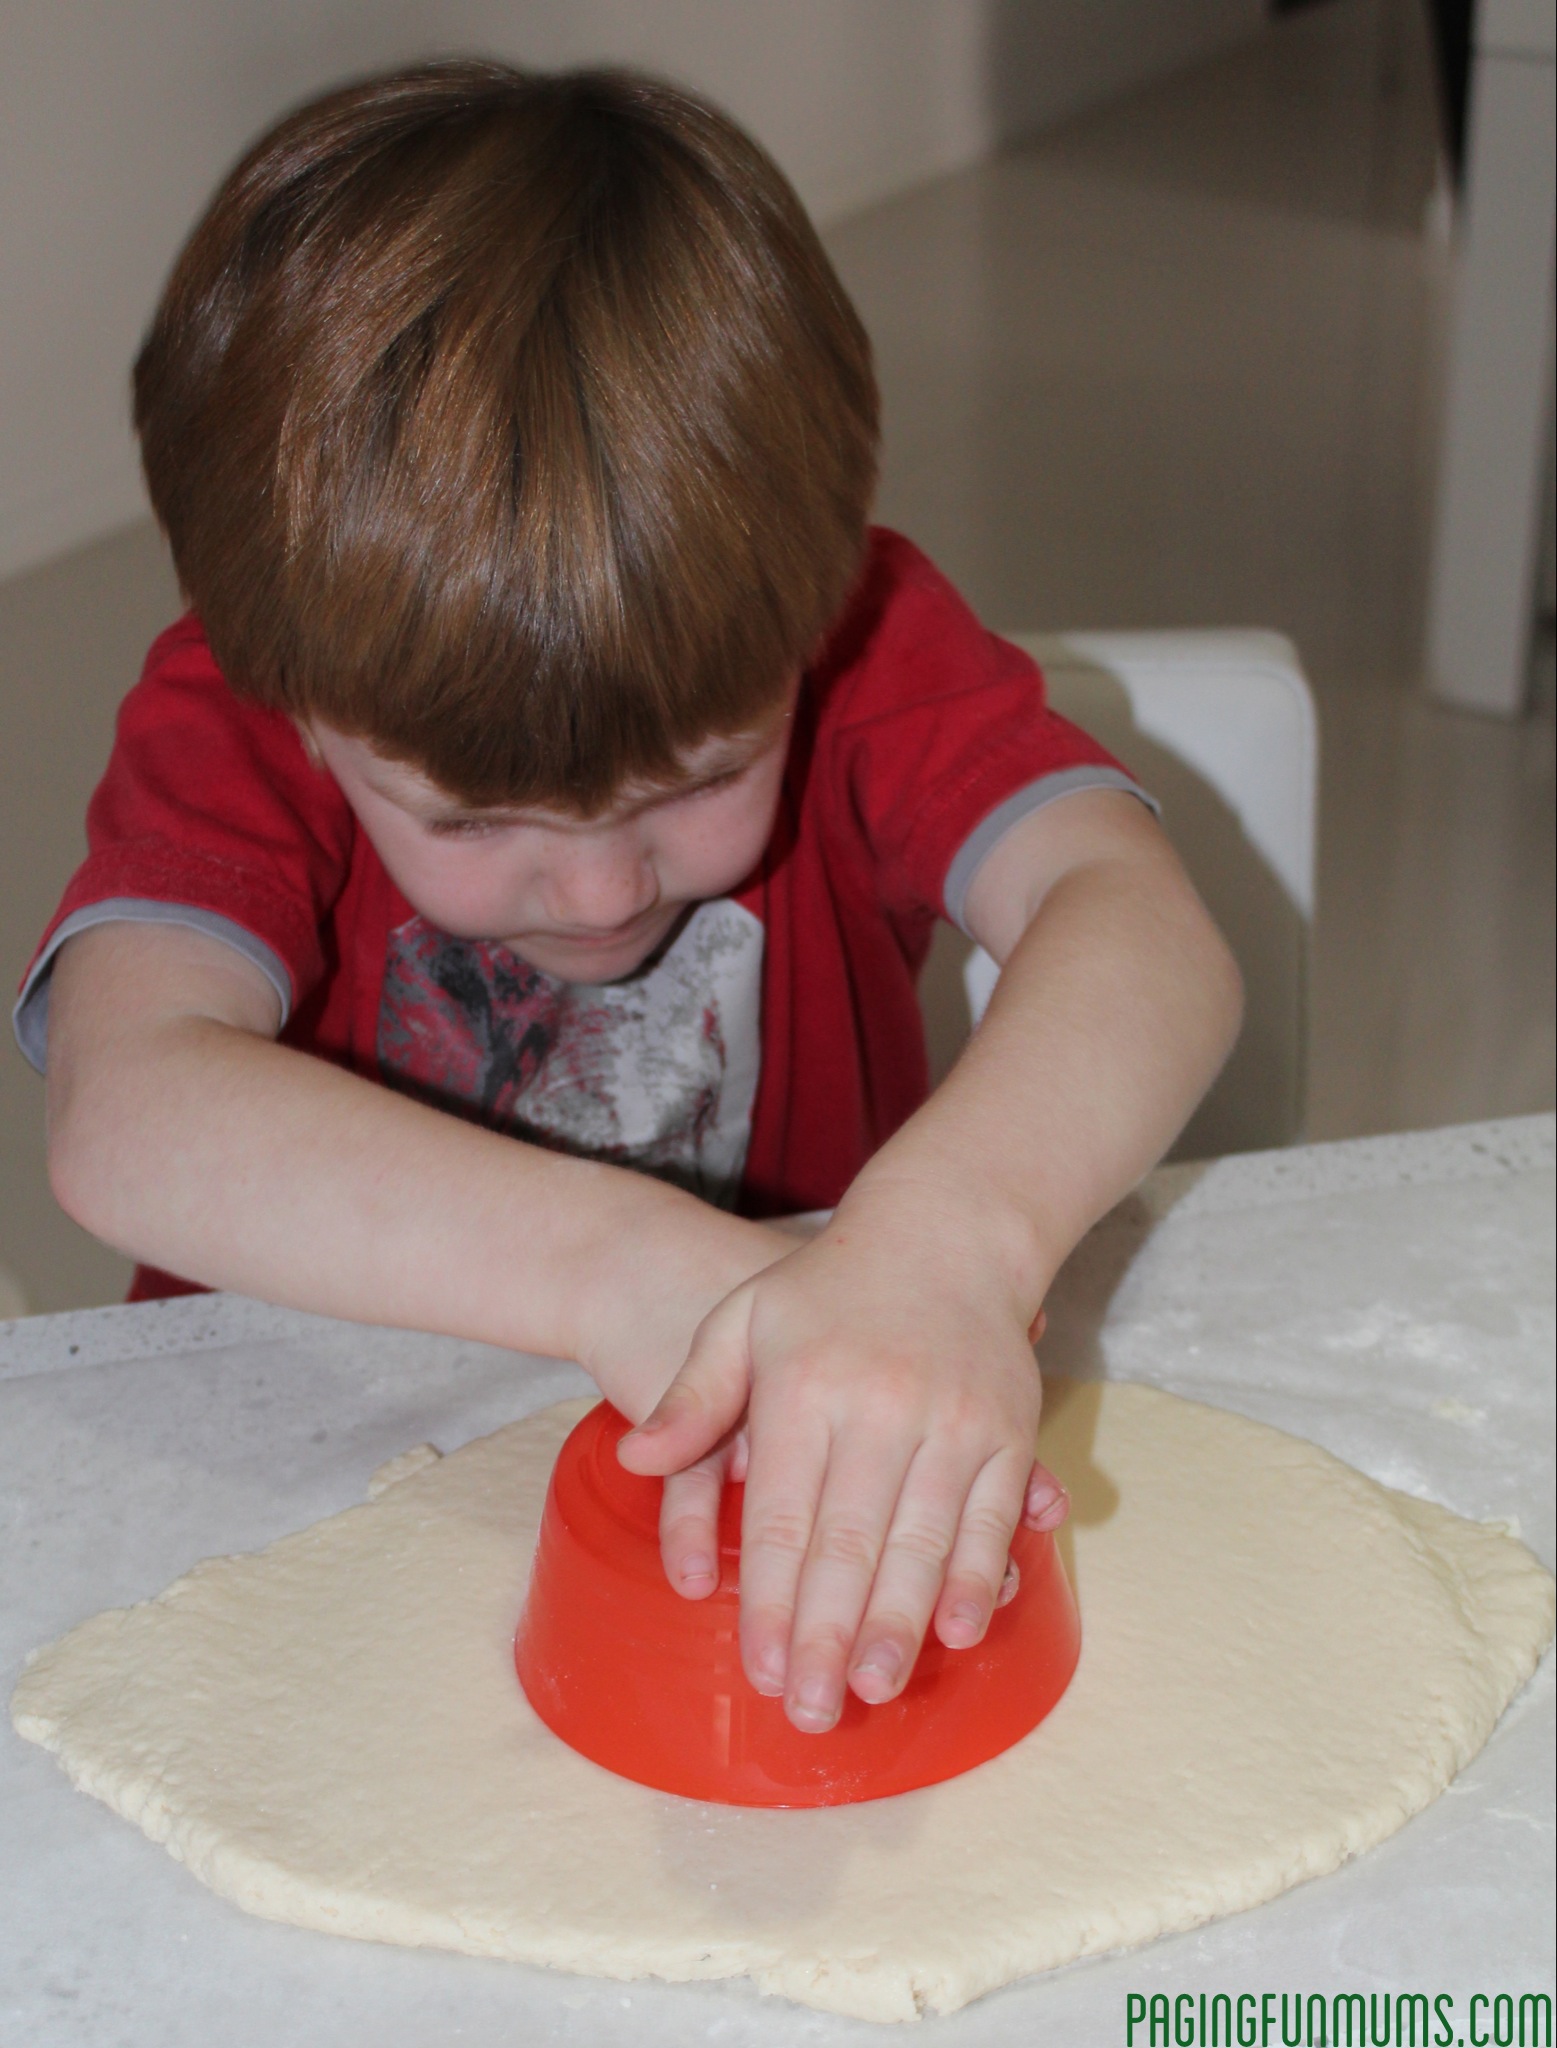
We also used a small bowl to fit a larger dinosaur.
Take your dinosaurs and place them onto the dough & push down (hard enough to make a good print & not too hard so you push through to the bottom). Again, dip your dinosaurs in flour before imprinting too!
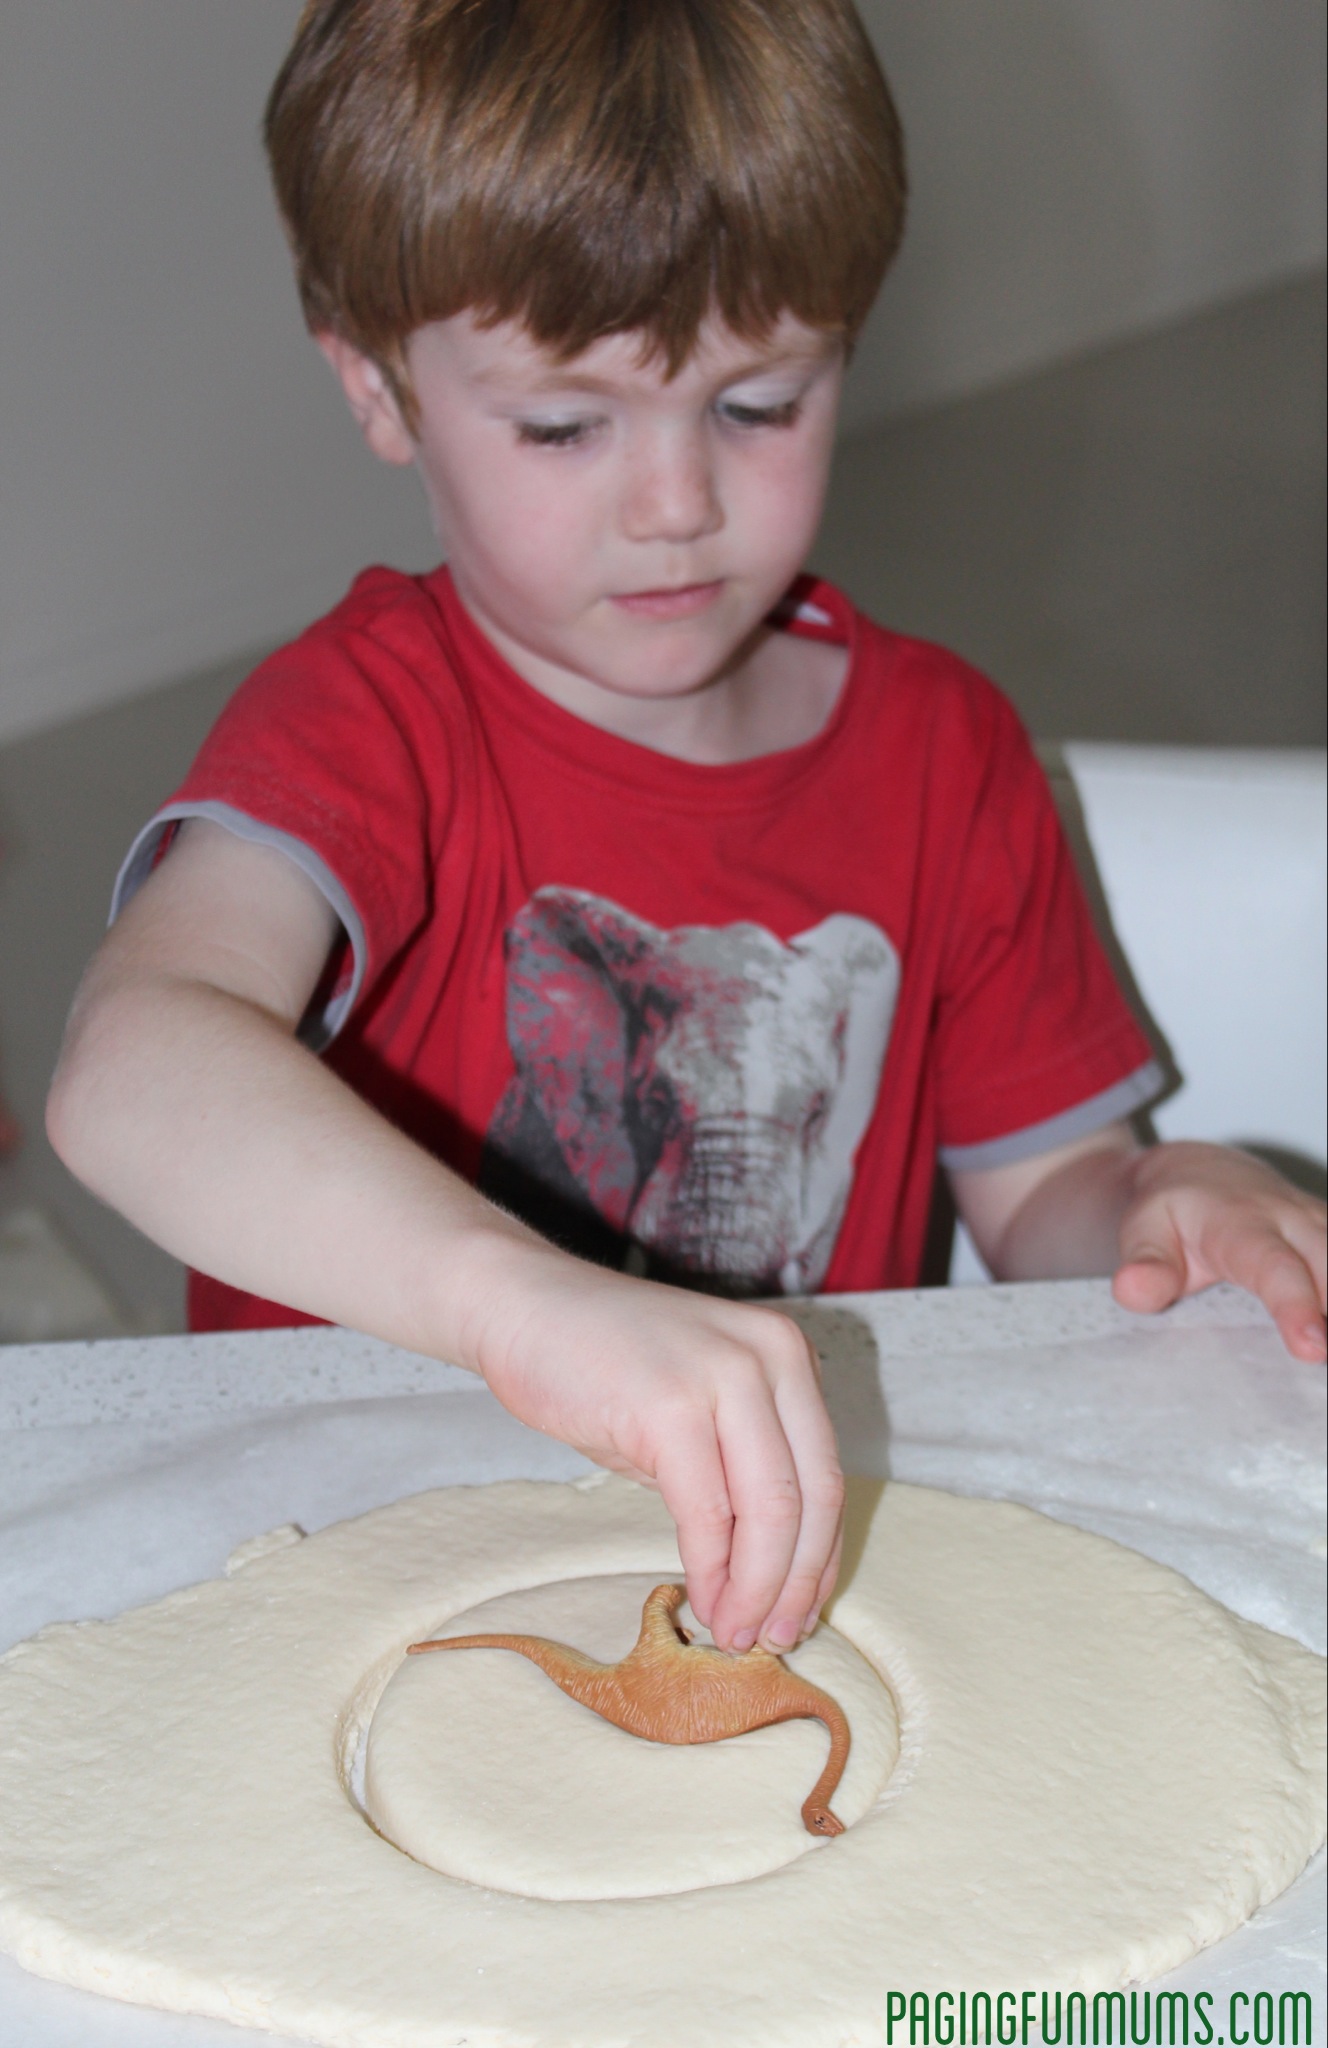
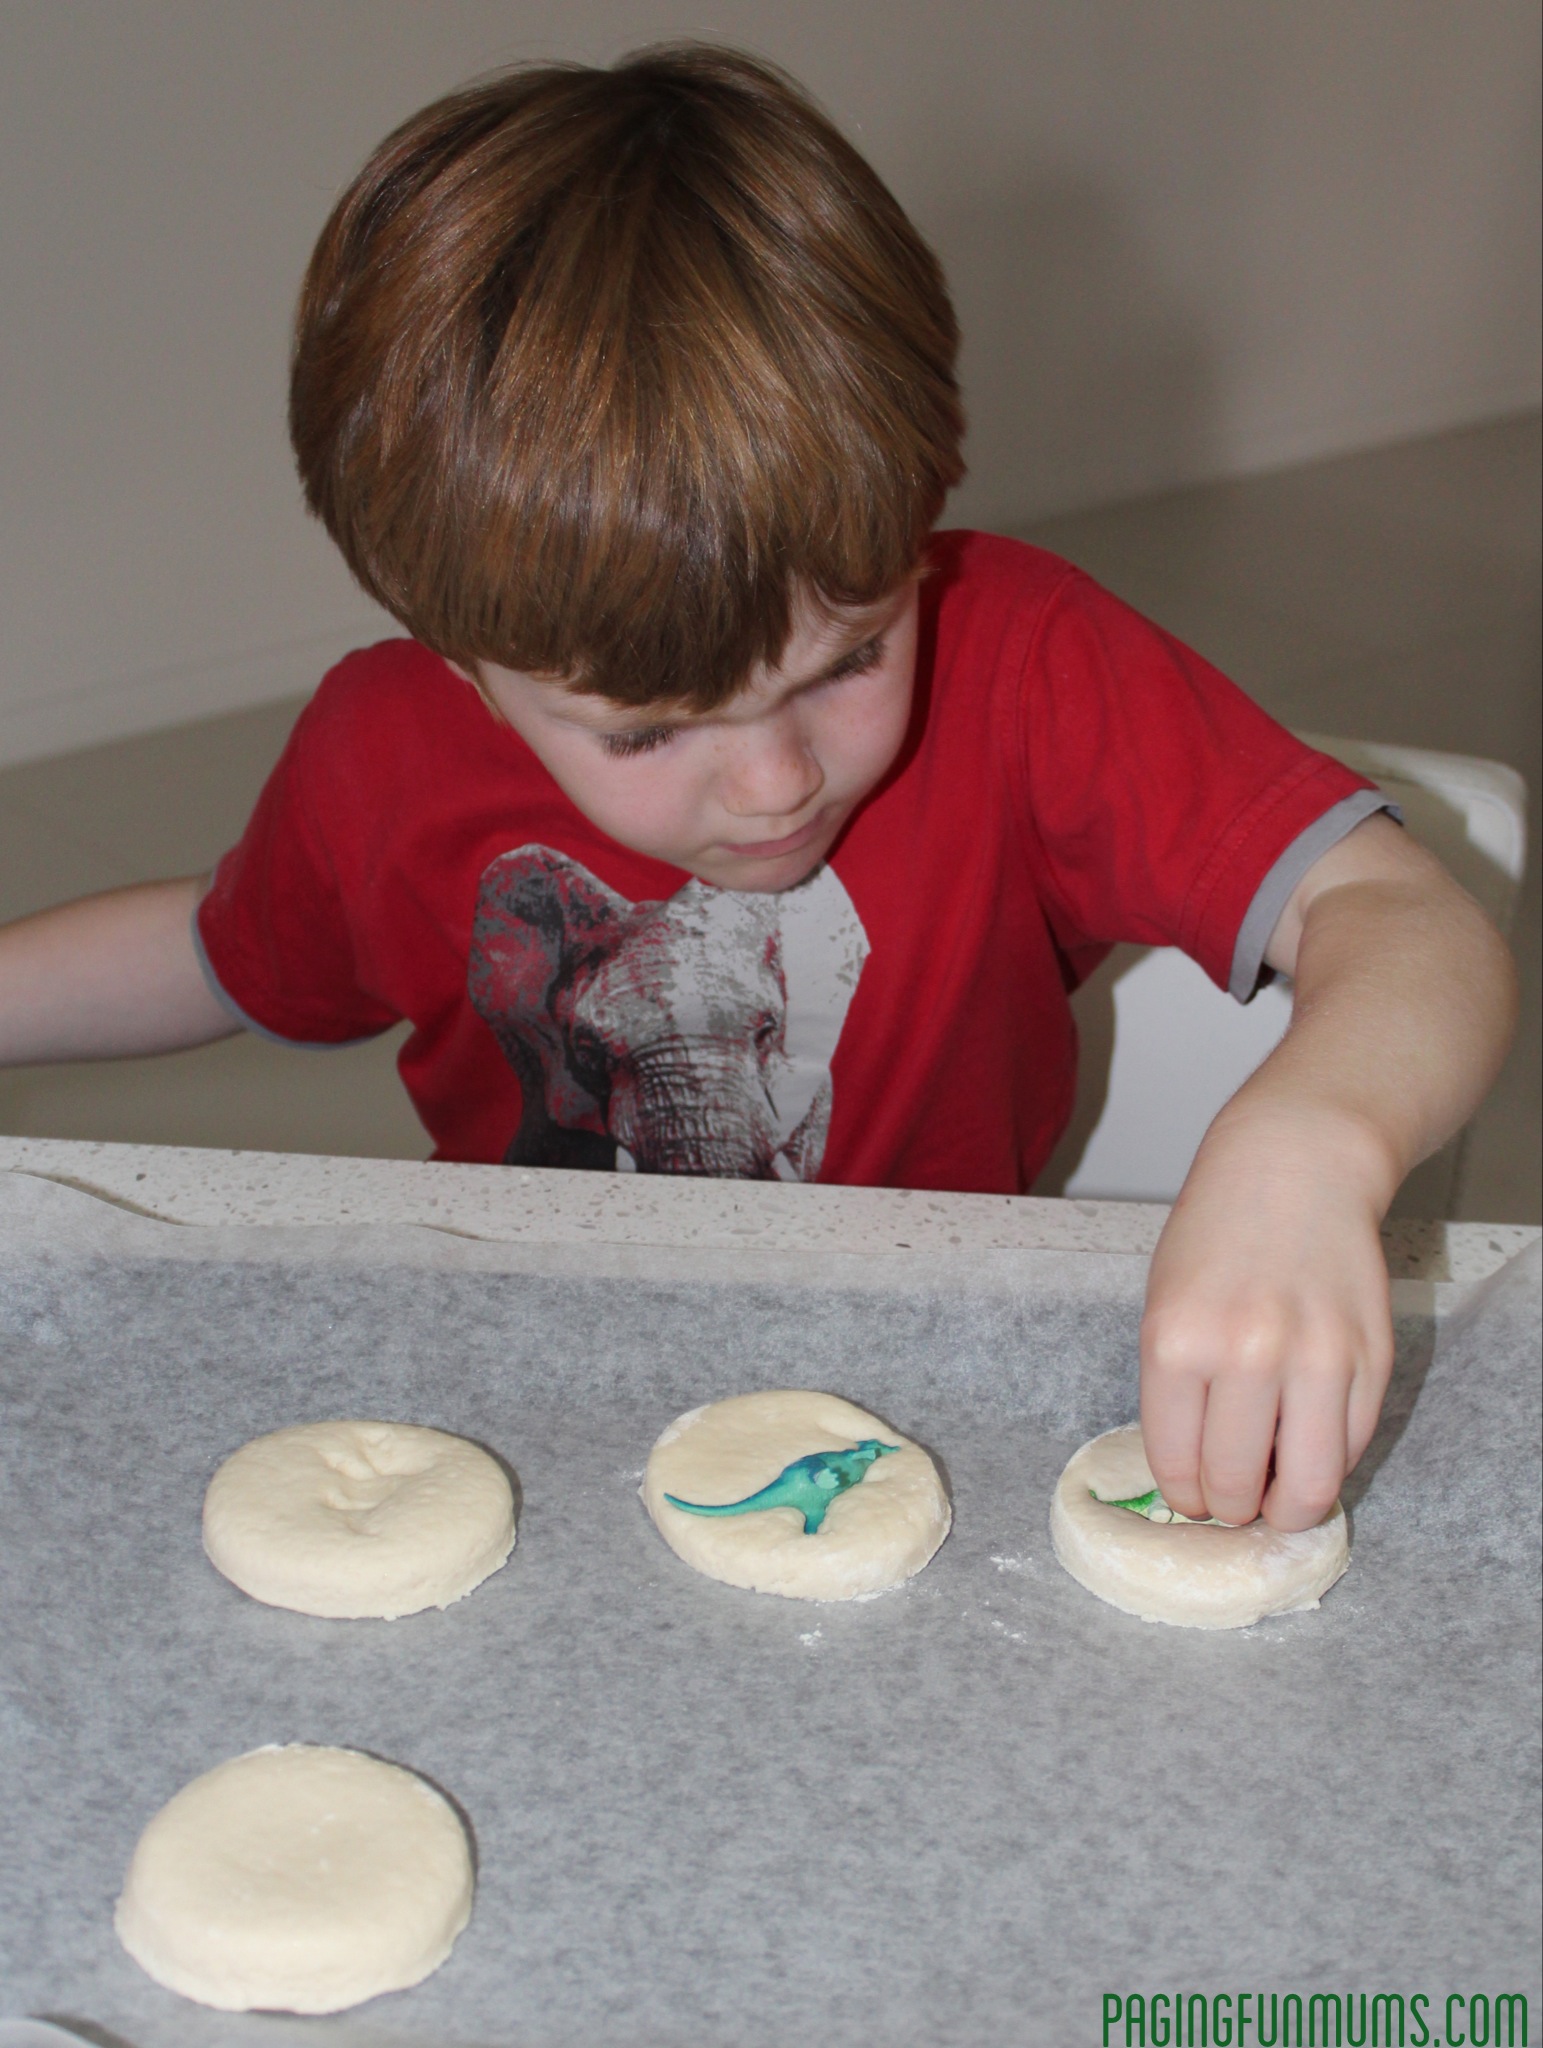
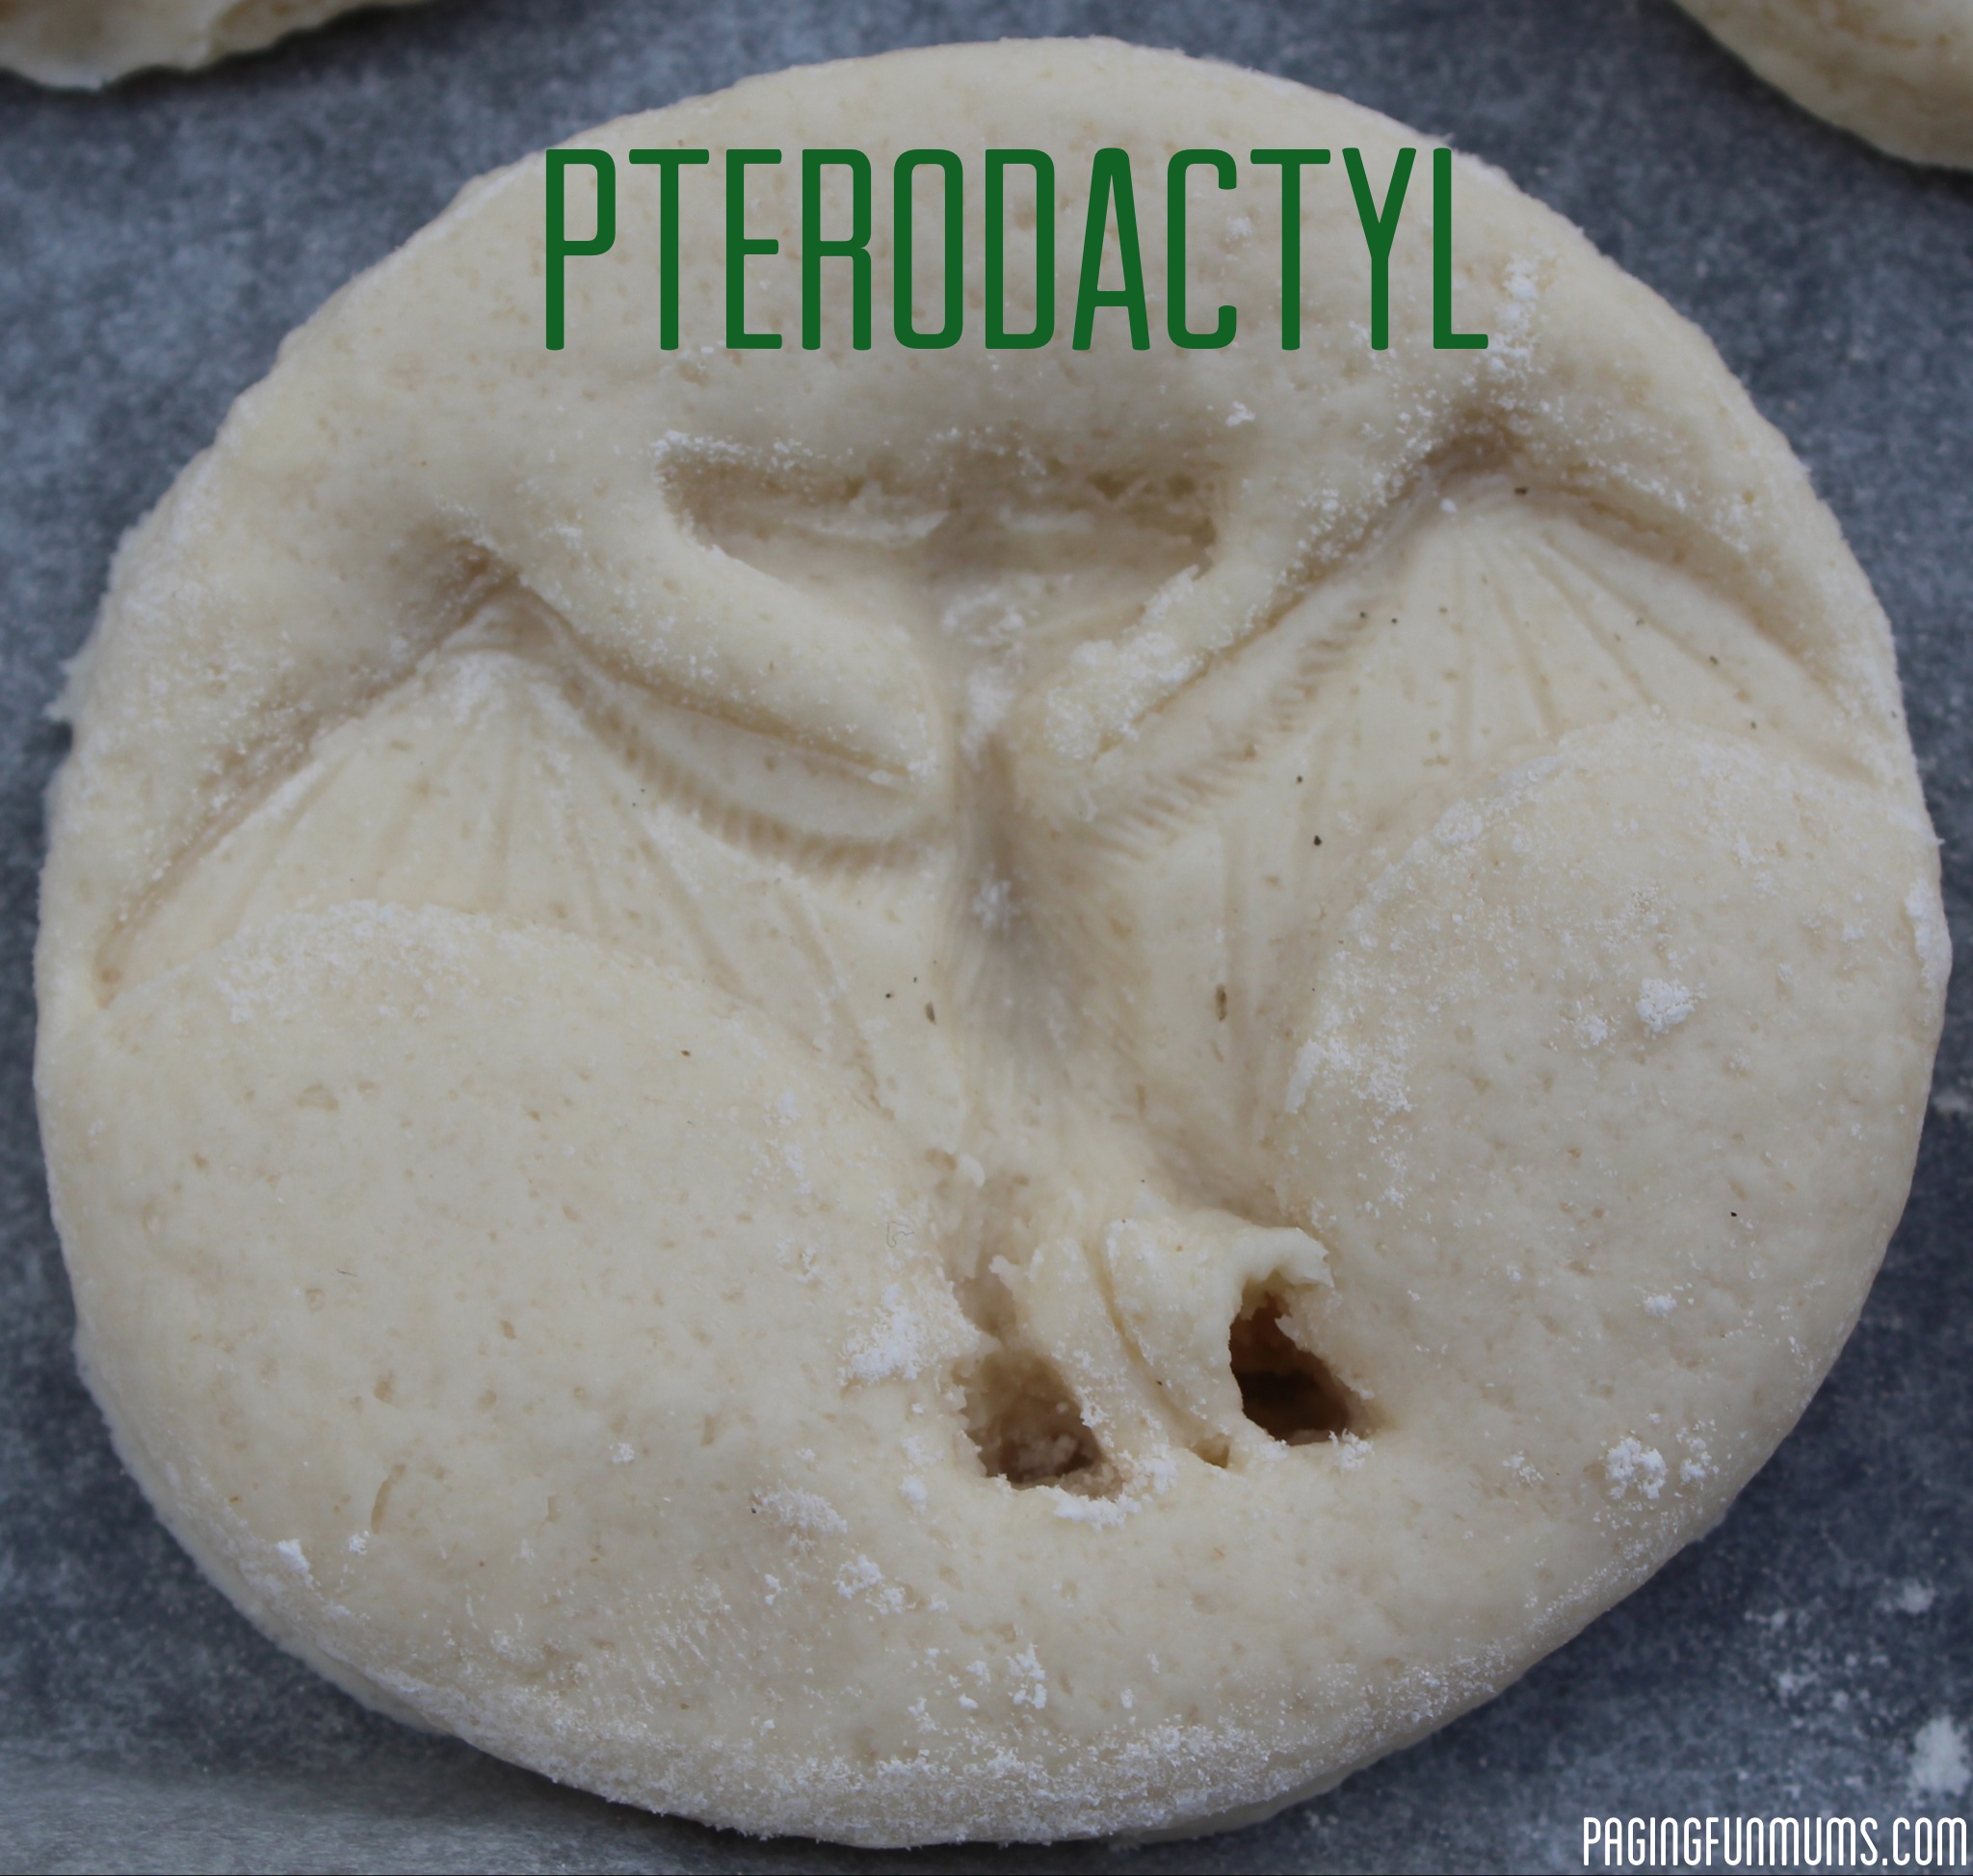
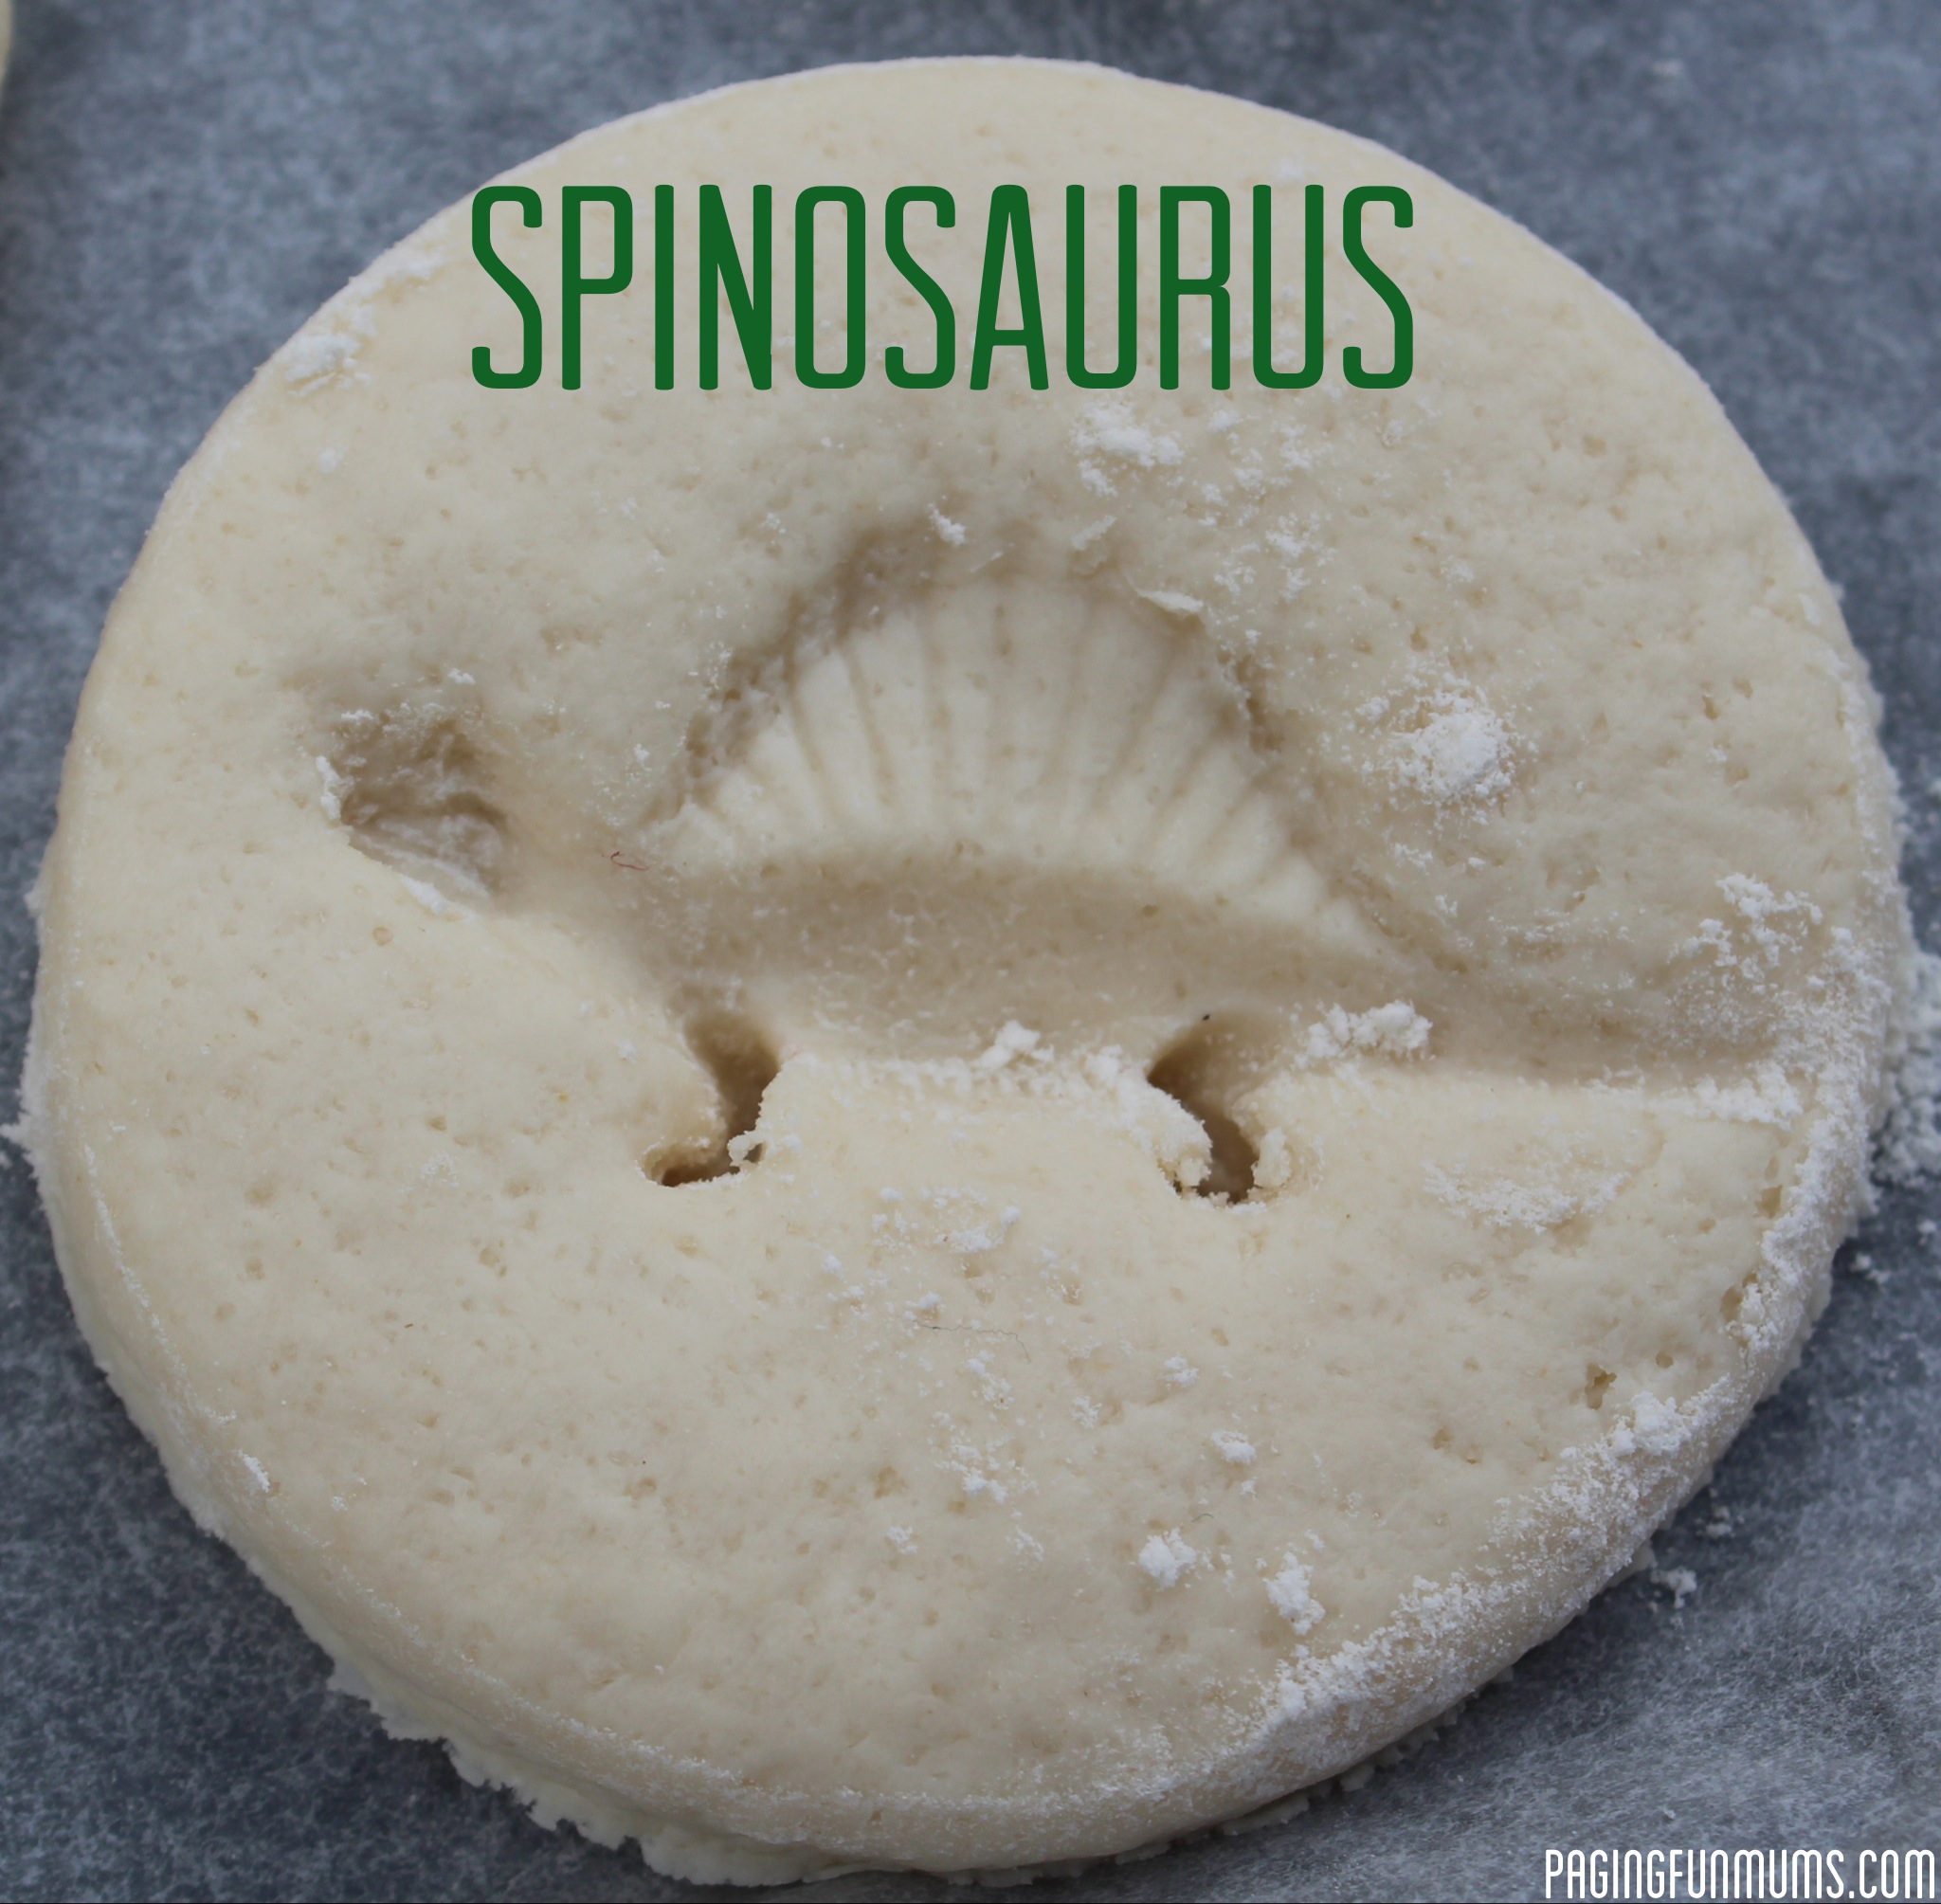


The pack of Dinosaurs we bought, had some cool little plants too, which make some great prints!
Place all of your ‘fossils’ onto a baking tray lined with baking paper and bake for about an hour at 180 degrees – this will make your dough nice and hard.
Cool thoroughly on wire racks.
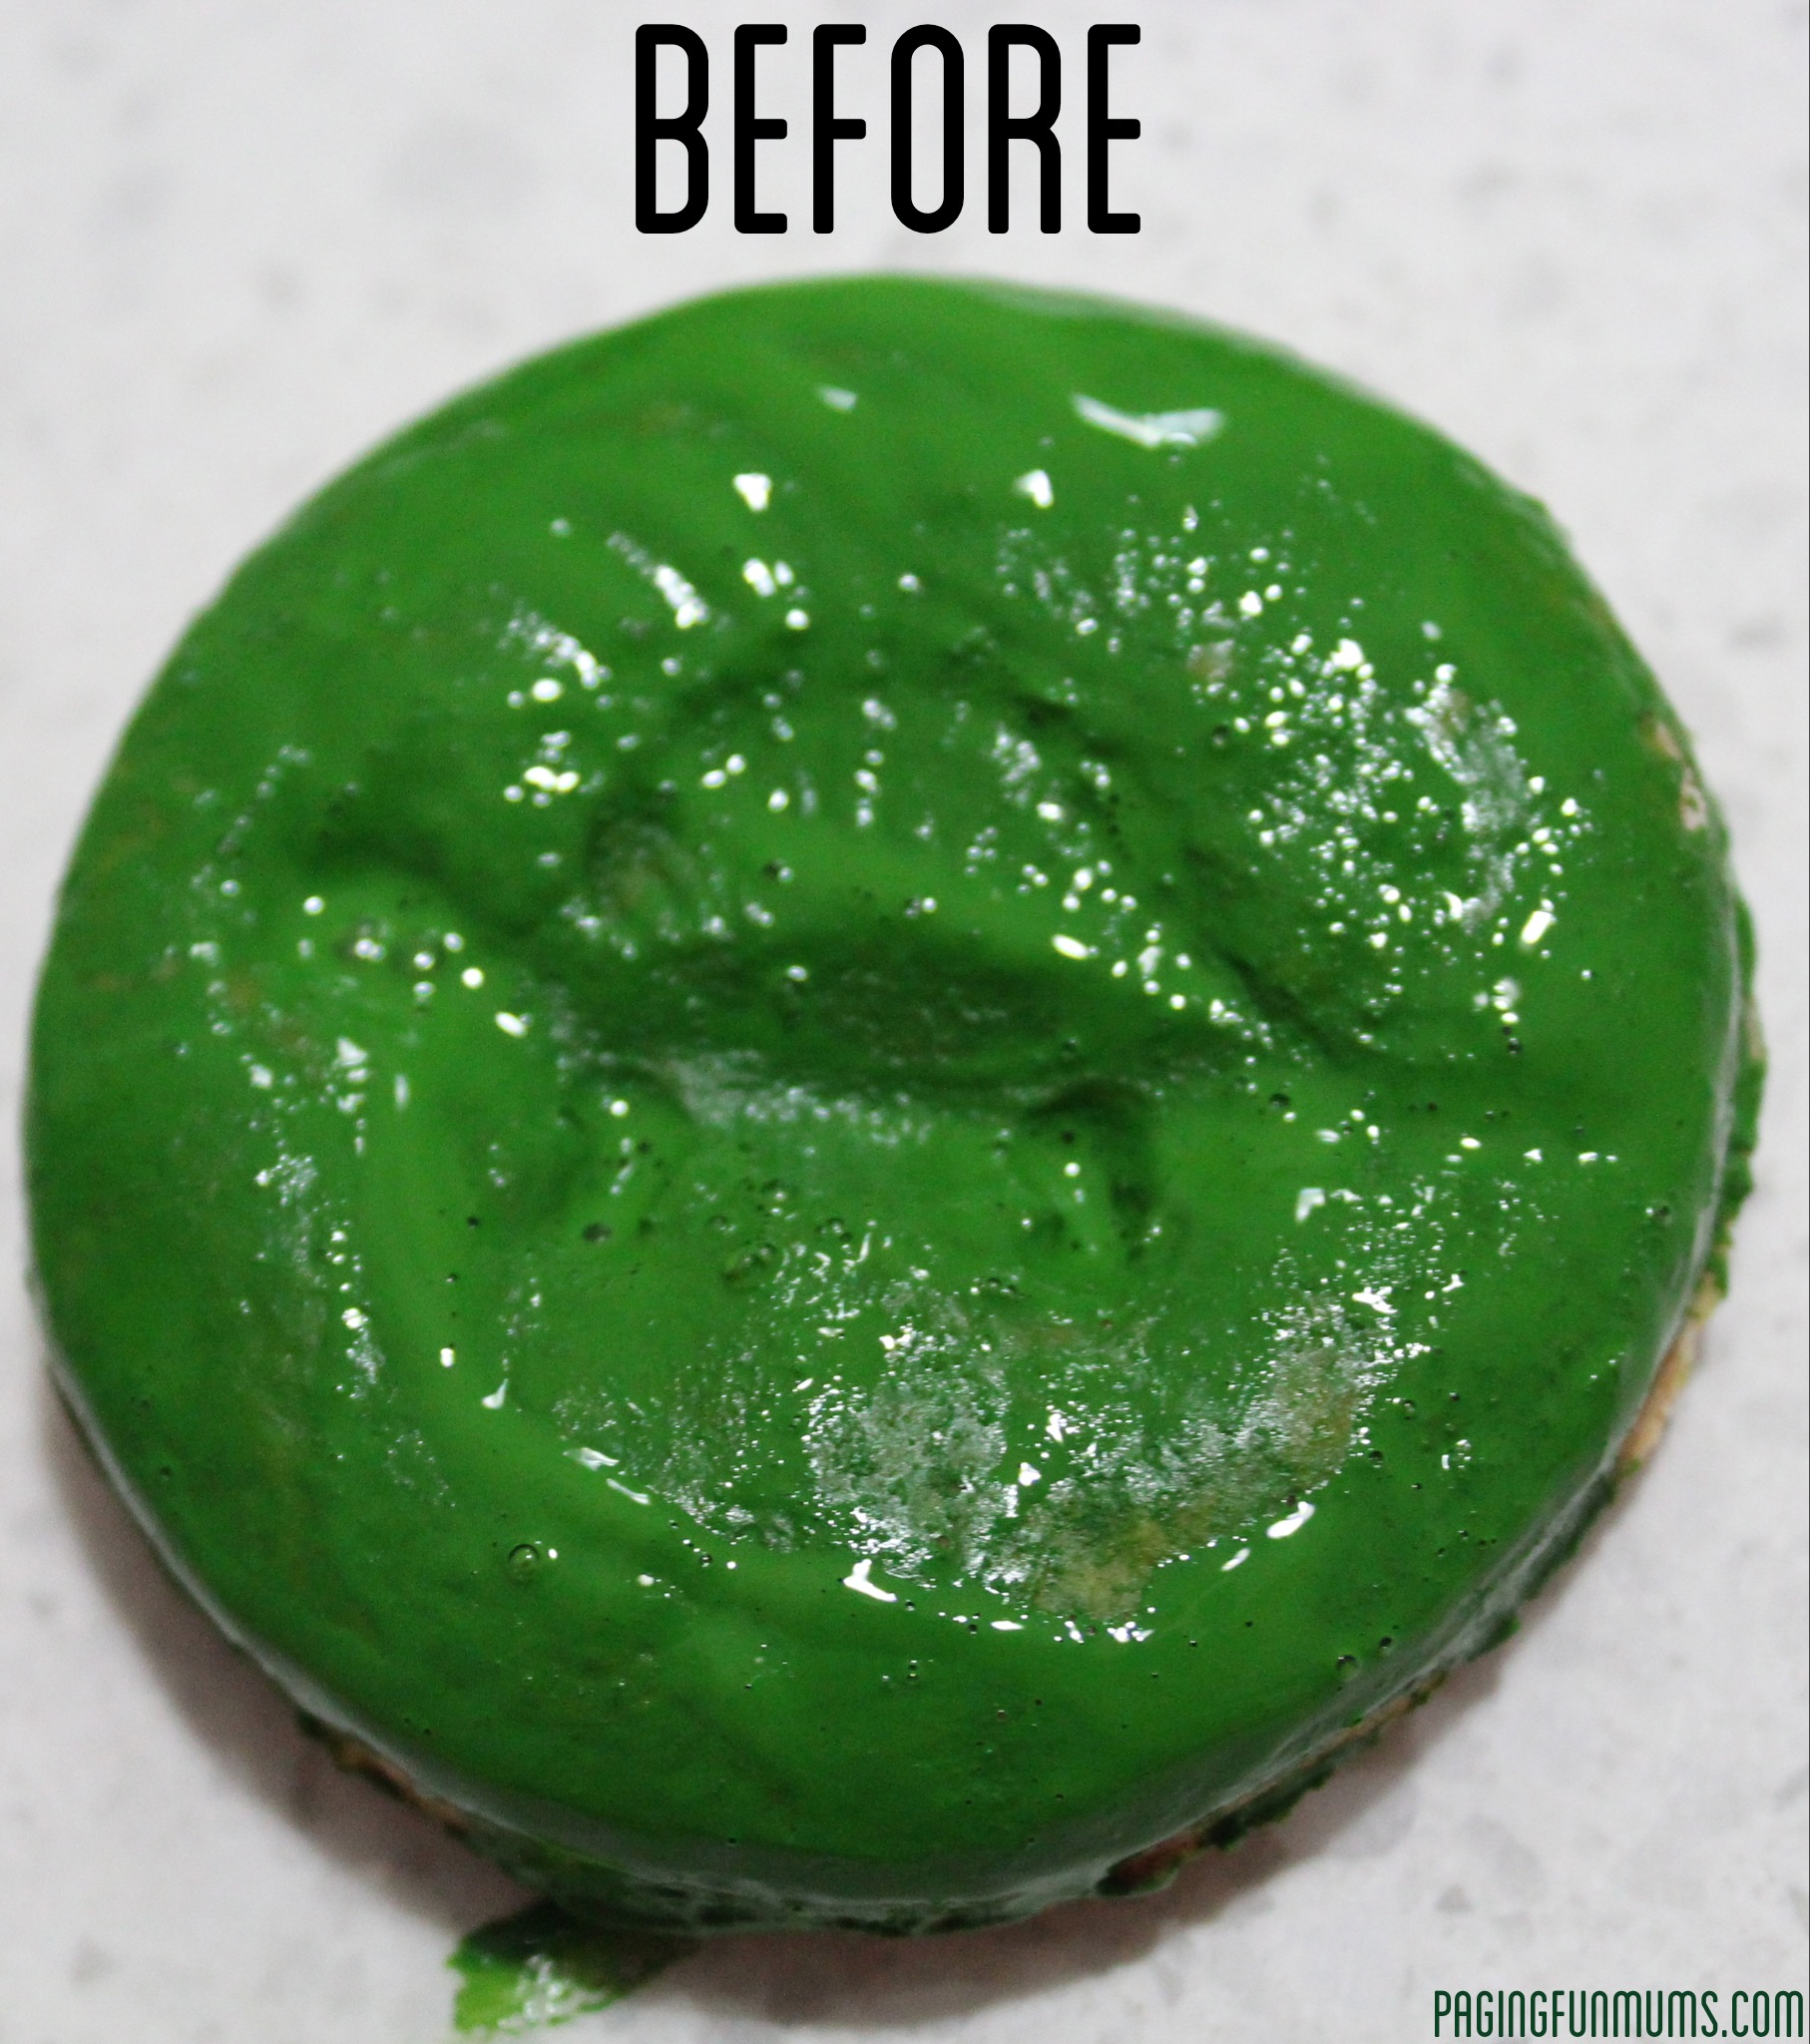
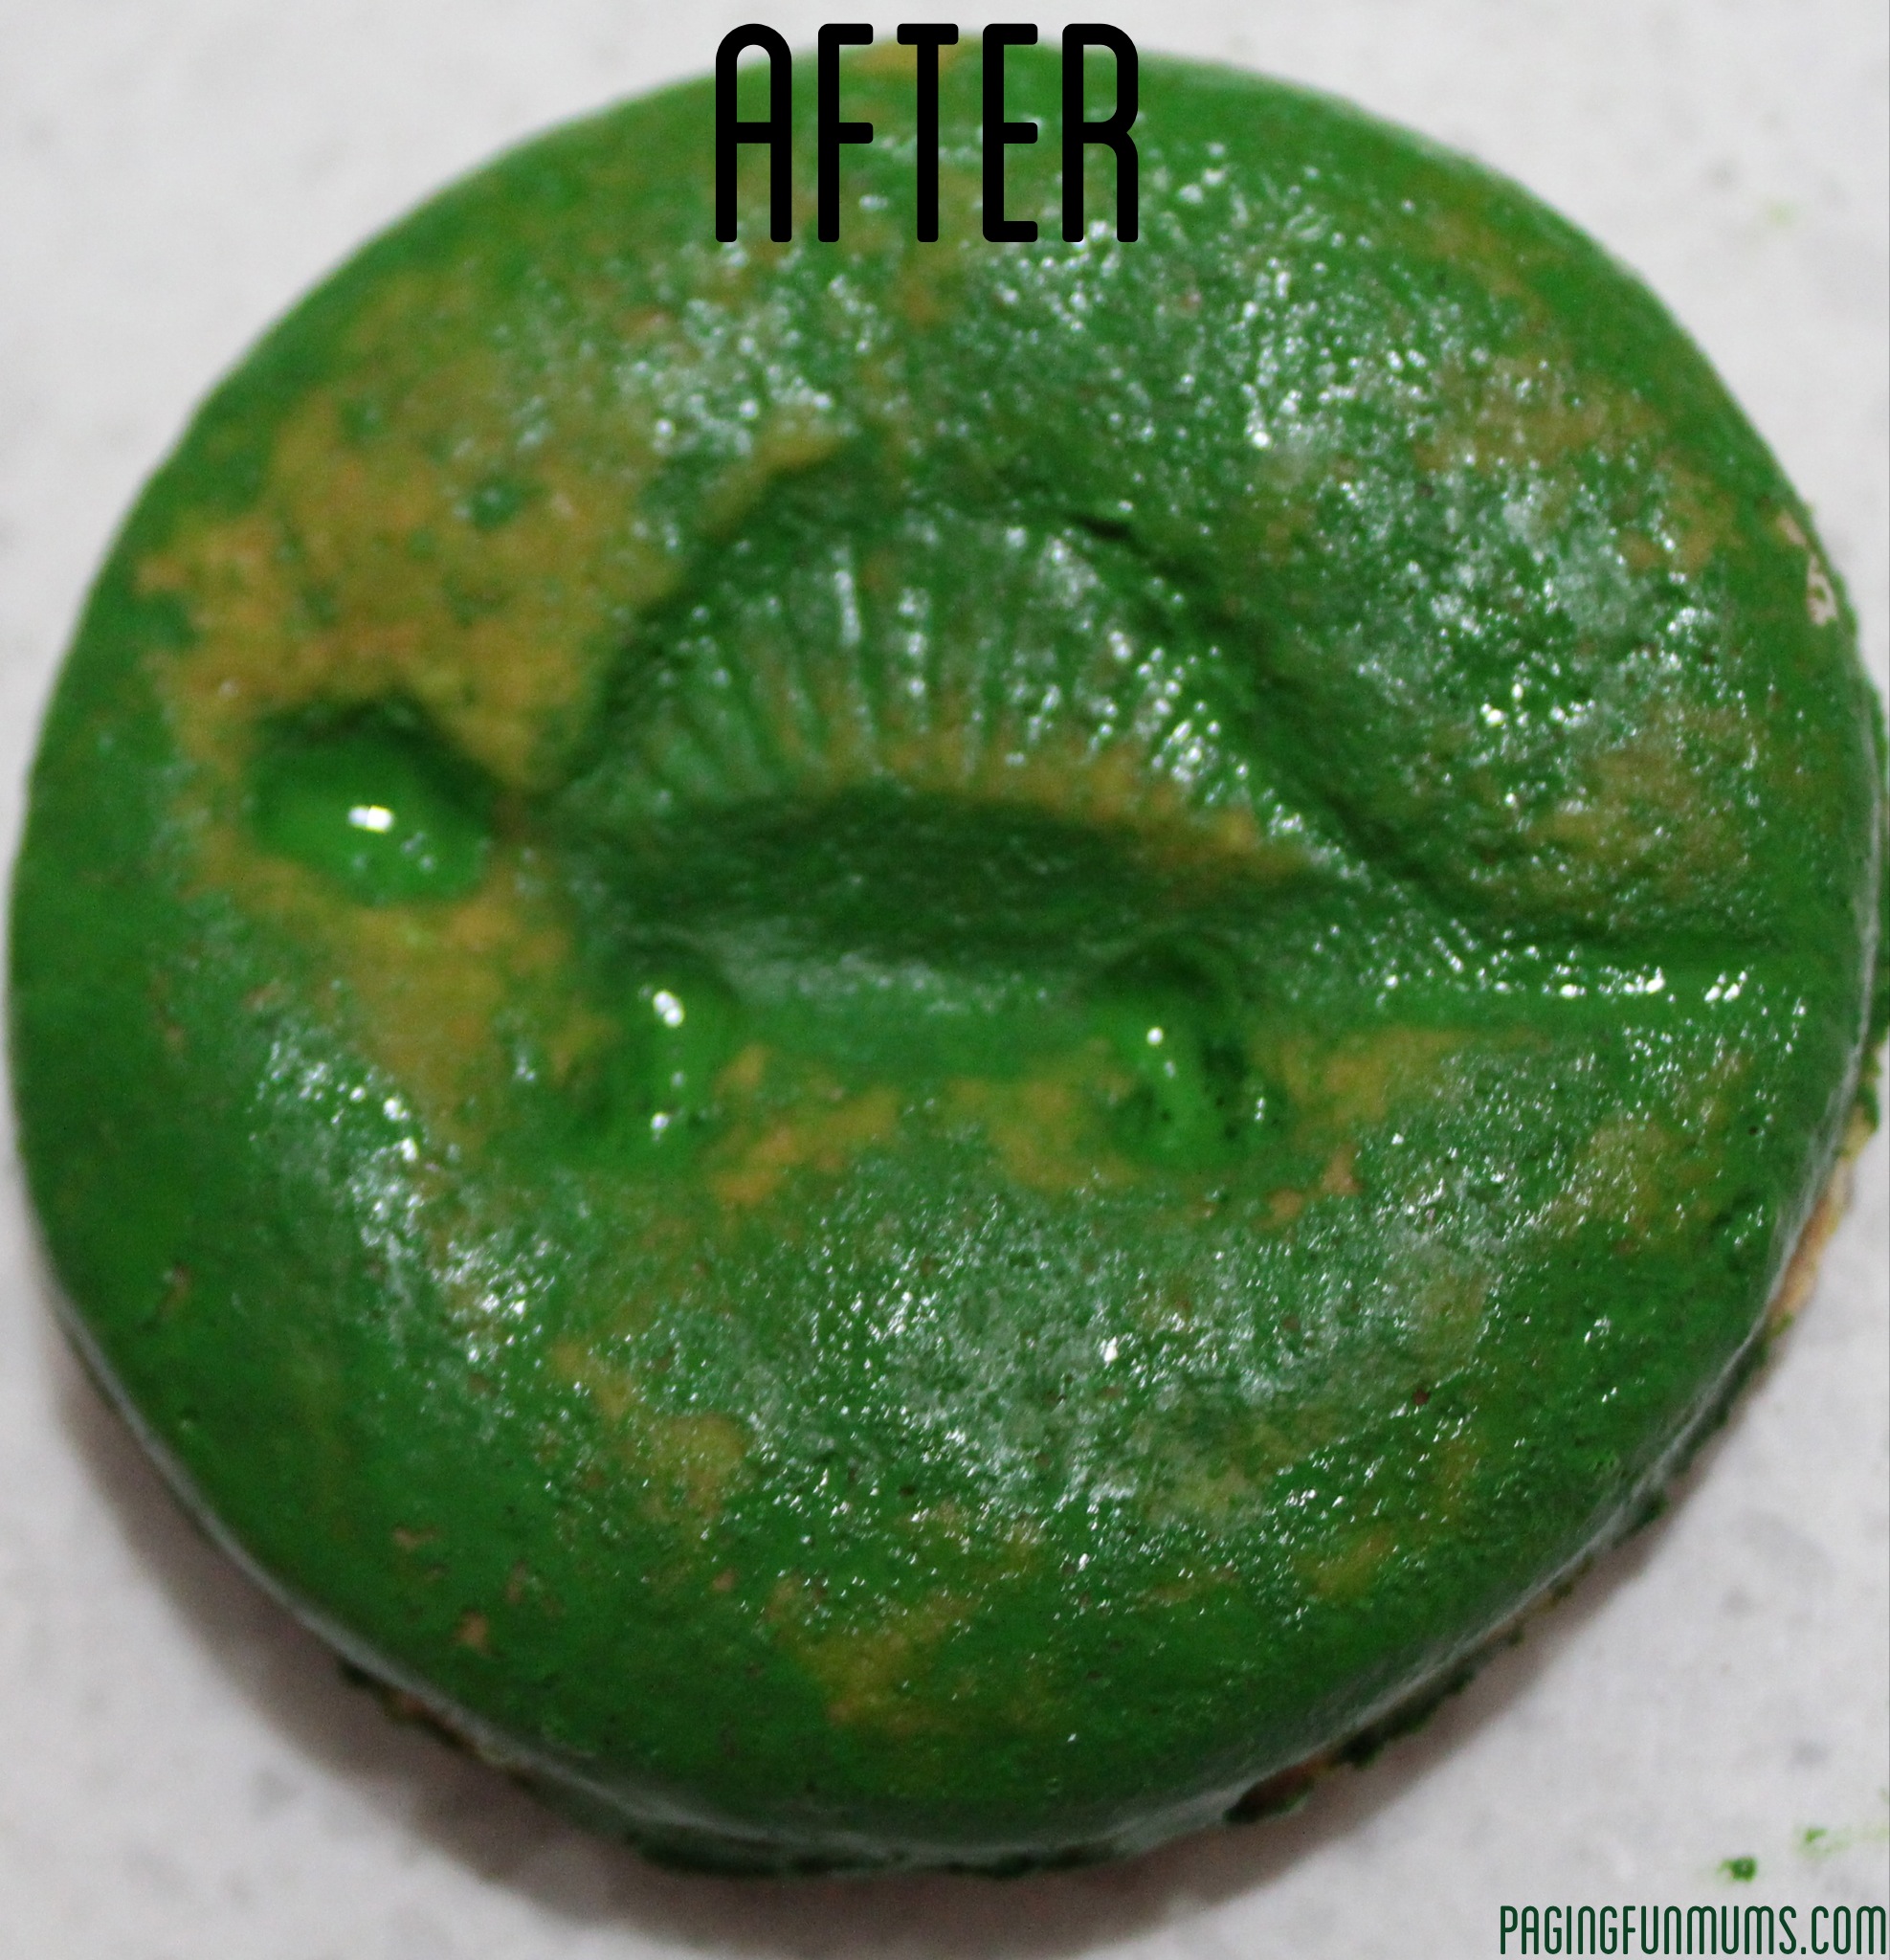
Then it’s time for the kids to get painting. We used acrylic paint & watered them down. ‘Earthy’ tones work best! I mixed some black & white to create a cool grey colour, then used an army green colour which looked great too. I wish I had of had brown paint on hand but we are going to make these again so I’ll use brown then : )
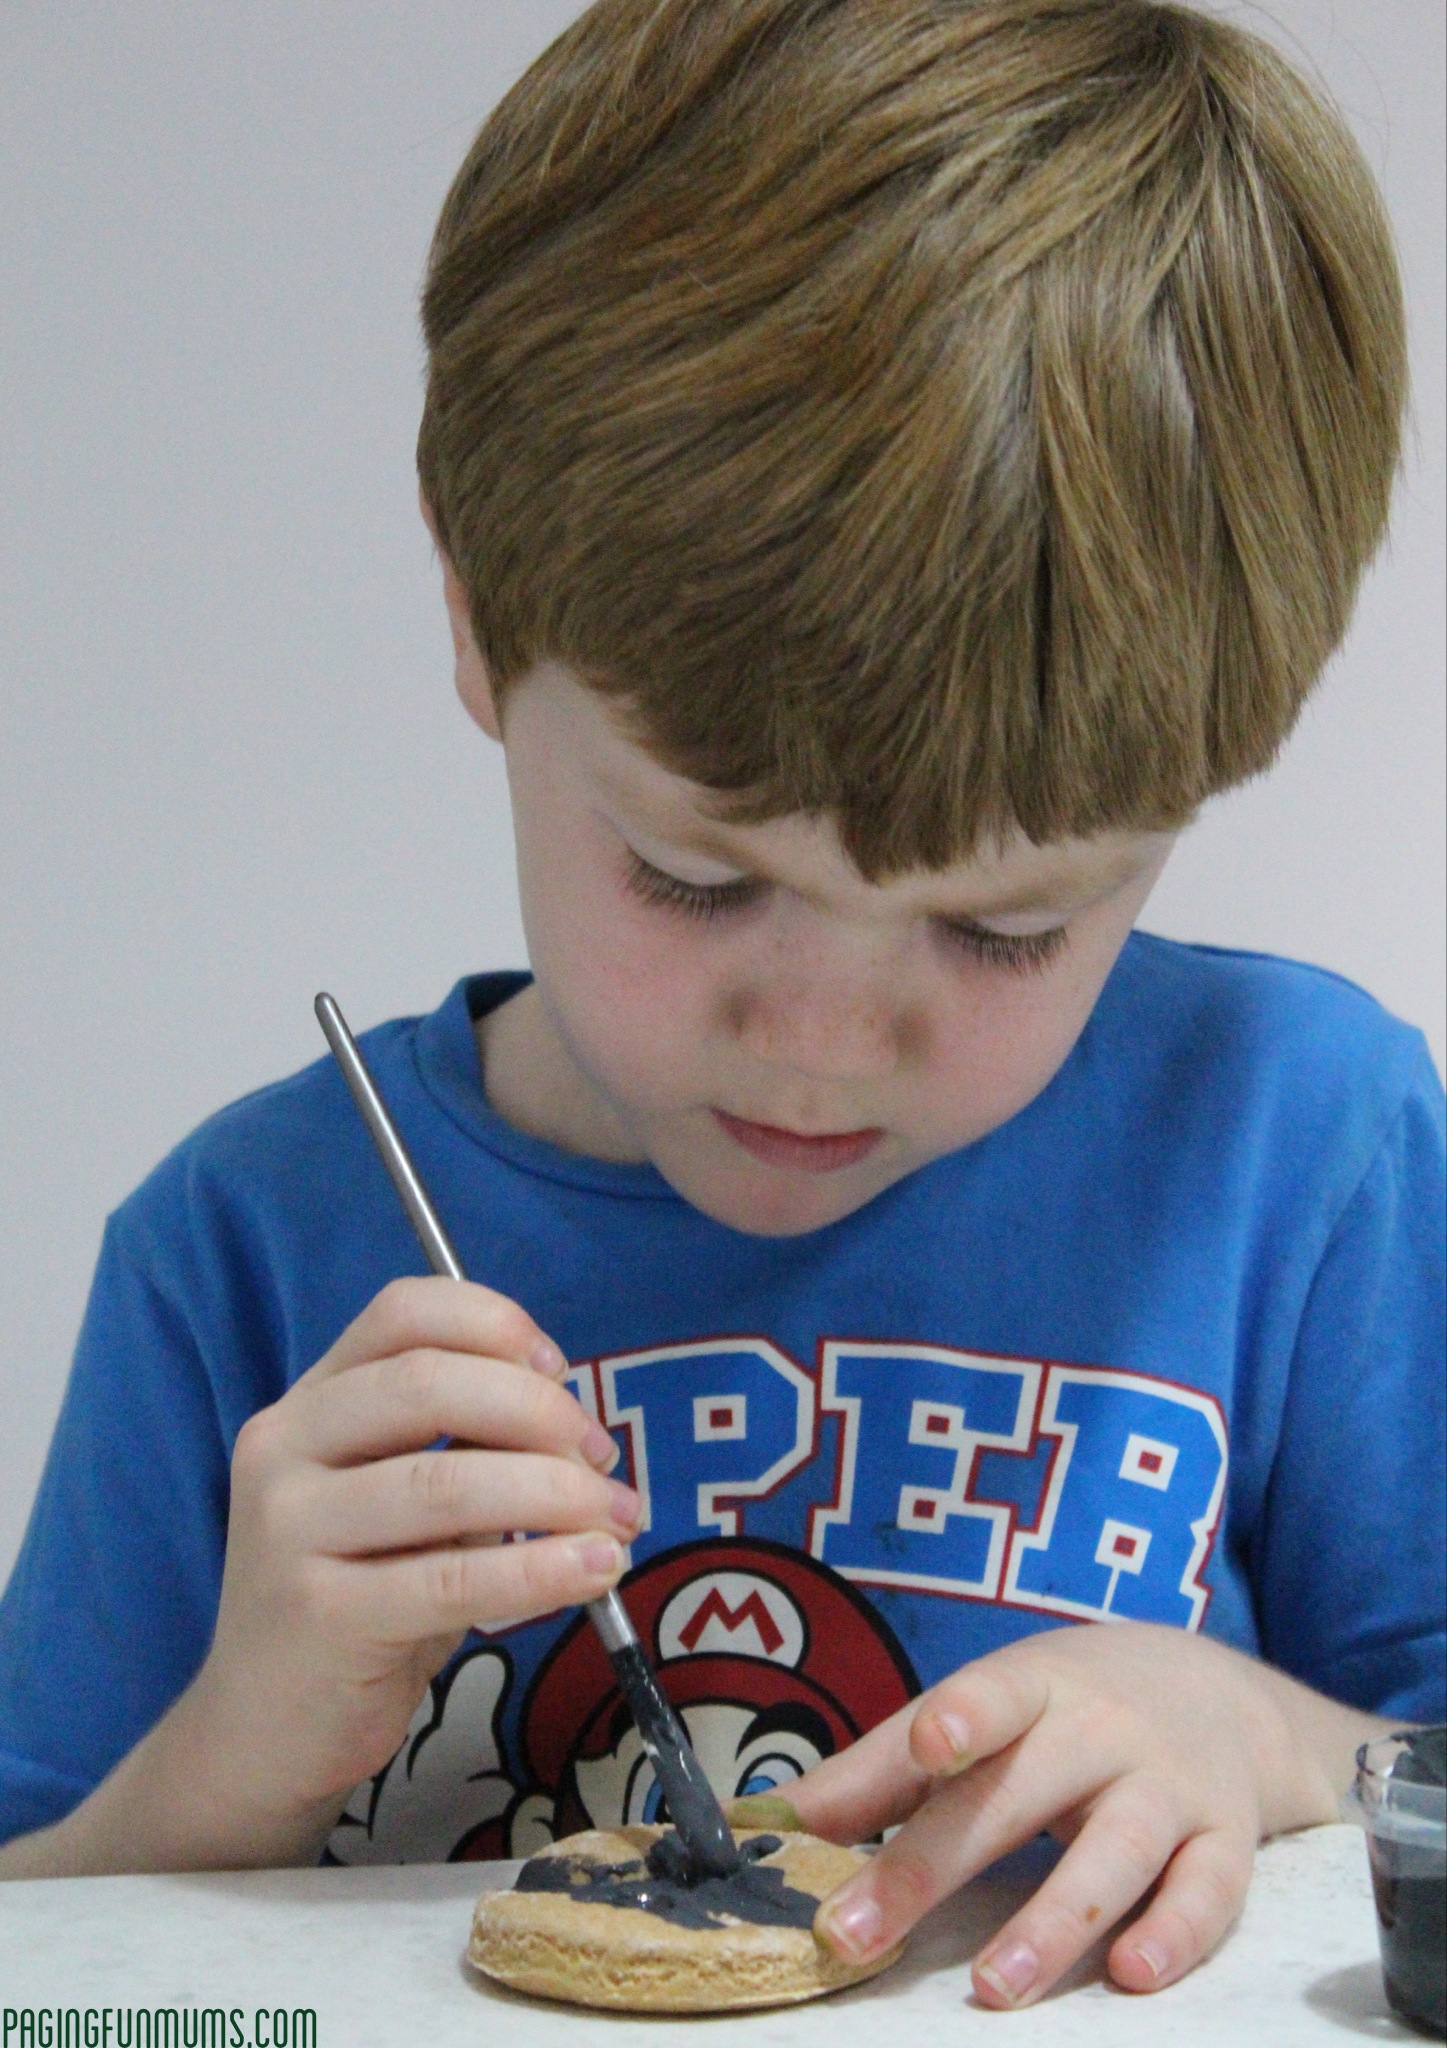
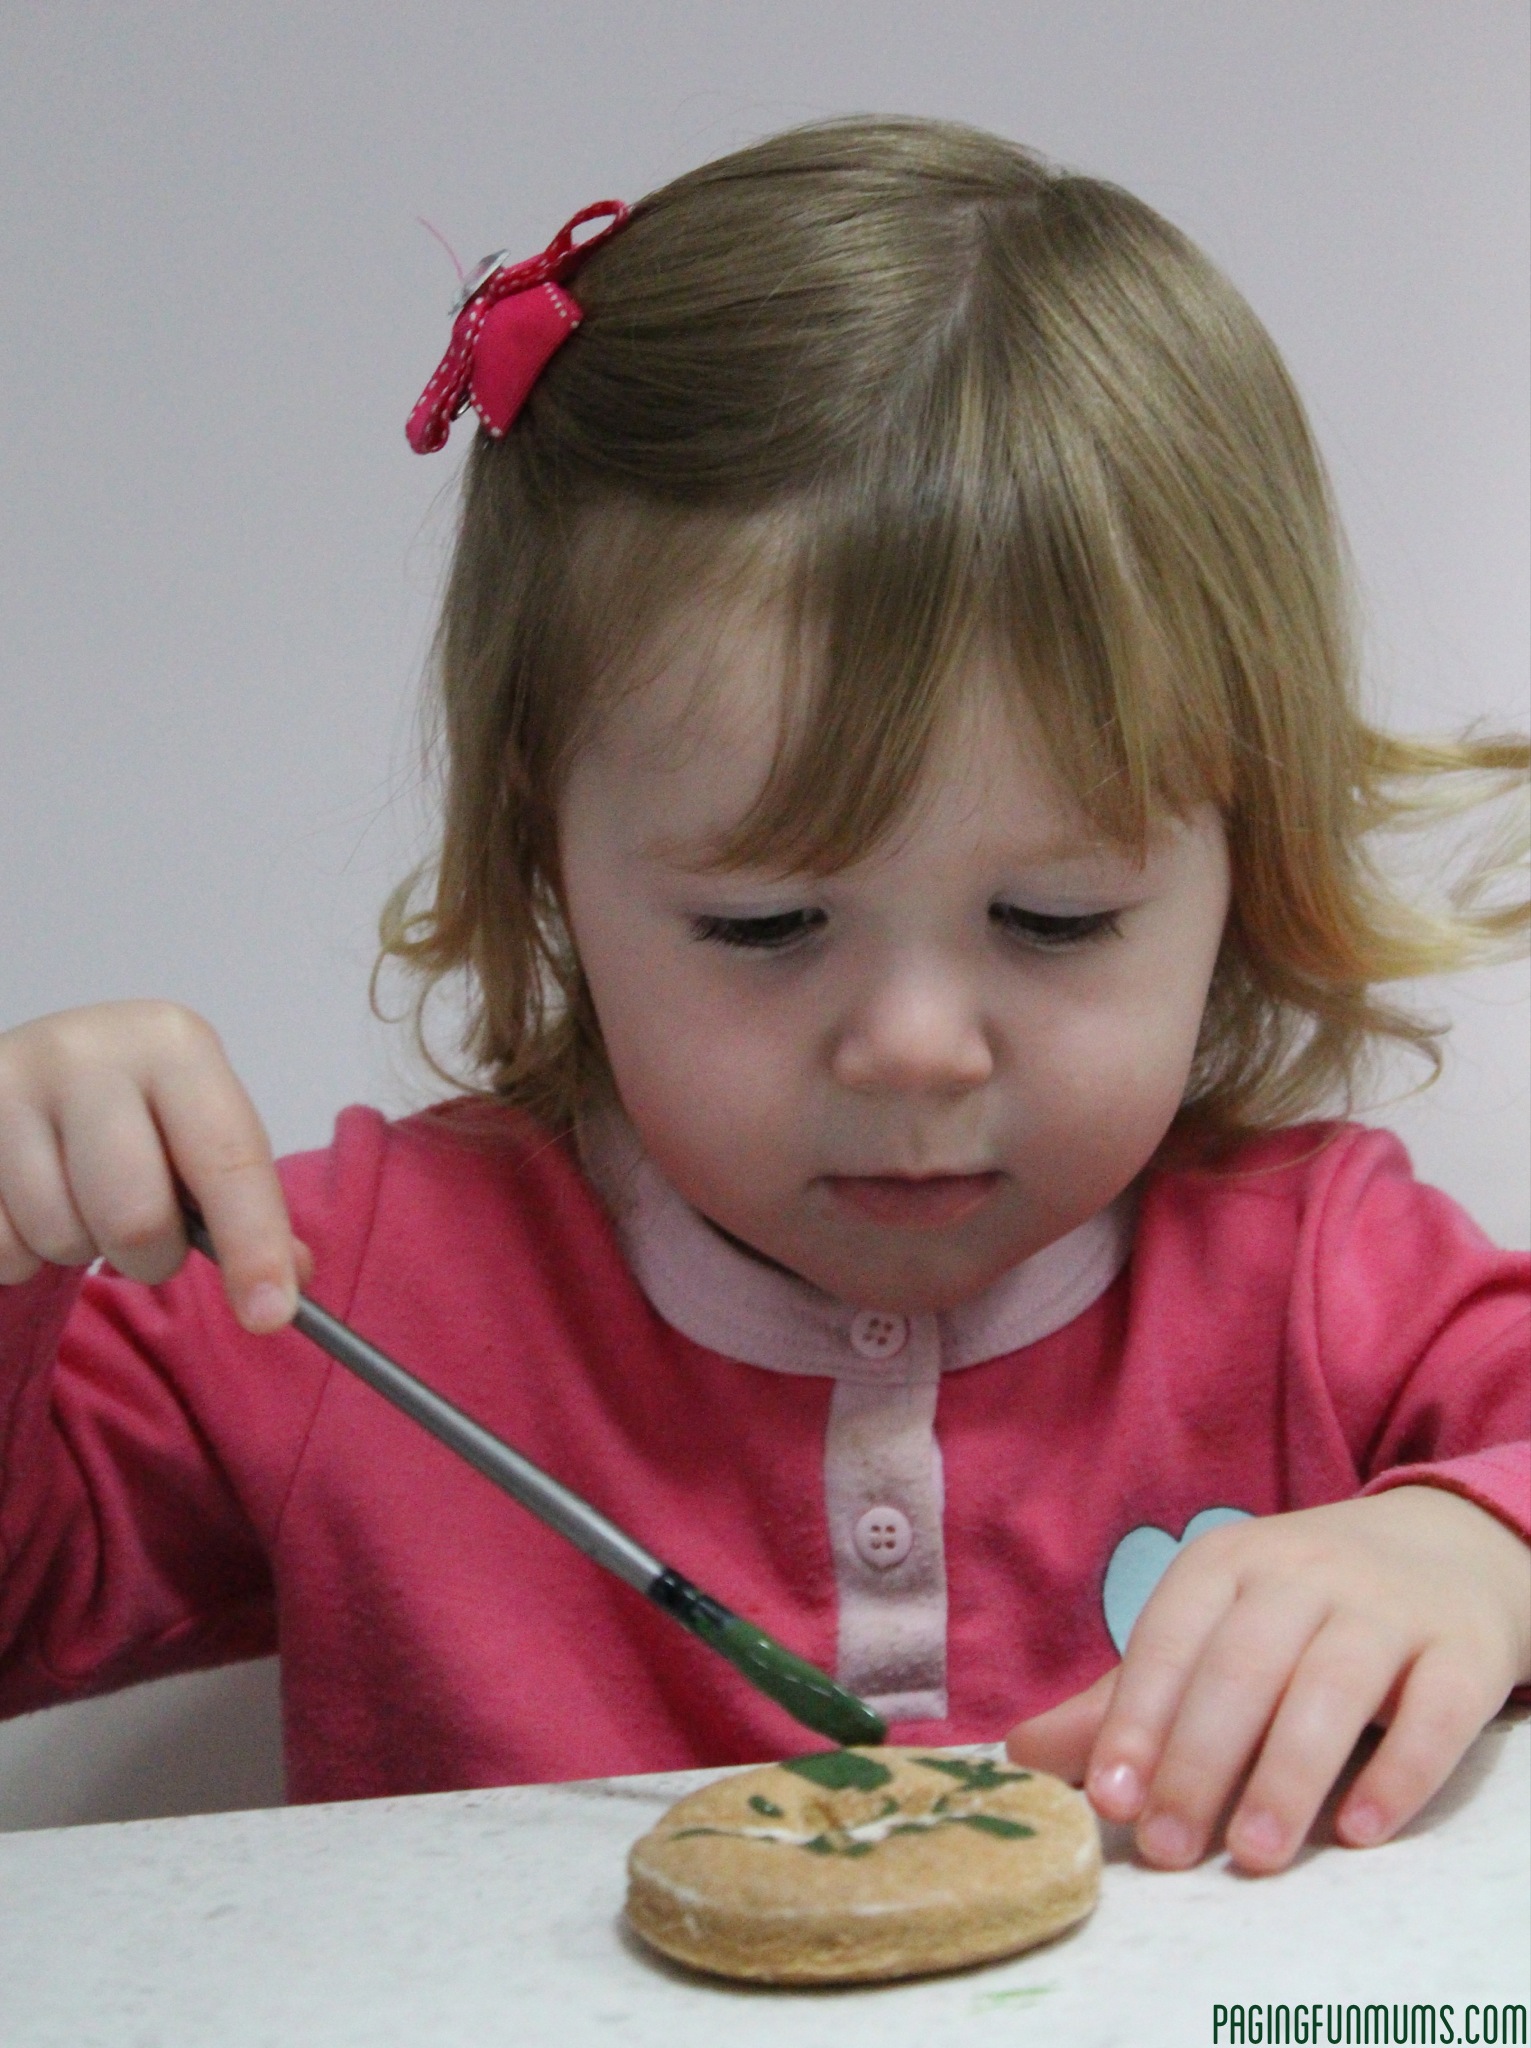
Then blot your painted fossils with paper towel this gives them a great look!
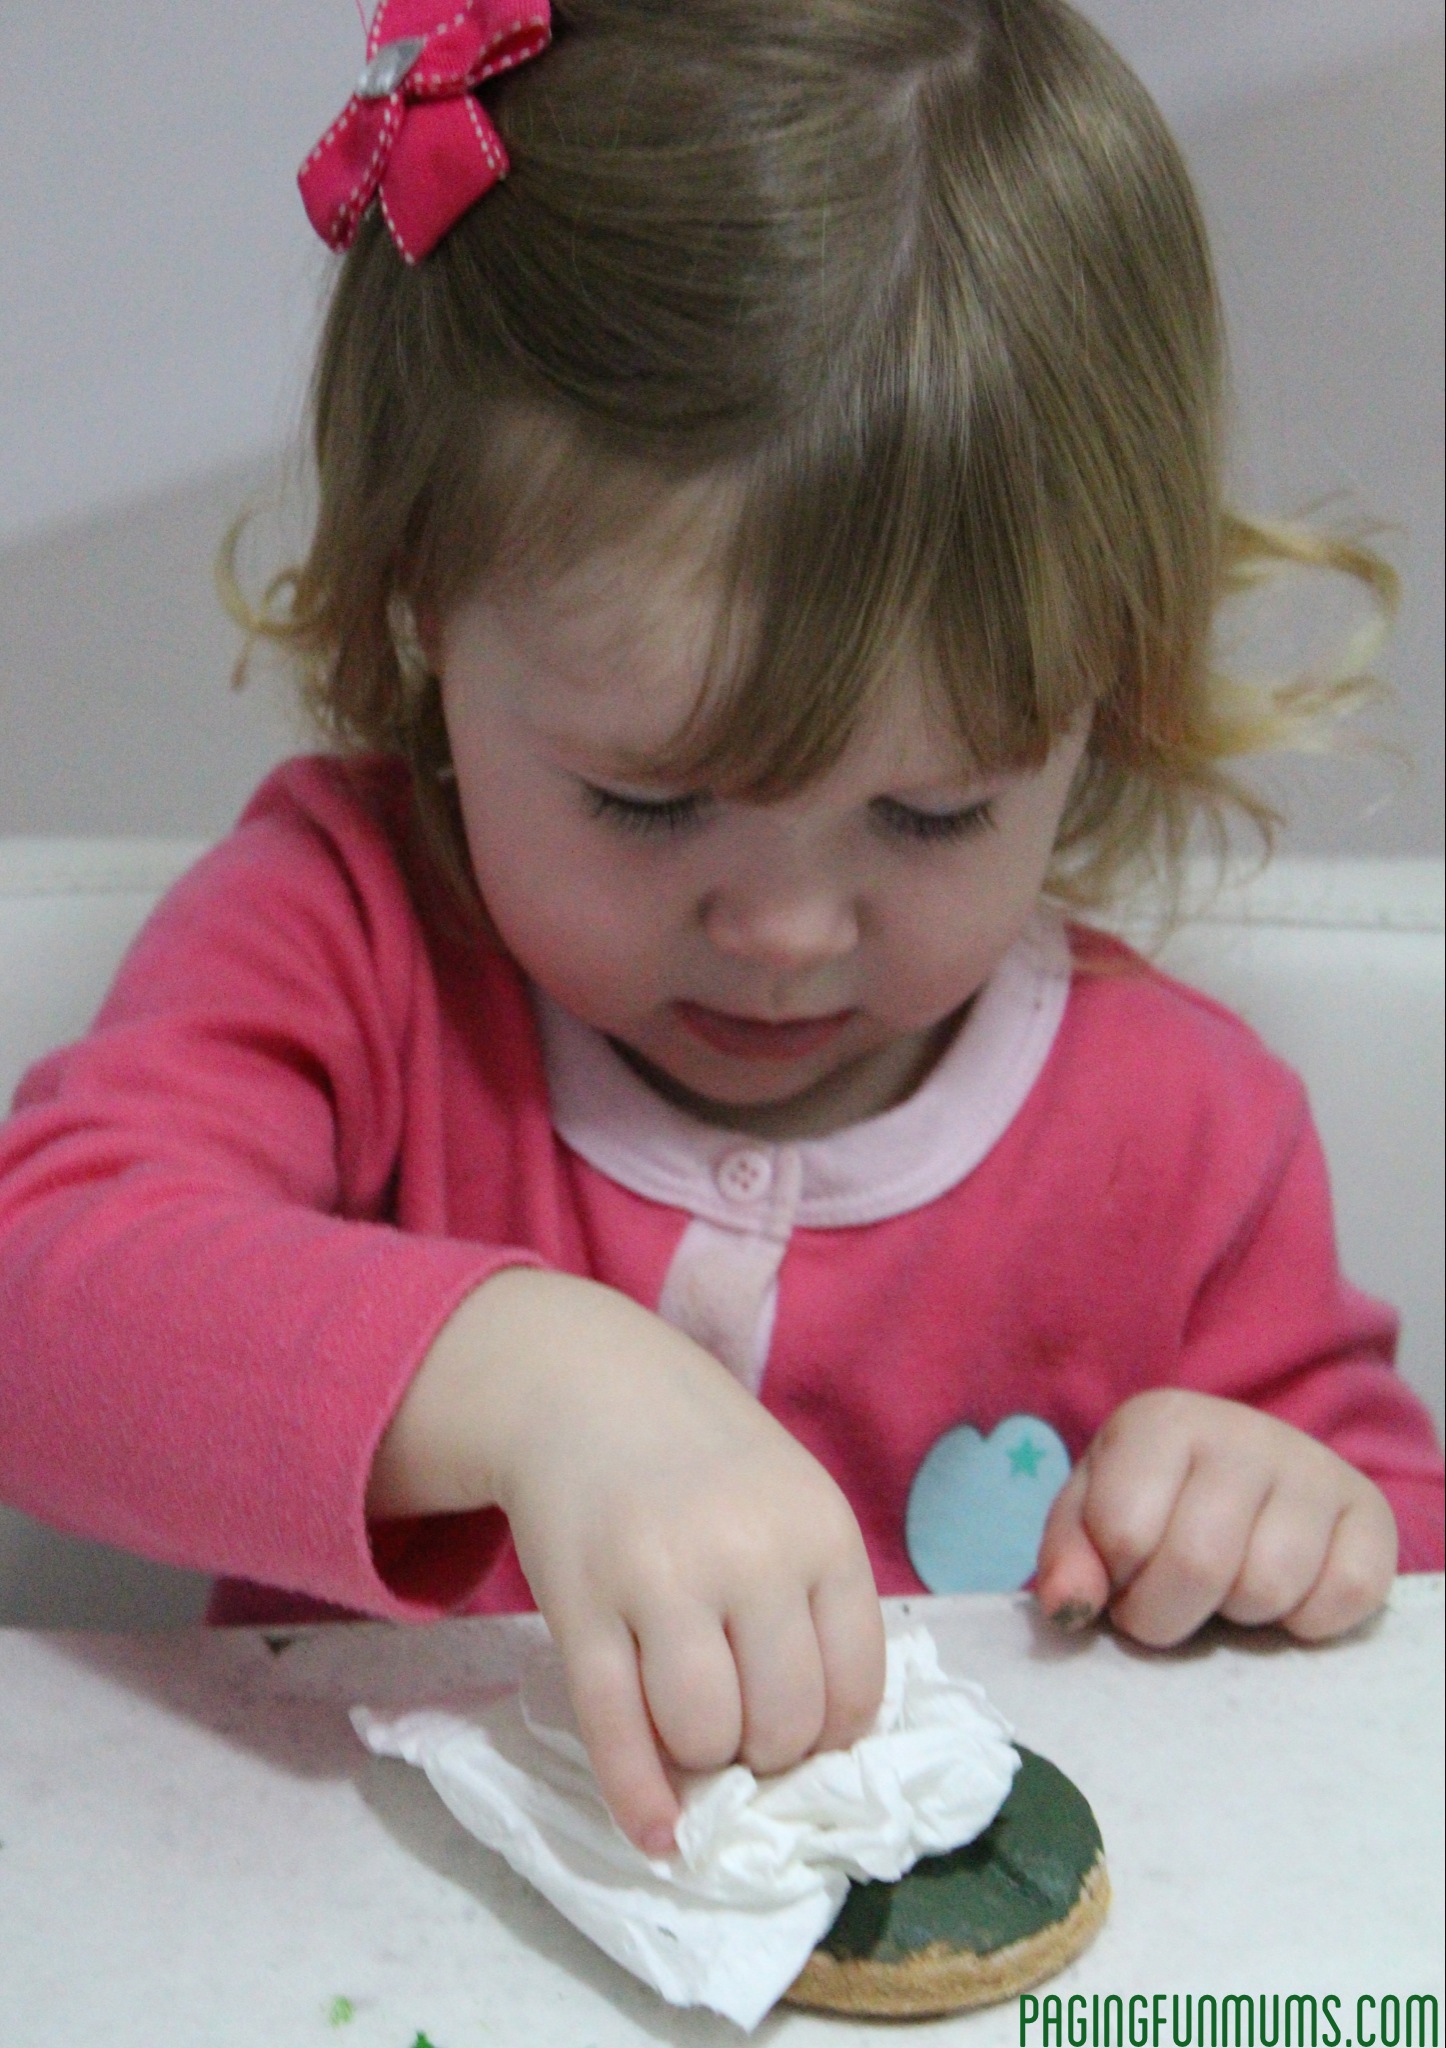
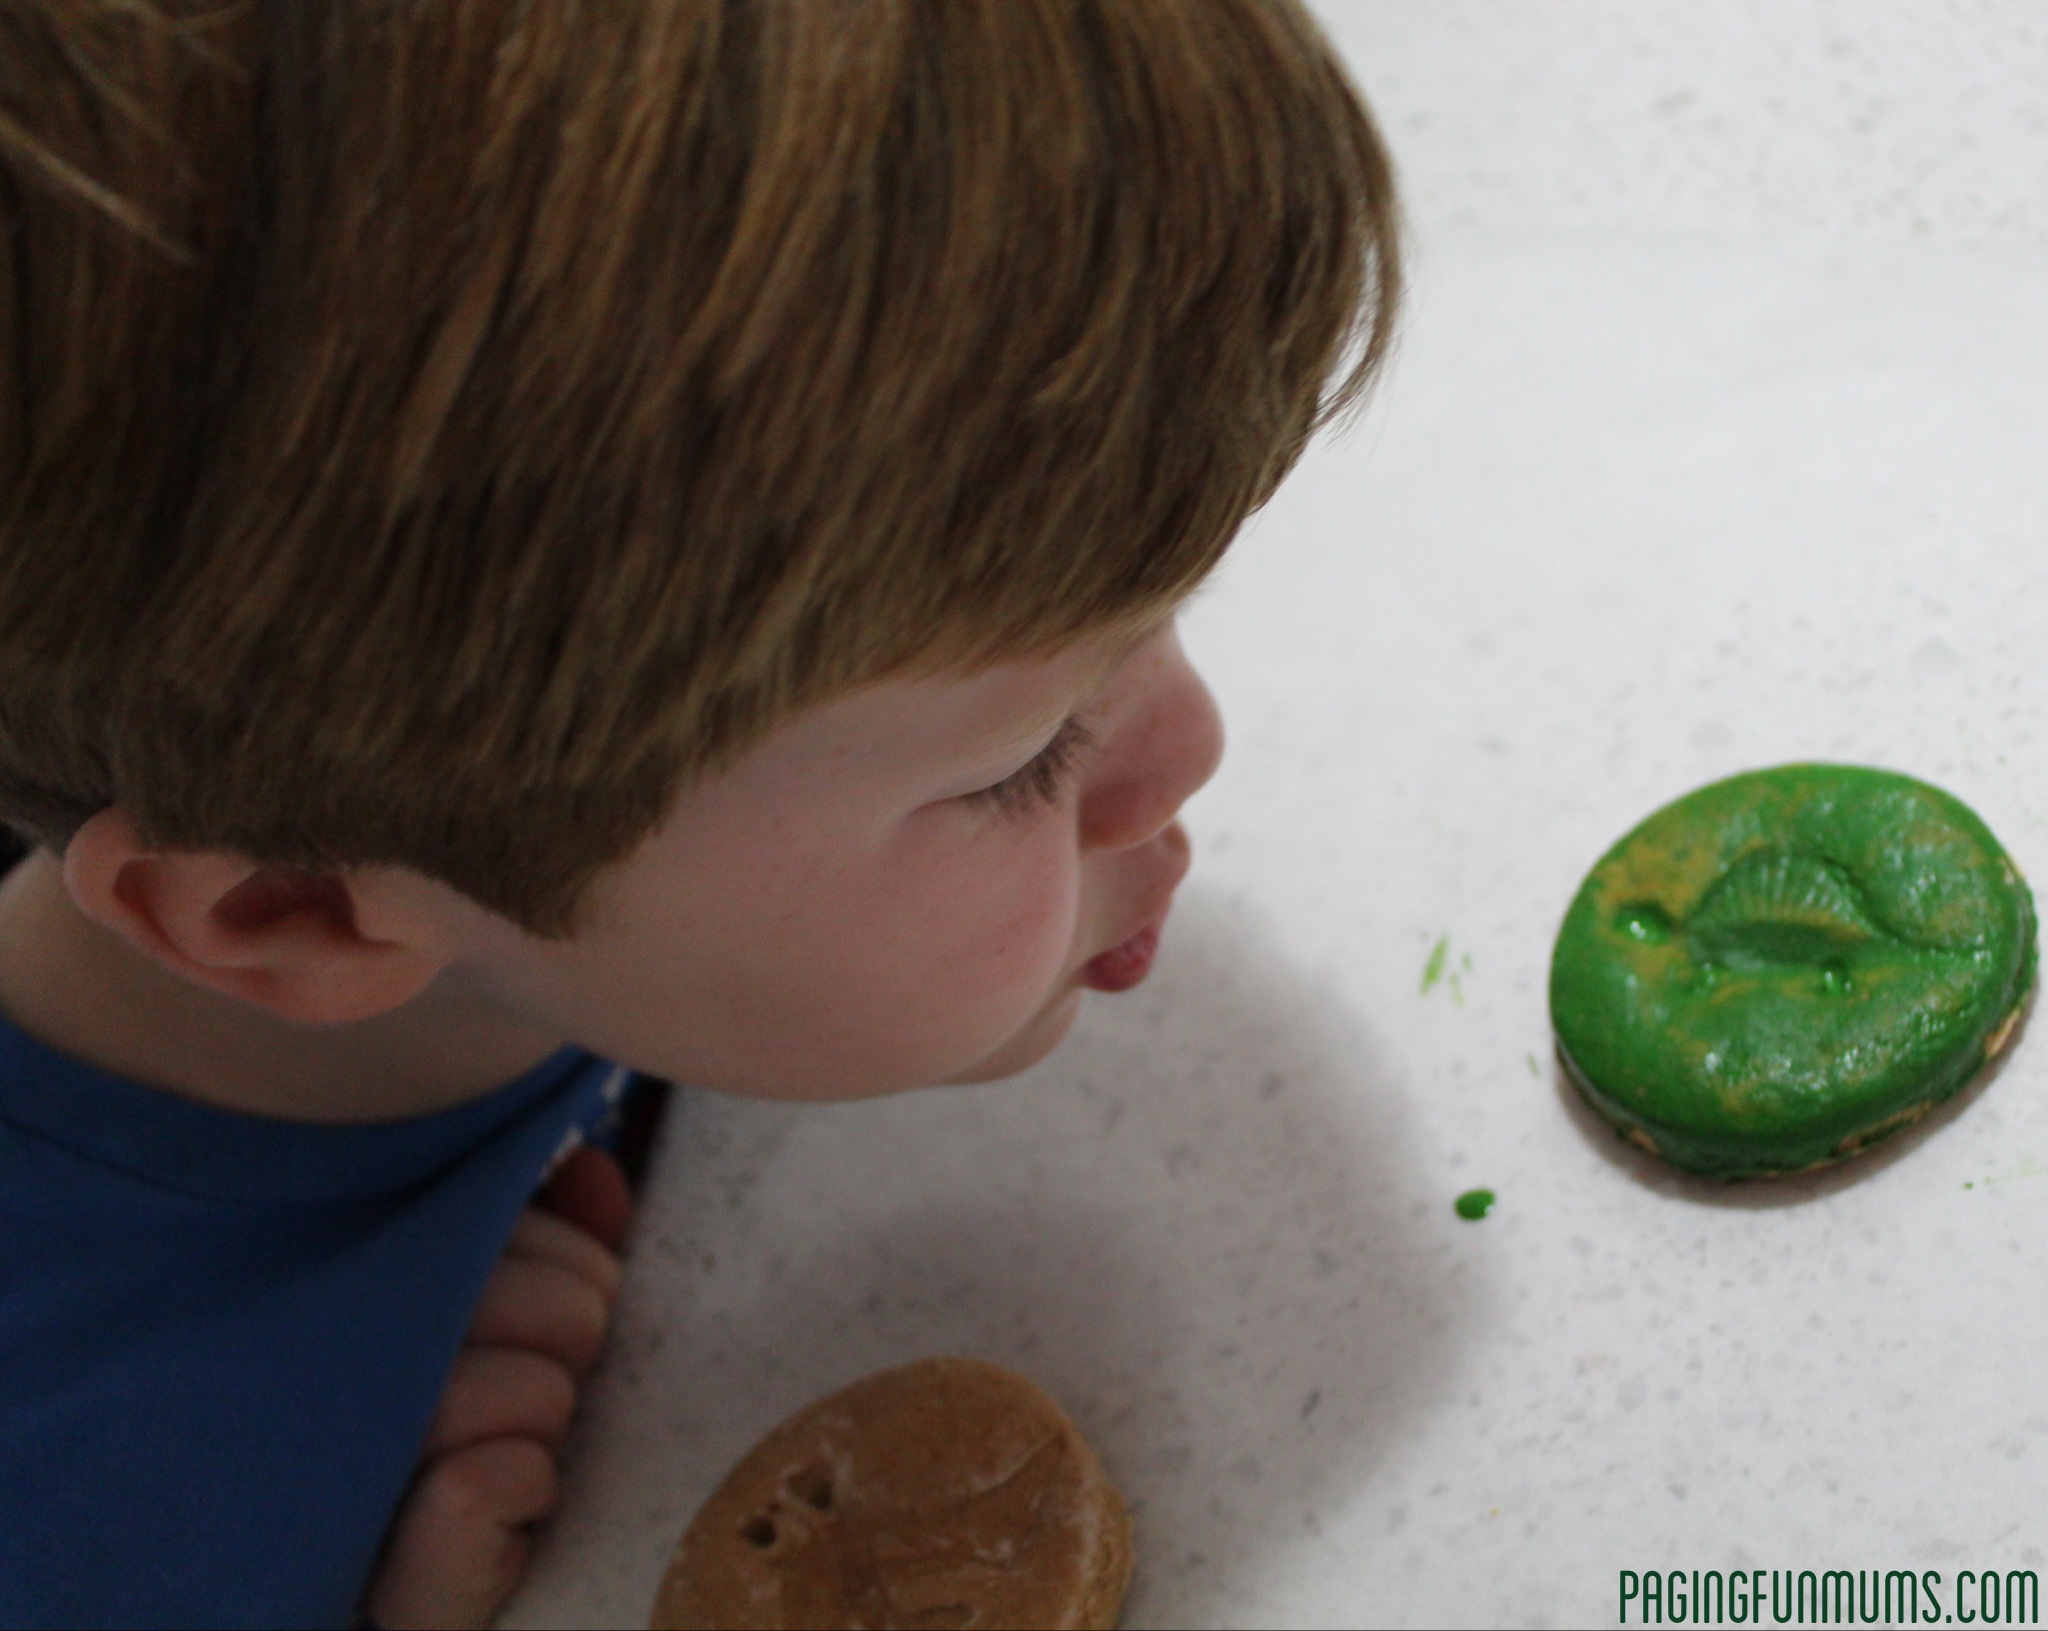
Then let dry completely before play.
You can also opt to paint yours with Modge Podge to seal your fossils.
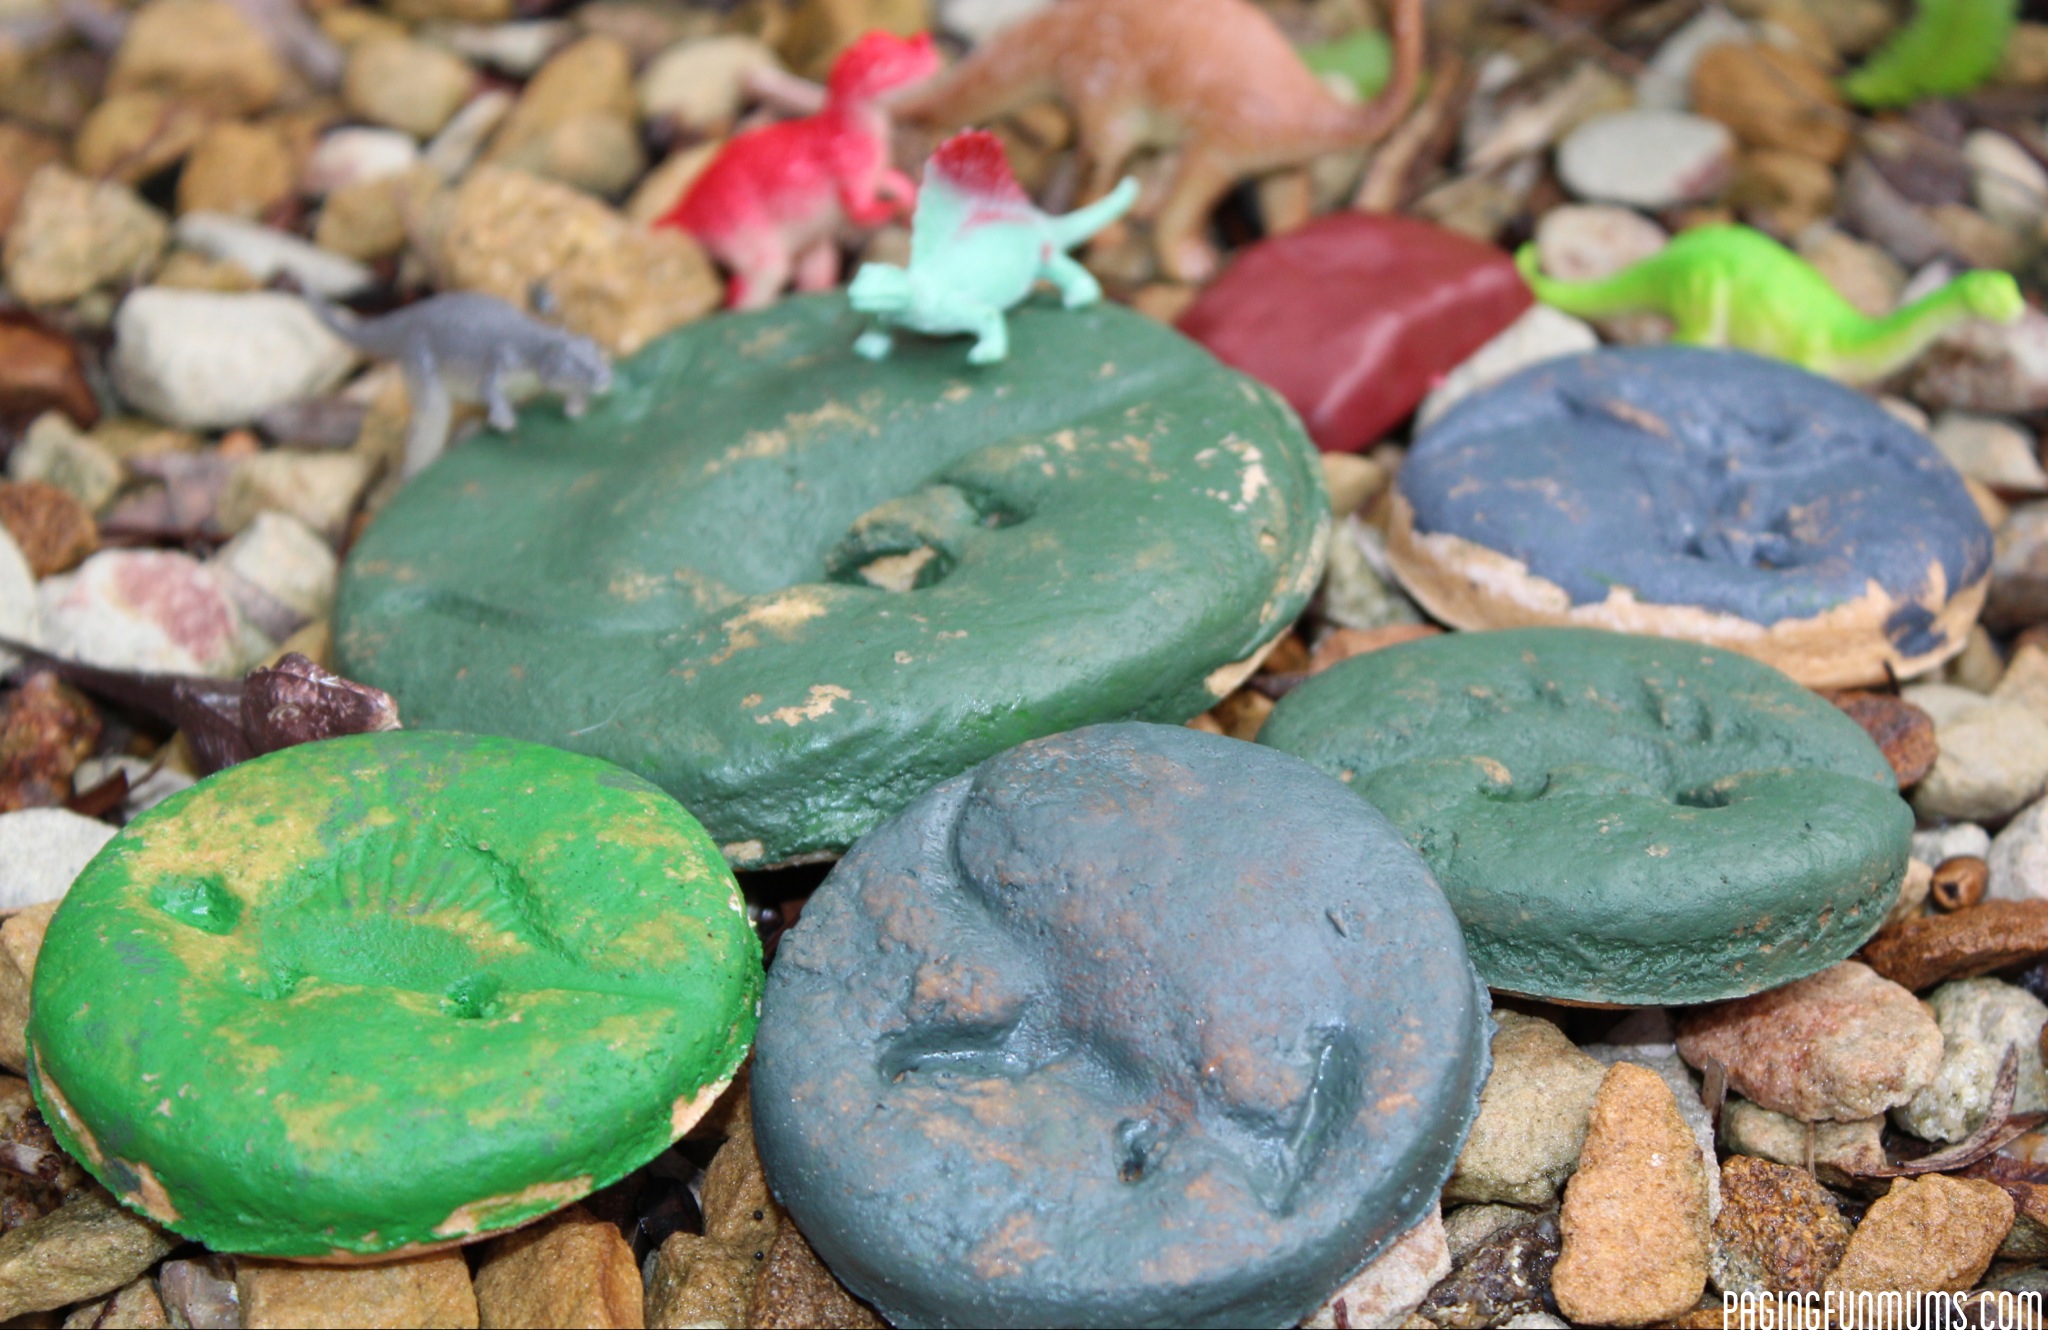
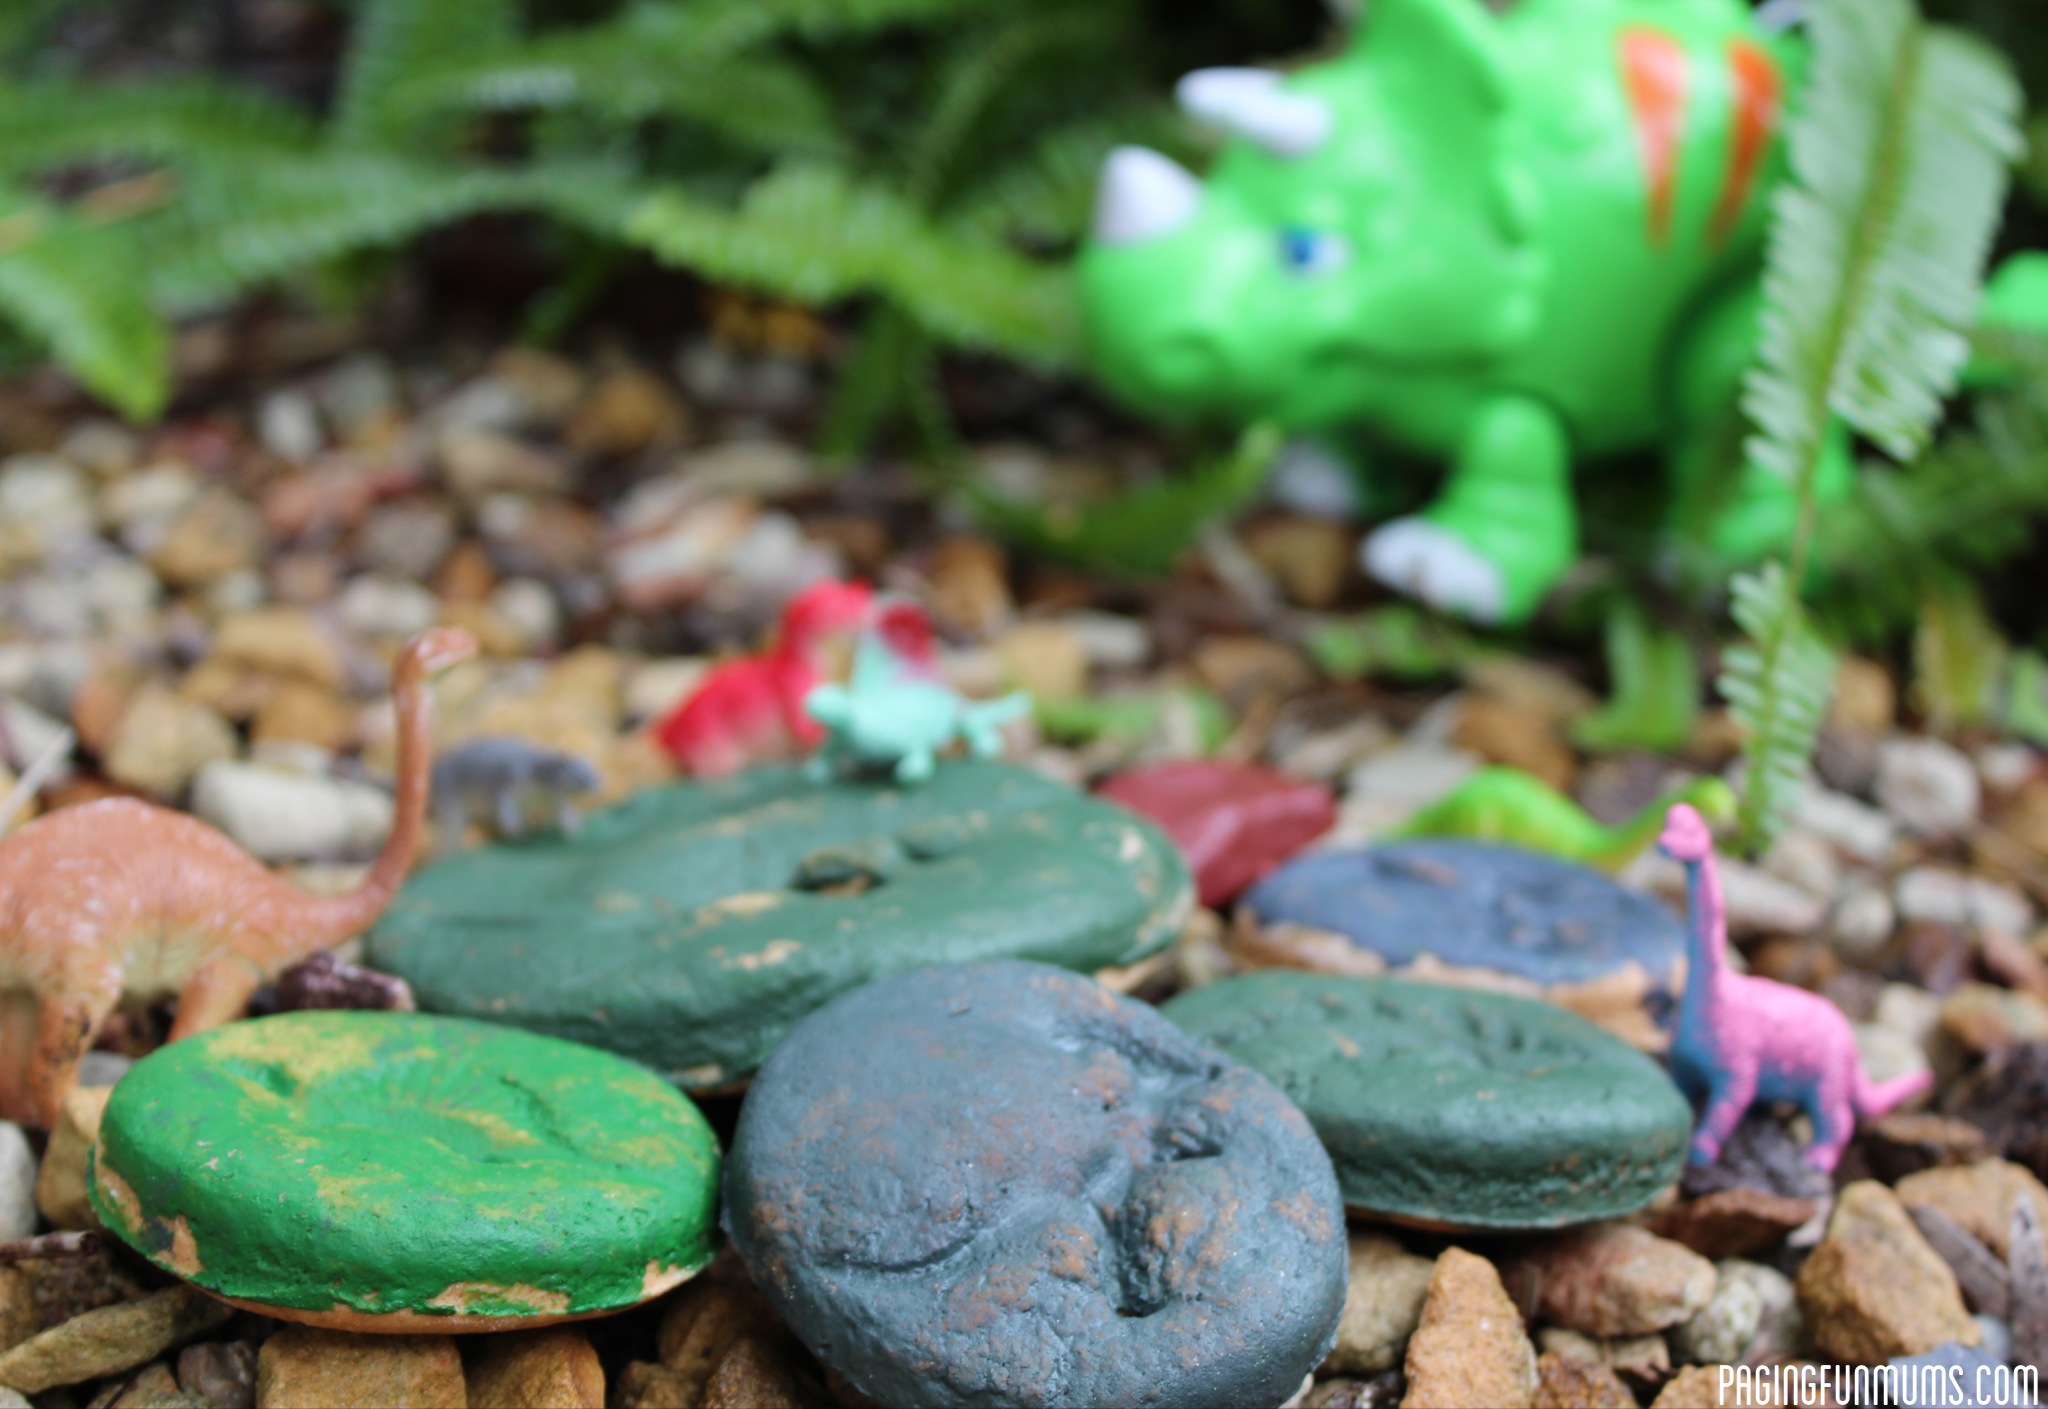
This was a great activity that the kids really enjoyed. We talked about each ‘fossil’ and spoke about what each dinosaurs name was & whether they were a carnivore or herbivore.
If you liked this activity, you may also like our:


About how many fossils does one batch make. I am doing this tomorrow with my class of 21 and wasn’t sure how many small fossils one batch of the salt dough would make.
Hi Courtney, What a great school project/activity for the kids!I can’t tell you exactly how many it made as I can’t quite remember – I would take a rough guess that there would be enough for maybe 6 kids from this batch.
Hope that helps.
Louise x
Are you able to premake this dough and store in airtight container until use
Thanks
V
You sure can 🙂
Excellent. Thanks.
Yay! Thanks for this! We are in the midst of dino day here with our little paleontologists. Ours are in the oven as we speak, we had to use gluten free flour for my child who is Celiac so we will see how they turn out. It was plenty of dough for our 4 homeschooled kiddos. 🙂
Hi! What kind of flour did you use? All purpose? Self rising?
Hi Michelle, we just used plain flour 🙂 Jen x
Do you know if you can paint them before you cook them?
Hi Ash, I haven’t tried it but I can’t think of a reason why not! Let us know if you try it, I’d be really interested to hear 🙂 Jenni x
Hi! What a great activity! I was wondering whether baking at 180 means Celsius or Fahrenheit? I’m guessing it’s Fahrenhait but 180 seems like an odd number. Thank you!