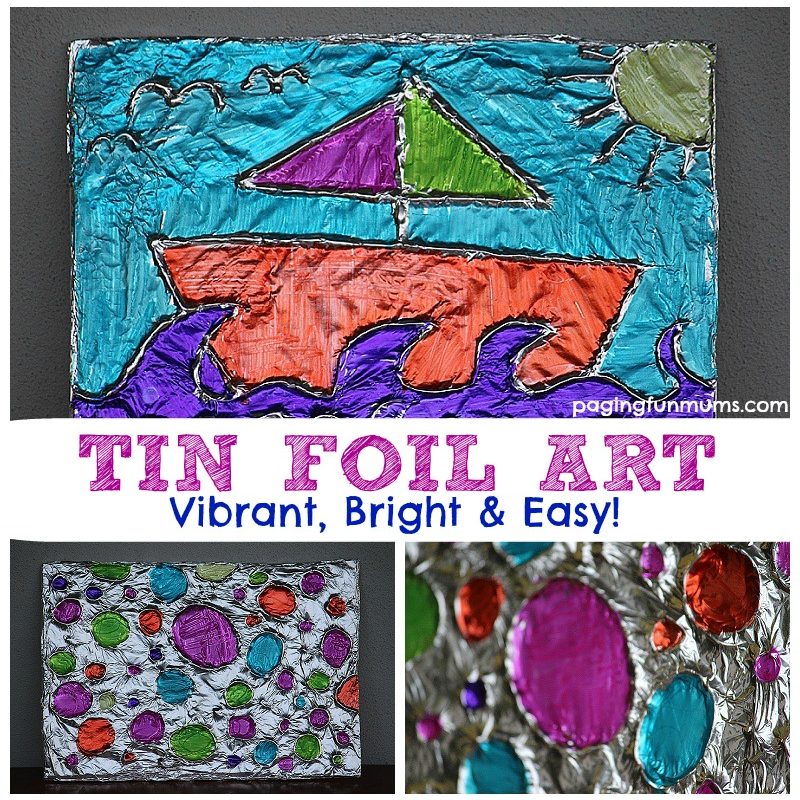

This Textured Tin Foil Art was so much fun to create! We were so thrilled with the vibrant colours and interesting textures that this process created! Want to know the best thing? You most likely have everything you need at home!
Materials Used –
- Recycled cardboard
- Glue gun with extra glue refills
- Tin Foil
- Glue stick
- Permanent Markers
- Scissors
Instructions –
Cut a piece of cardboard to make your frame. Have your child draw a simple design on the carboard, carefully go over the drawn lines with the glue gun and allow to dry*be careful as the glue will be hot – an adult should do this if it’s not age appropriate for your child.

Cover the cardboard with tin foil and gently rub to expose the textured outlines of the drawing then colour the tin foil using the permanent markers.
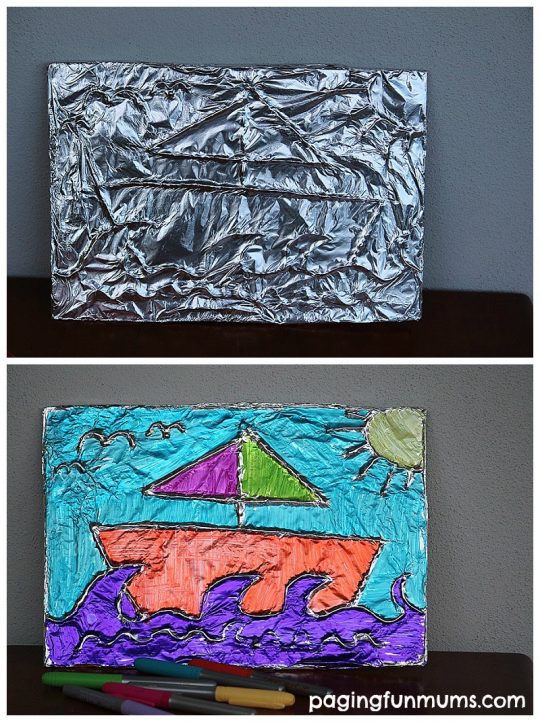
The hidden details really ‘pop’ out once the colouring is complete!

We really enjoyed this FUN project and look forward to trying some other Tin Foil art projects soon!
If you enjoyed this project you might also enjoy these FUN art ideas –
Louise x
If you want to become a Fellow Fun Mum Member & receive all of our fun craft, recipes & activities as well as special offers & promotions – click the button on our home page : )


Another idea that is really cool: if you buy the heavy tin and Home Depot or lowes and make a design and then put it on a heated skillet and use crayons to color it in and the crayons melt leaving a colored wax.
Cool stuff
I did this recently with a grade 6 class and they LOVED it. Such a fun and hands-on activity.
Claire x
what is the glue stick for? I didn’t see it in the directions, but it was on the list of materials.
to glue the tin foil down?
to outline shapes on cardboard before tinfoil goes on
I can’t imagine 23 sixth graders with glue guns. Anyone done this with white glue. I’m thinking it could dry over the weekend
…
Hi Carolyn, You could use string and regular glue :). Lou x
I die cut small shapes out of heavy tag board, and the kids create a design with the shapes, glue the foil on with glue stick, and color with sharpies (I have also used those dry erase crayons -they are pretty soft, and lay on lots of color). I love the effect of the outline, I just haven’t had luck with string and glue with my 2nd graders. You could use Stikki Wikki (which is pricey).
I have made these tin foil pictures with 3rd-8th graders. I had them glue down various thicknesses of string, hemp or thin rope on the cardboard instead of using a glue gun for their designs. It worked great and no burned fingers!
Can you use Crayola washable markers instead of sharpies? The kids I watch are 2 and 4 and I don’t trust them not to get it all over them and their clothes!
Only the Sharpies came out with bright colors. Sorry
What about craft paint on tinfoil?
When I was a 10 year old child , I used to get a piece of clear glass (out of an old photo frame) and then trace a nice picture from a book with black paint on to the glass , fill in everything outside the outline of the picture with same black paint, leave it to dry over night , then find silver papers (from chocolates/ Easter eggs etc ) and fill in parts of picture , such as clothes with different colored silver foil. very good results . cut piece of cardboard same size as glass . use for backing ,of picture. finish with black sticky tape ,to edge of frame, to meld c/board and glass together. I used soldiers in uniform from 17th century , Victorian ladies in ball gowns, clowns and birds as subjects.