
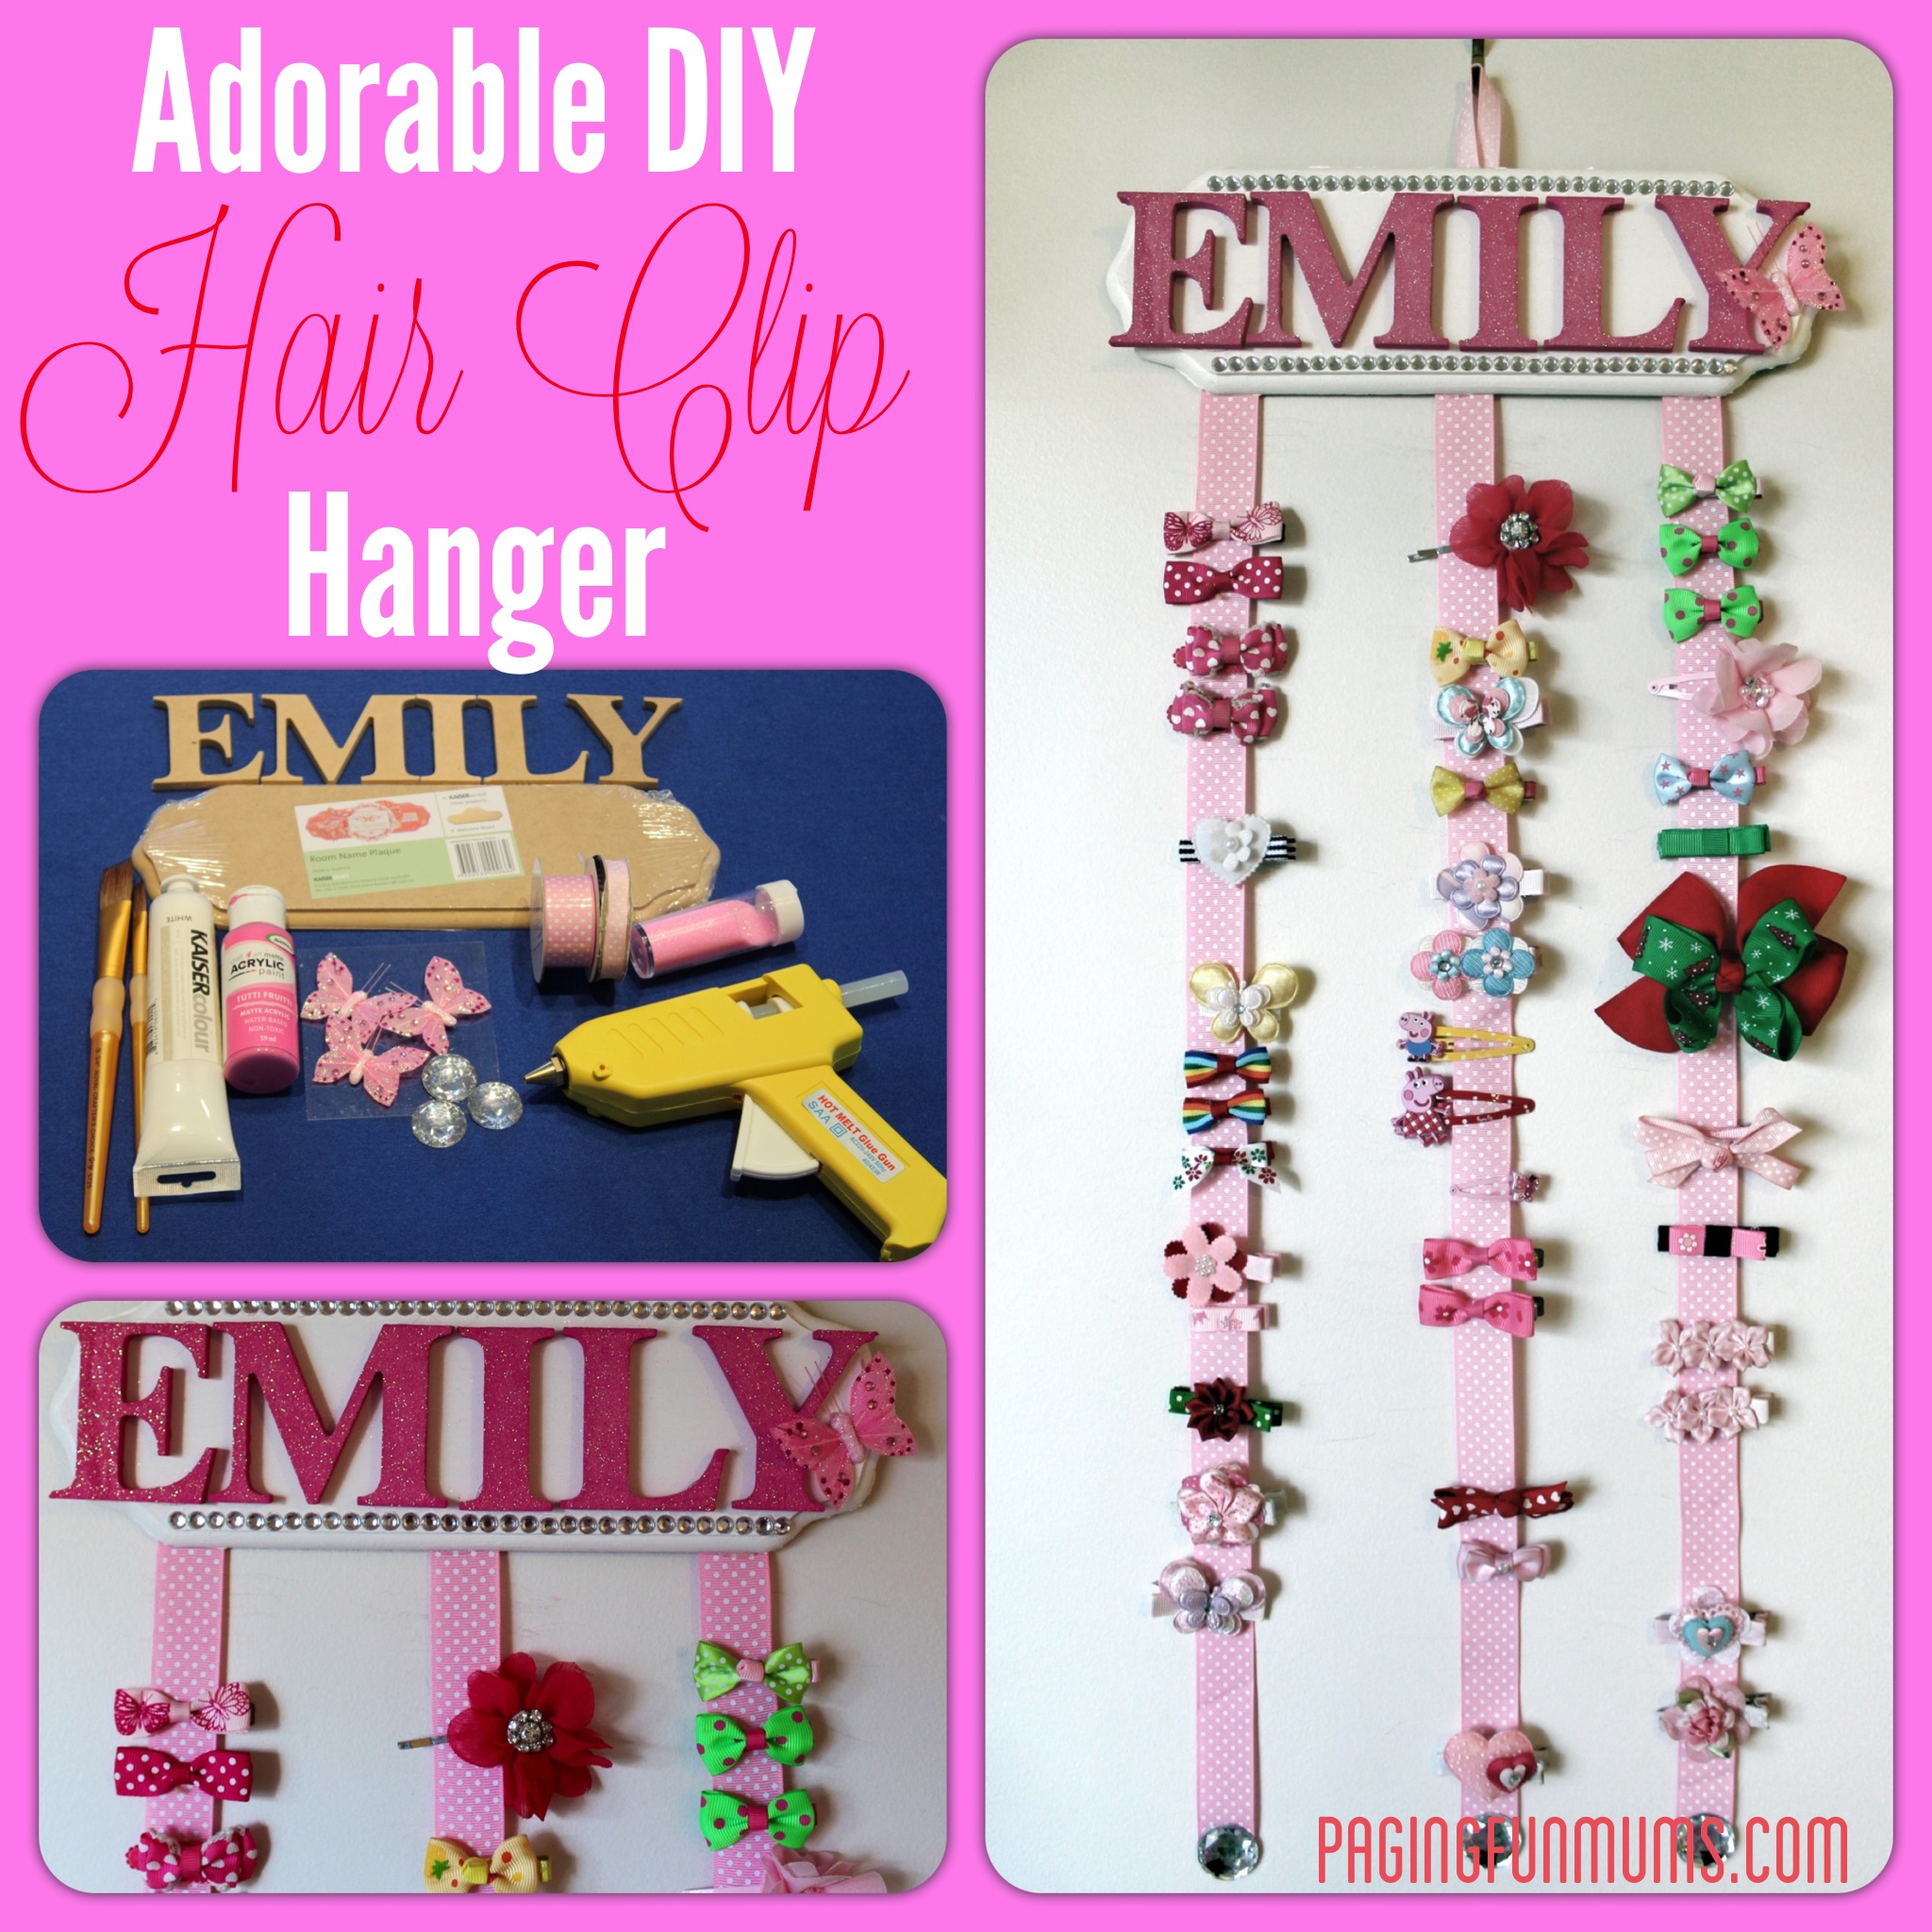
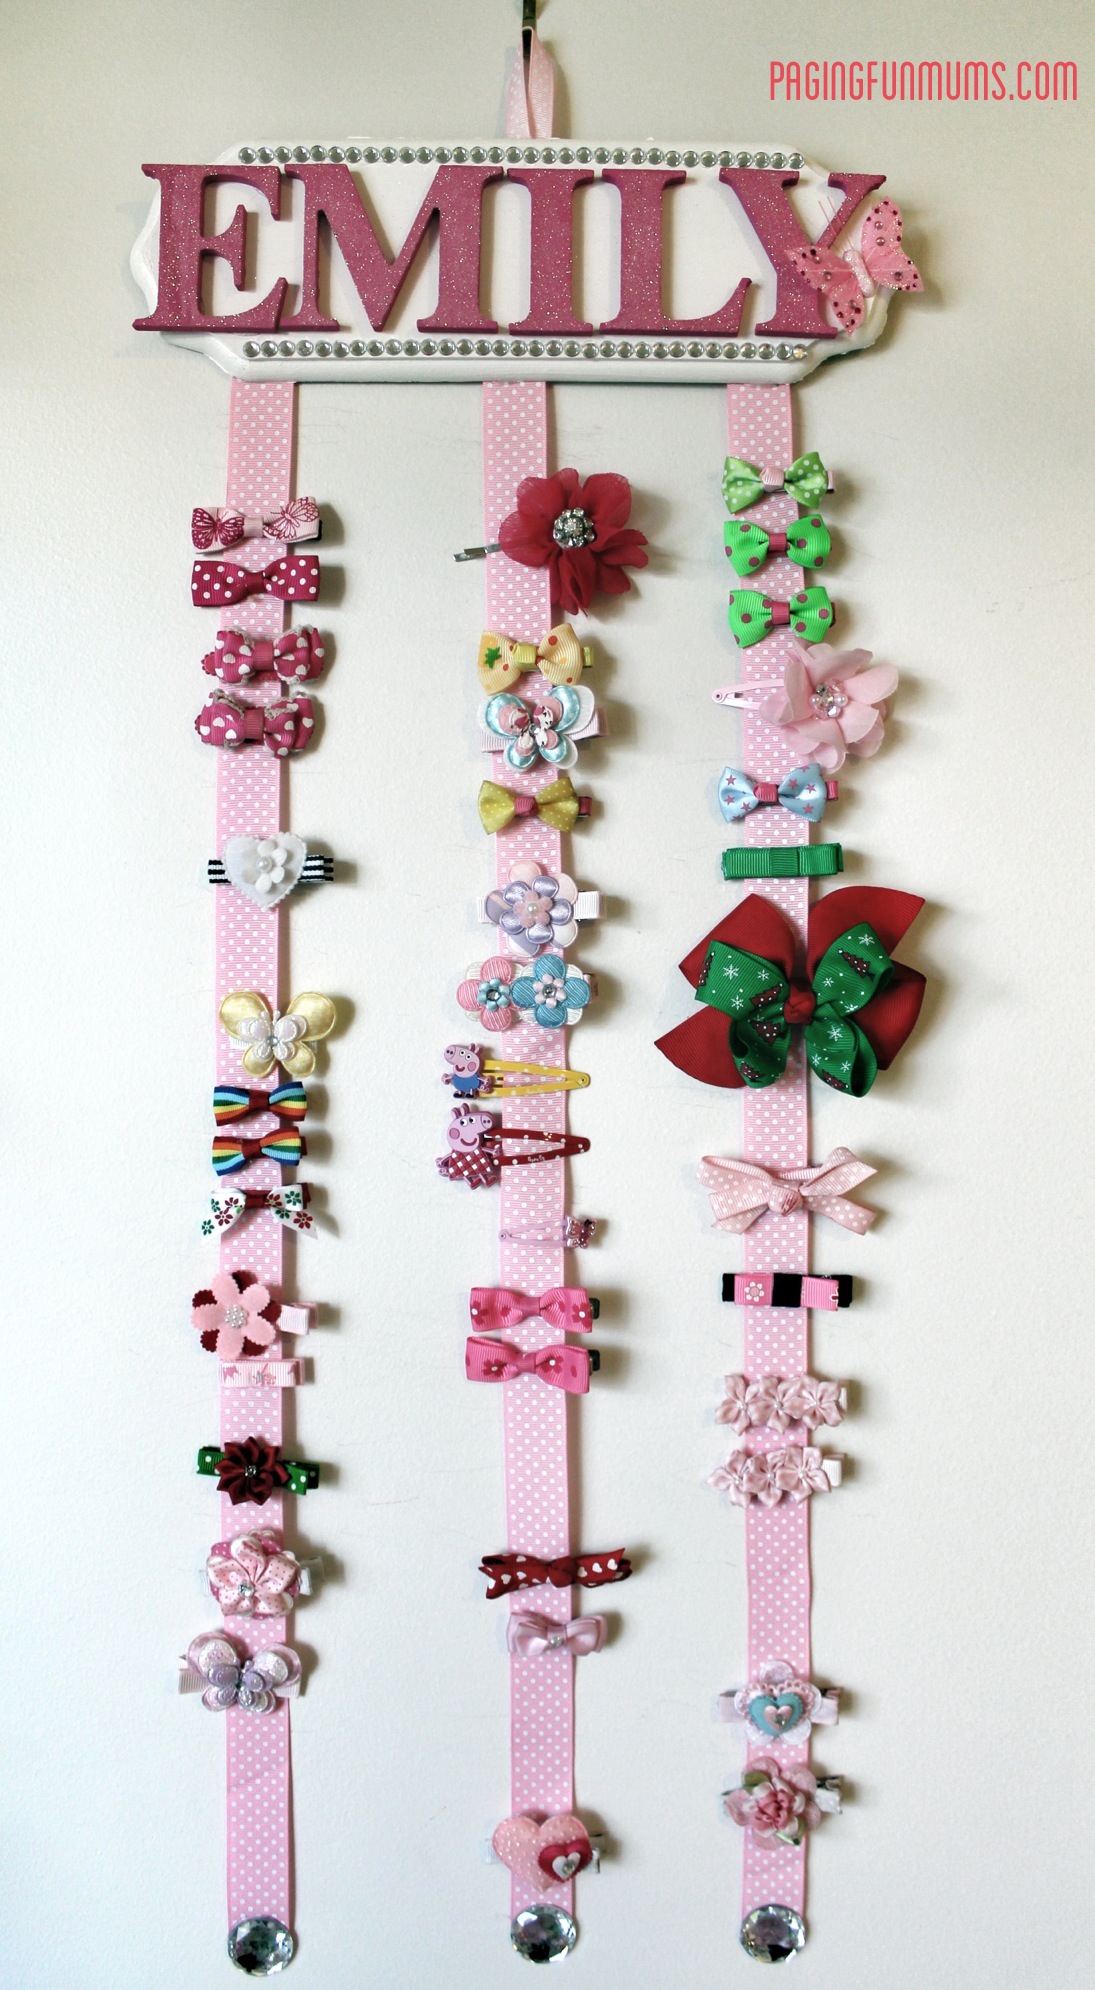
I made my first hair clip hanger when my little girl was about 6 months old. She has had headbands and hair clips in her hair since day one lol!
I had a look online for ways to store all of her little clippies but there wasn’t really anything I liked, so I took a little trip down to my local craft store (Spotlight) for inspiration and picked up a few goodies to make my own. It turned out beautifully and I have since made more for special gifts!
To make your own, you will need
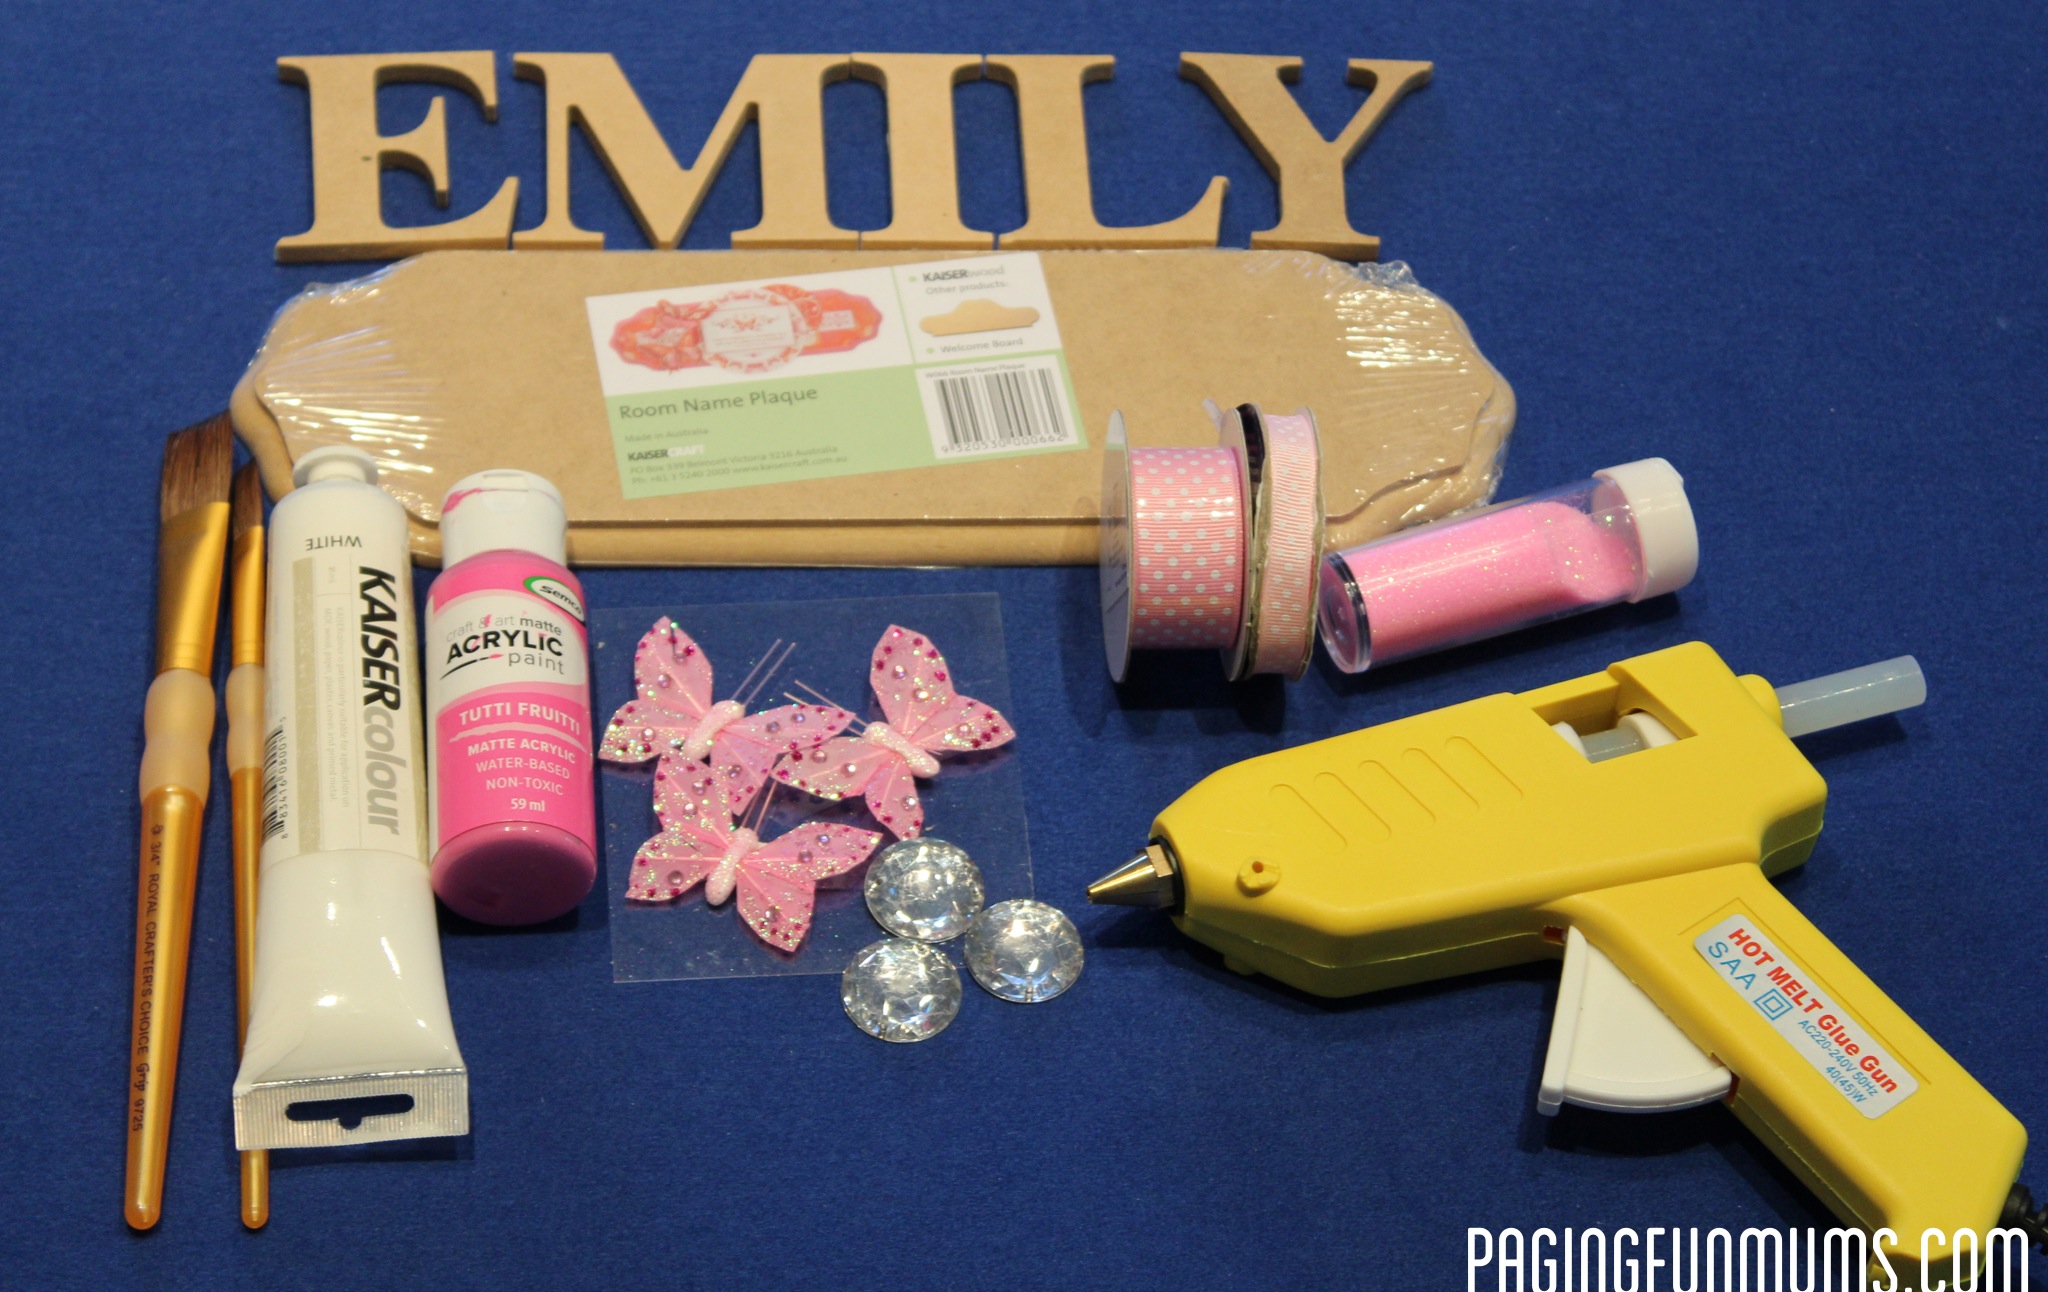
A wooden ‘name’ plaque (found at most Craft stores)
Wooden letters (to spell out the little Princess’ name)
Acrylic Paint (I used white and pink)
Glitter (I used a very fine pink glitter)
Paint brushes
Ribbon – 3 long lengths for hanging the bows & 1 short length to form the ‘loop’ for hanging
‘Bling’ embellishments or buttons (to weigh down the bottom of the hanging ribbons)
Glue Gun
Optional:
Craft Diamantes (you can buy these in lengths at most craft stores)
Butterfly embellishments
You can create whatever you like, but I like the ‘Butterfly Bling’ look ; )
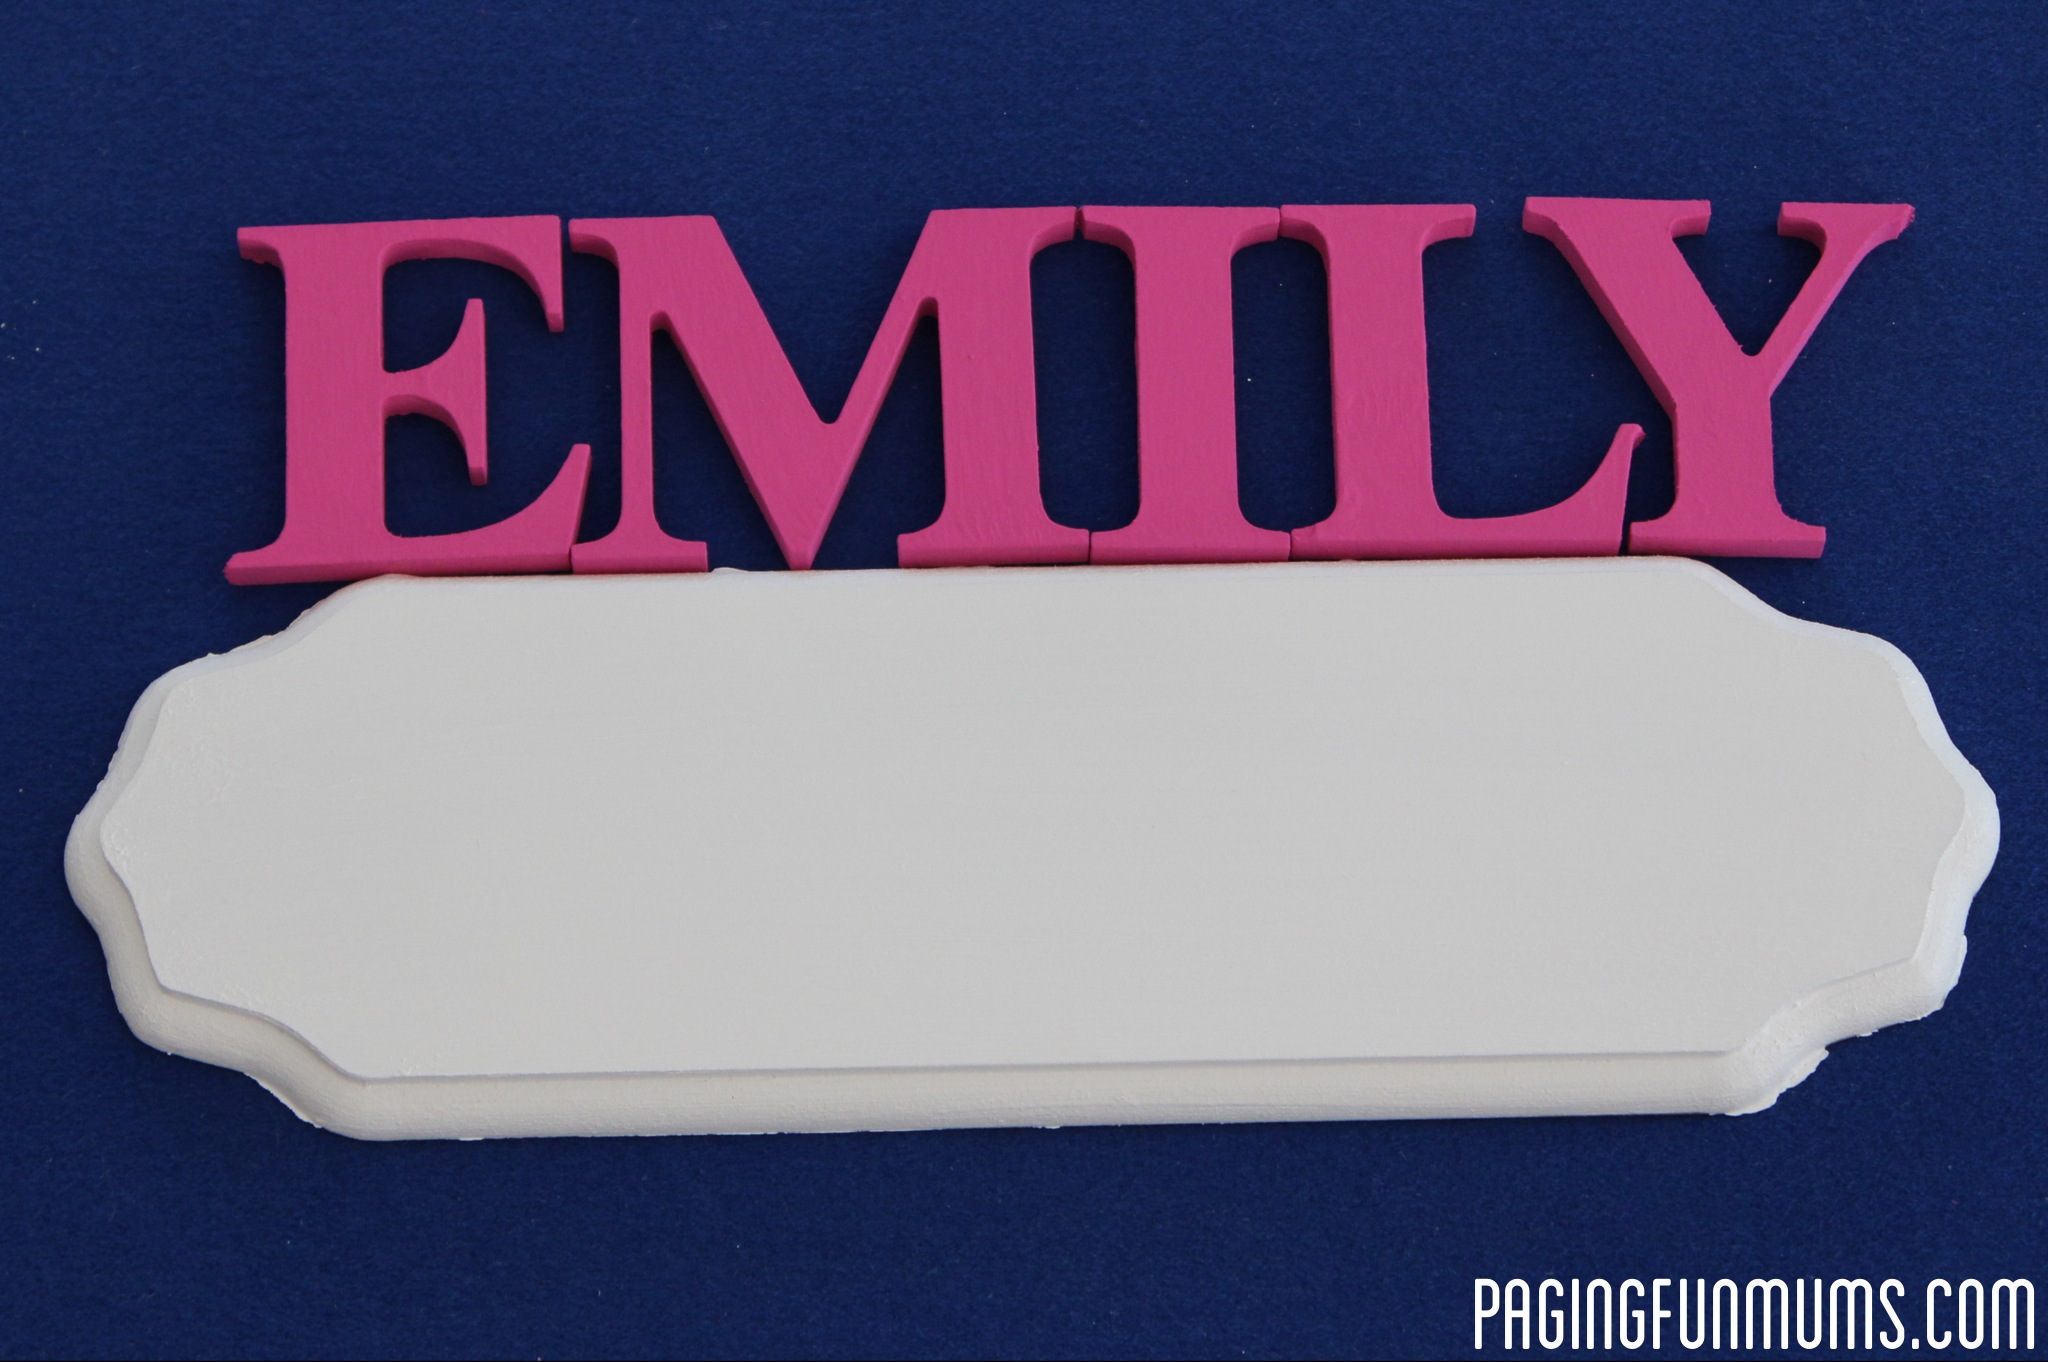
So first, you will need to paint your plaque and Wooden letters. I gave mine 3 coats but you could get away with 2 : ). After the 3rd coat of pink paint on the wooden letters, I added the glitter so it would dry into the paint. You don’t have to do this, but I think it looks so girly!
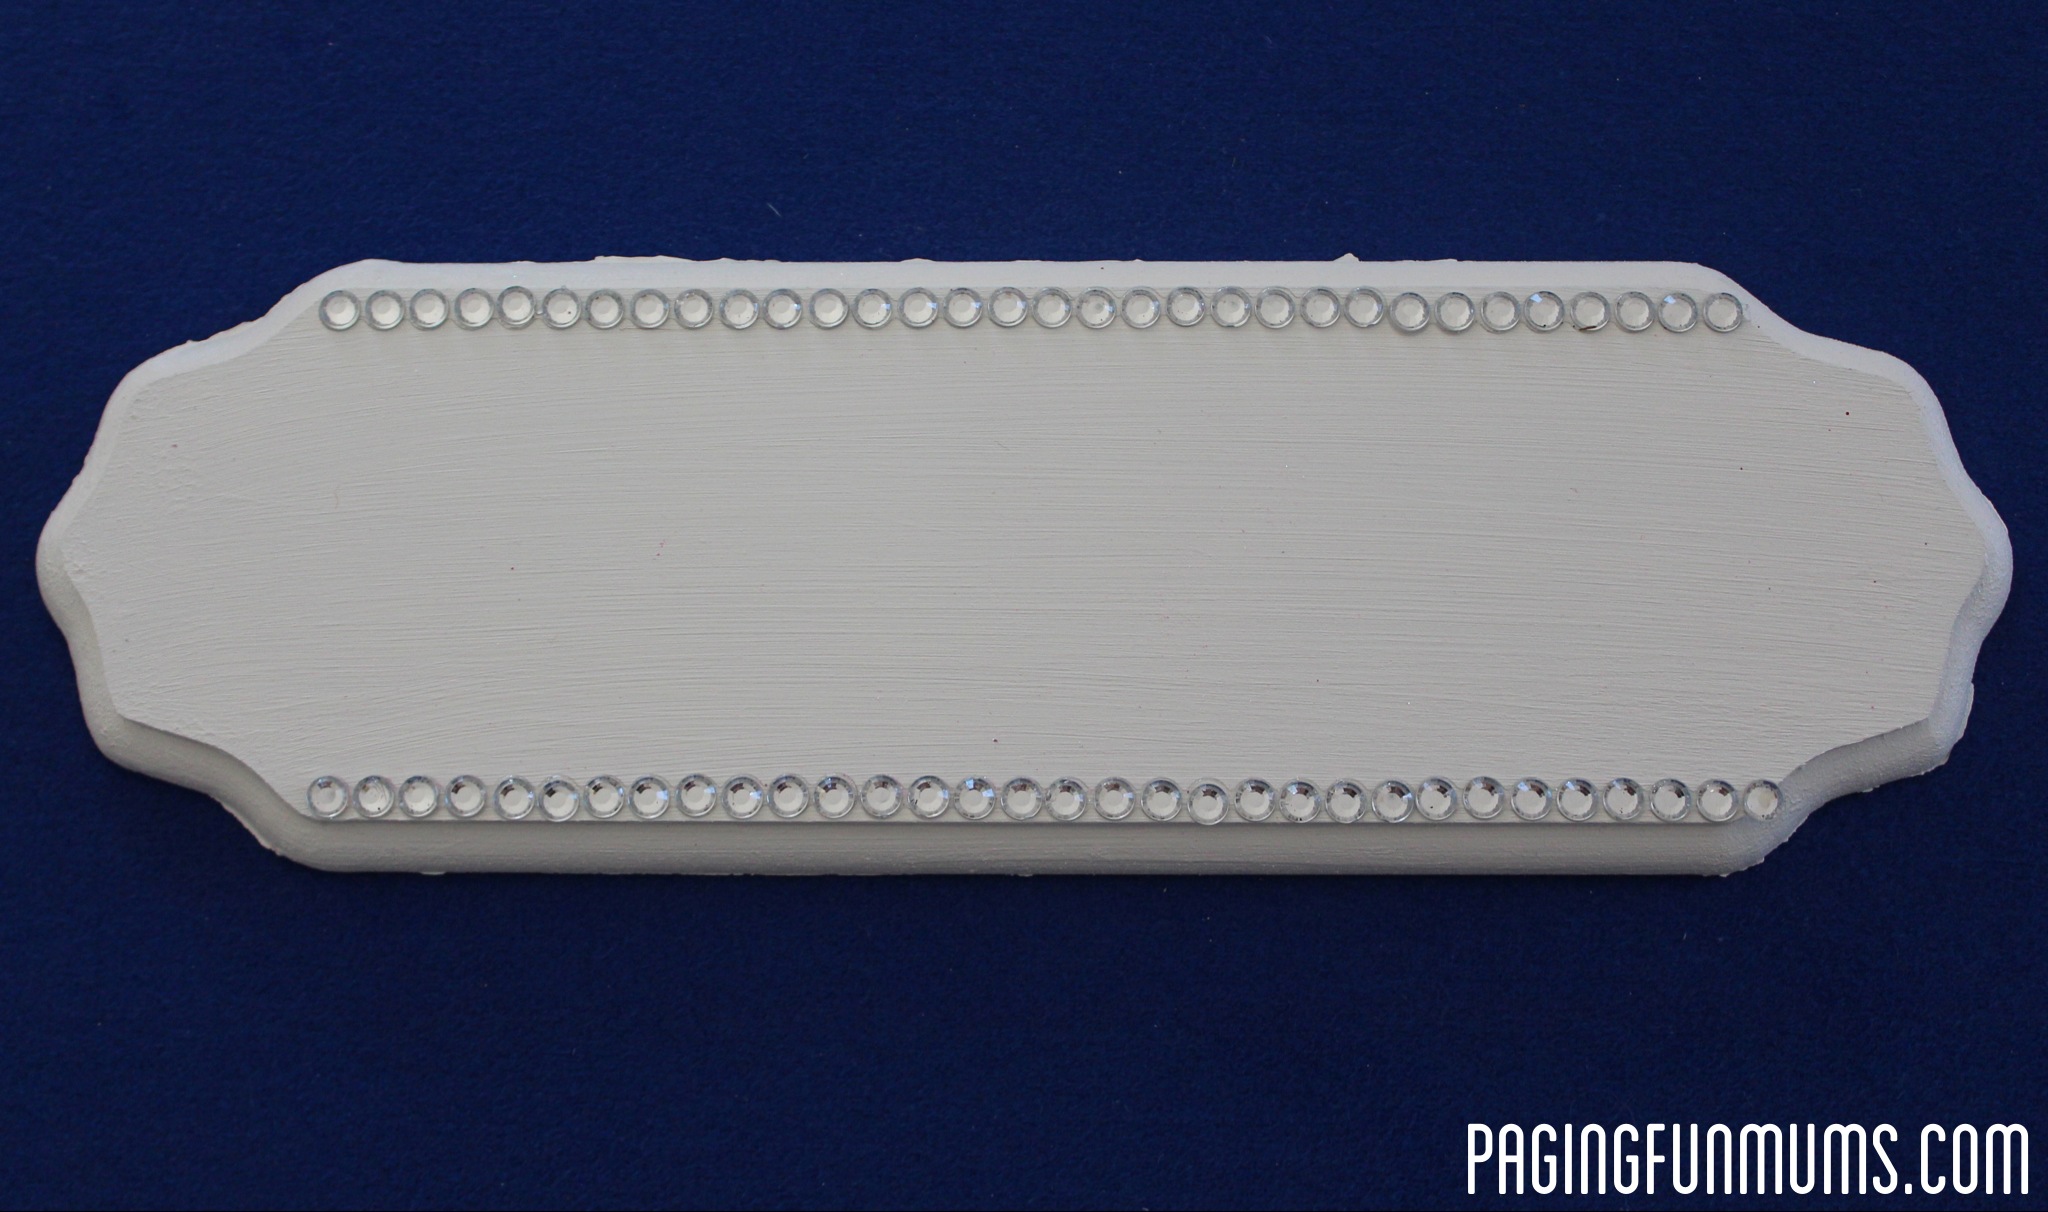
This is the stage that I added my ‘Craft Diamantes’. These come in strips so it looks ornate, but only takes a minute or so to do! These have adhesive on the back, but I add a little glue gunning action to make sure they stay in place.
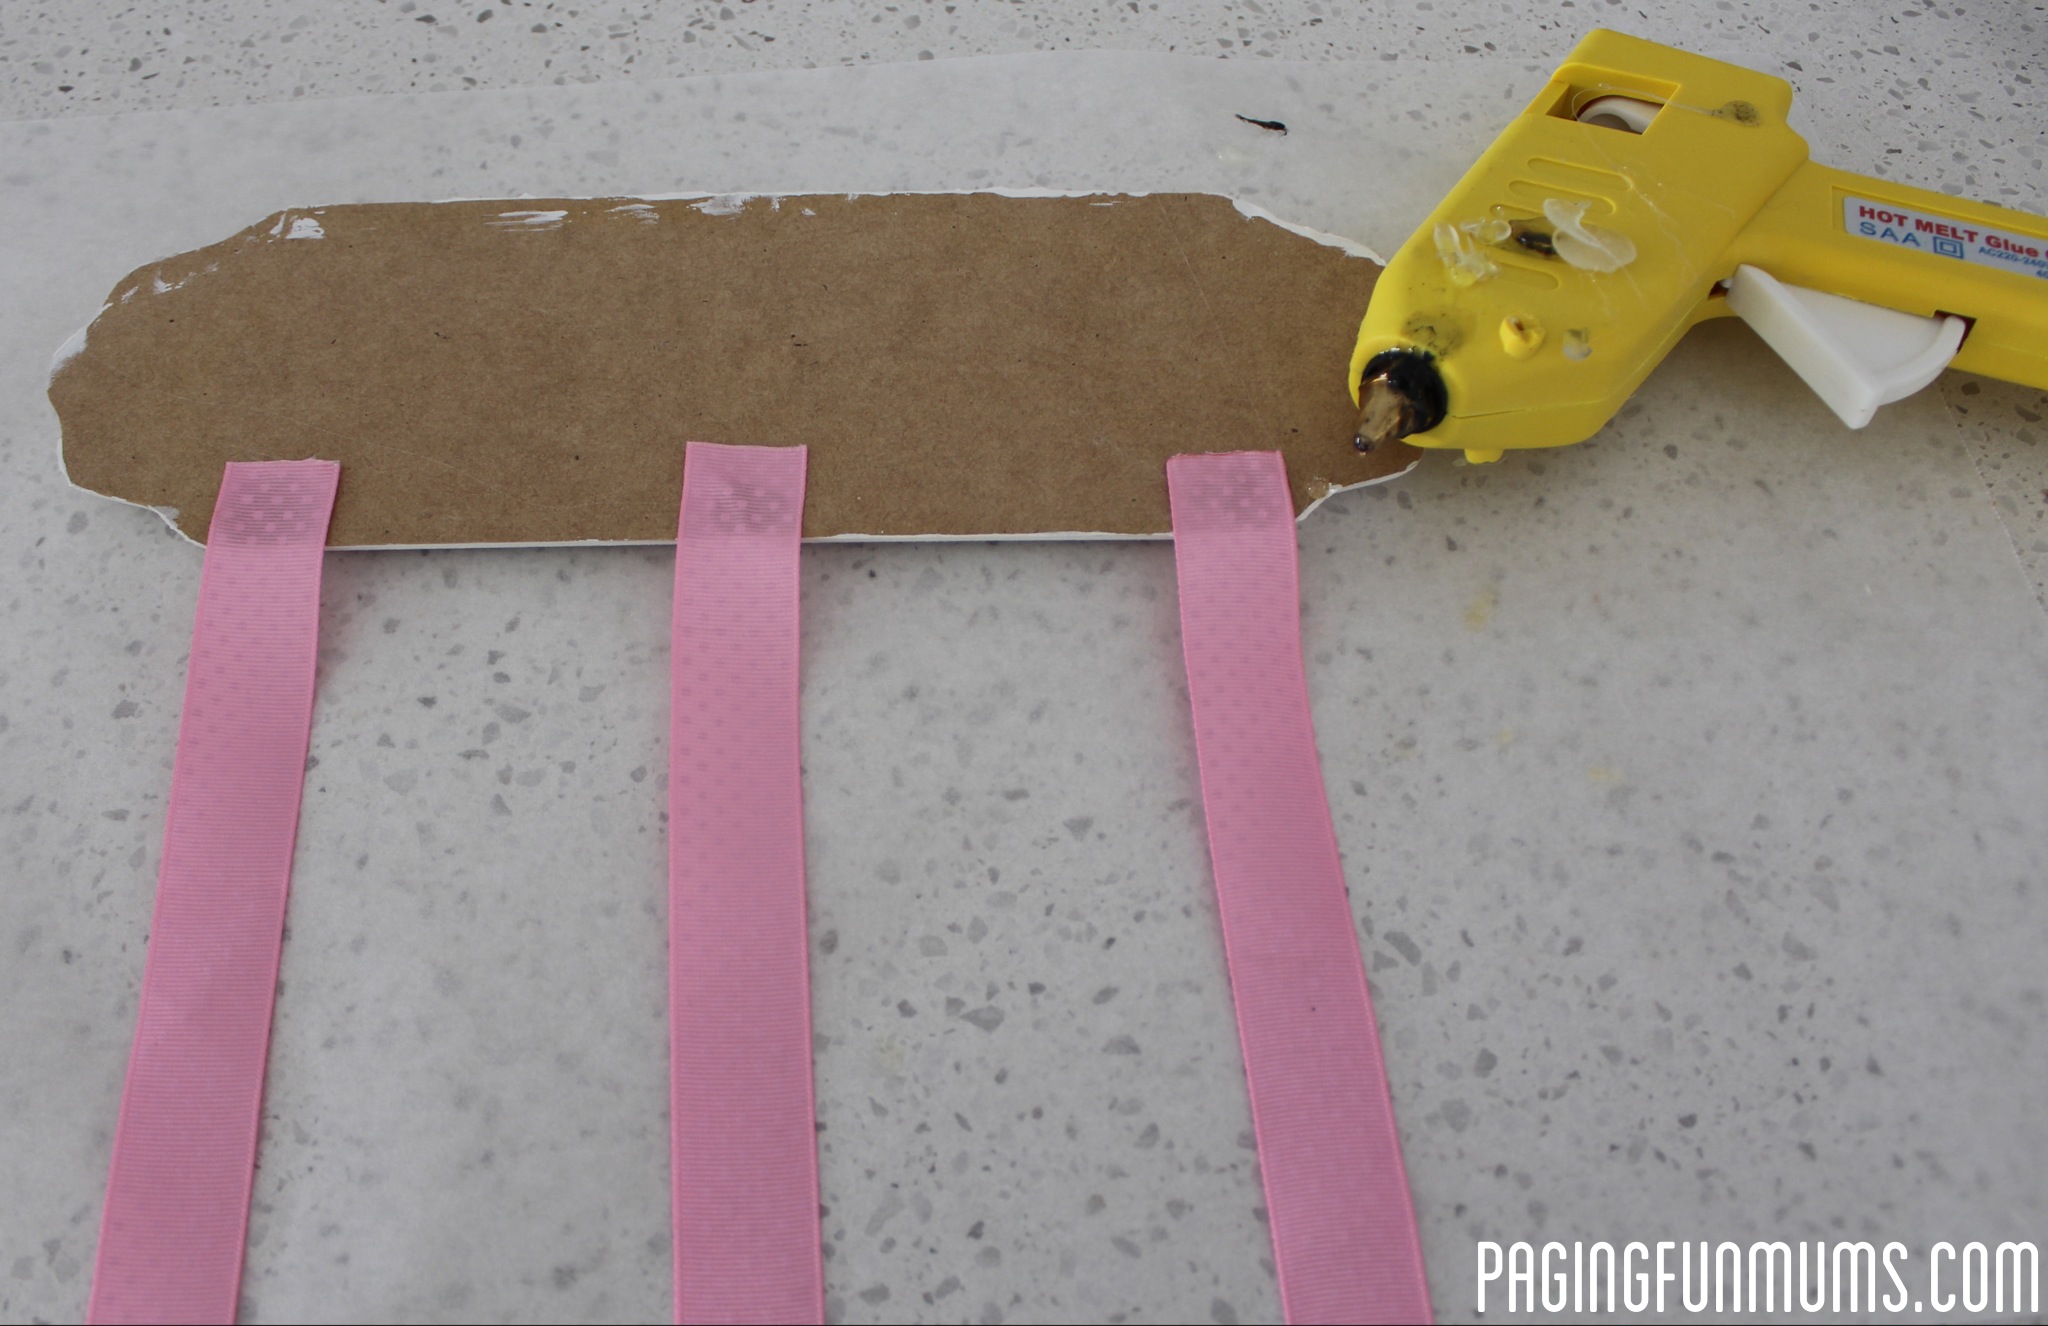
Then, using your glue gun, carefully add a dab of glue to the back of your long ribbon lengths and glue down in 3 equal sections.

Create a loop with your short length of ribbon and adhere with the glue gun to create your hanging loop. It might look a little messy on the back, but no one sees that part.
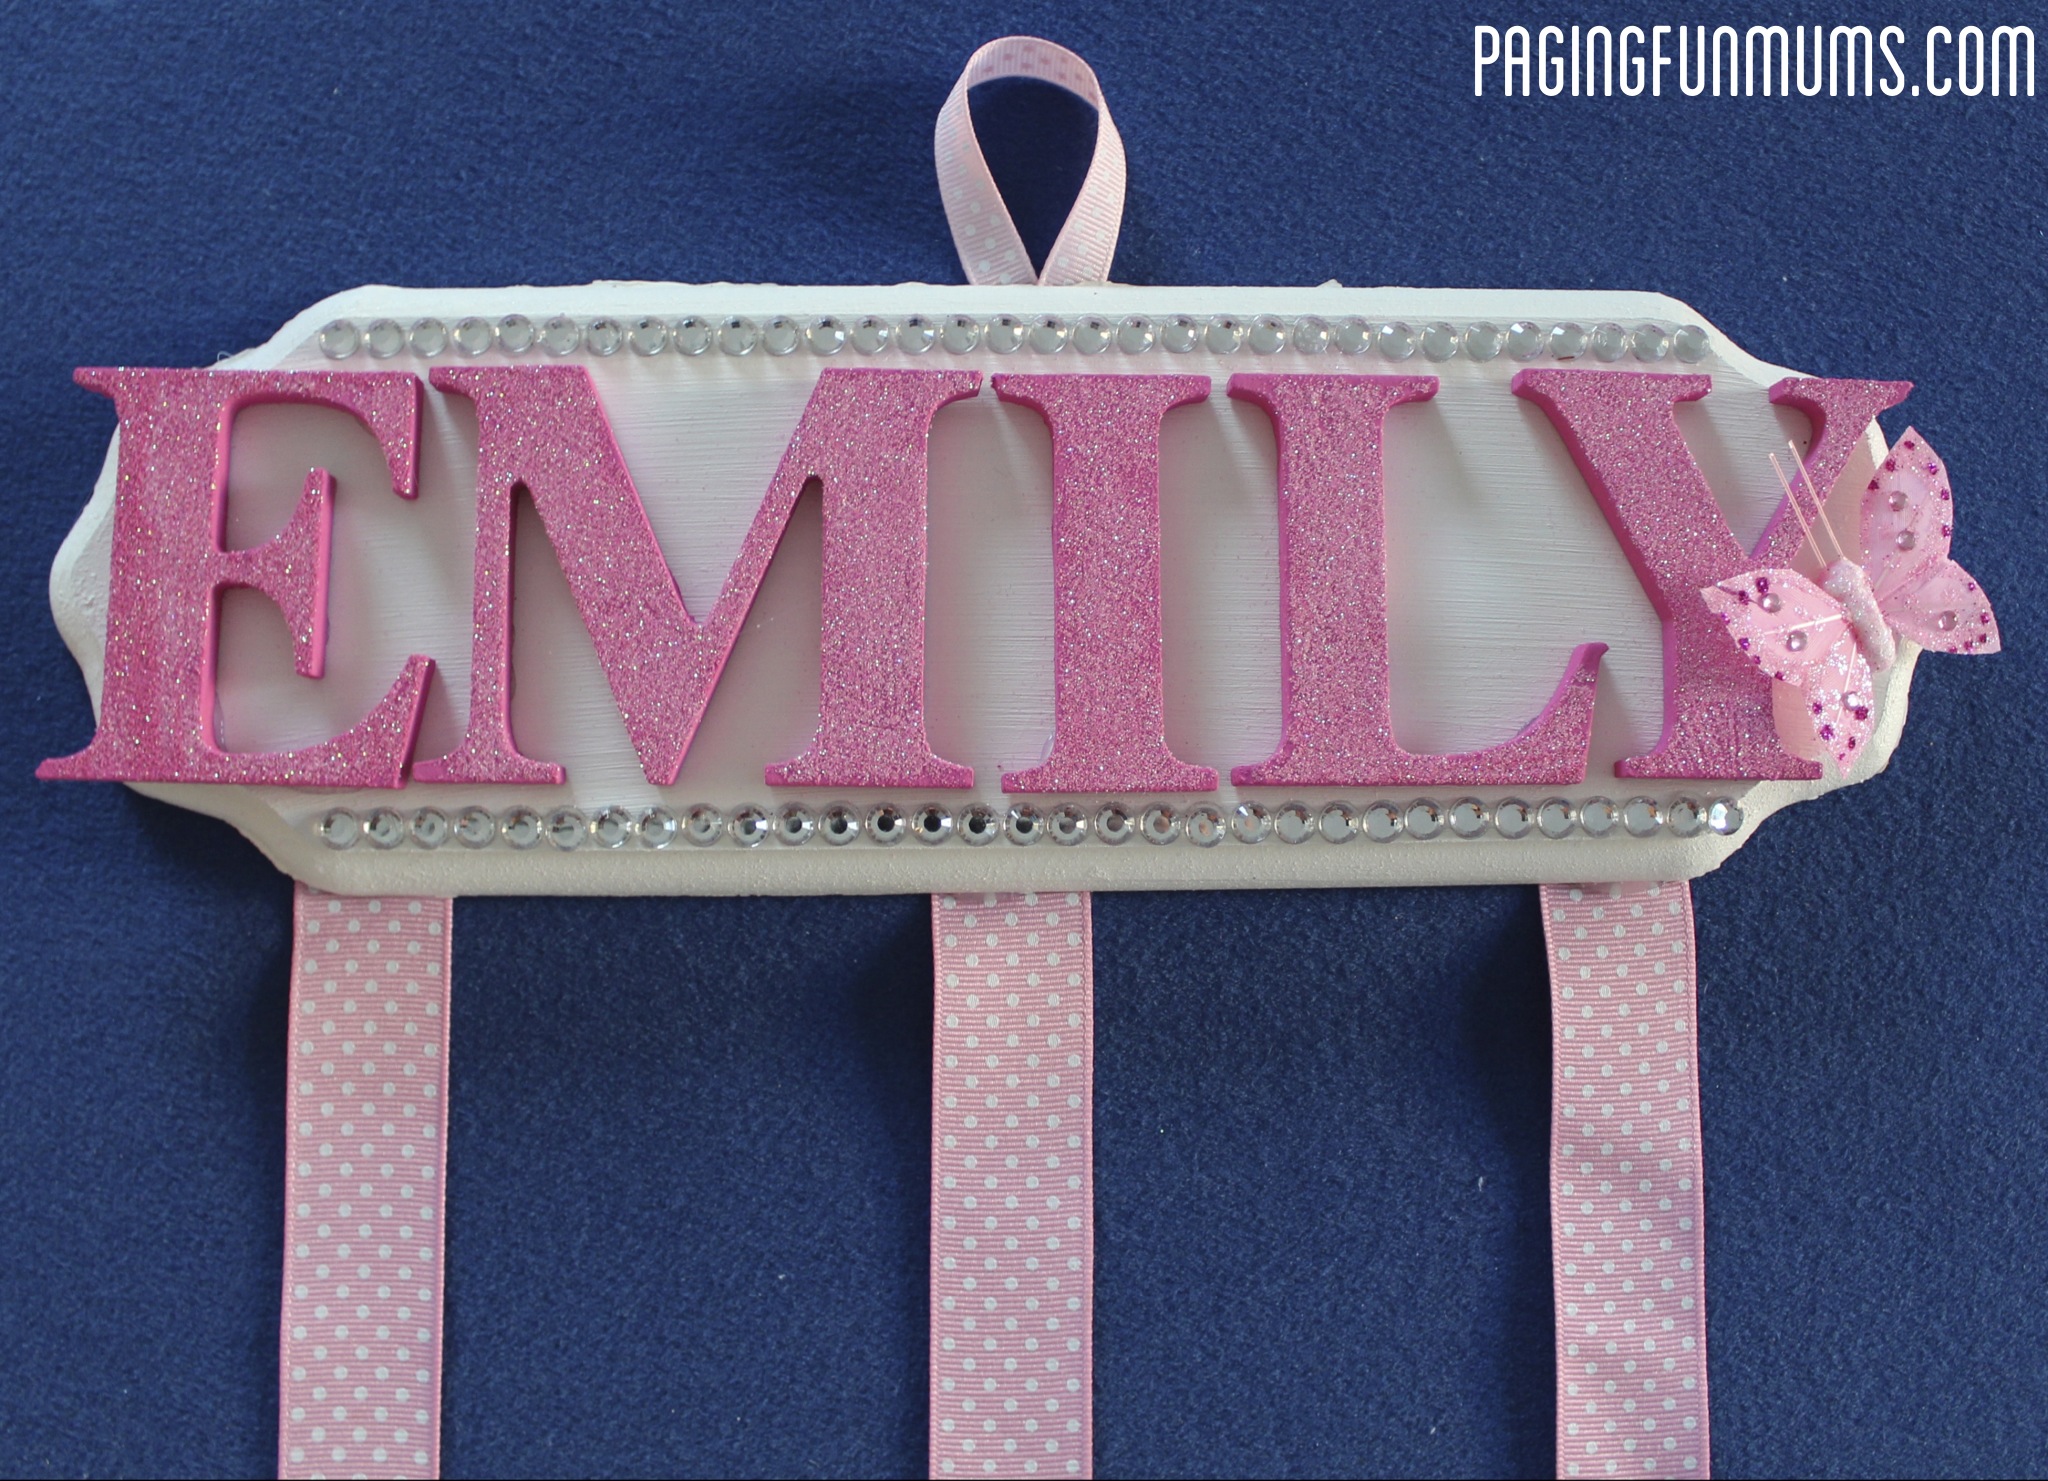
Then you glue on your wooden letters and add on your butterfly.
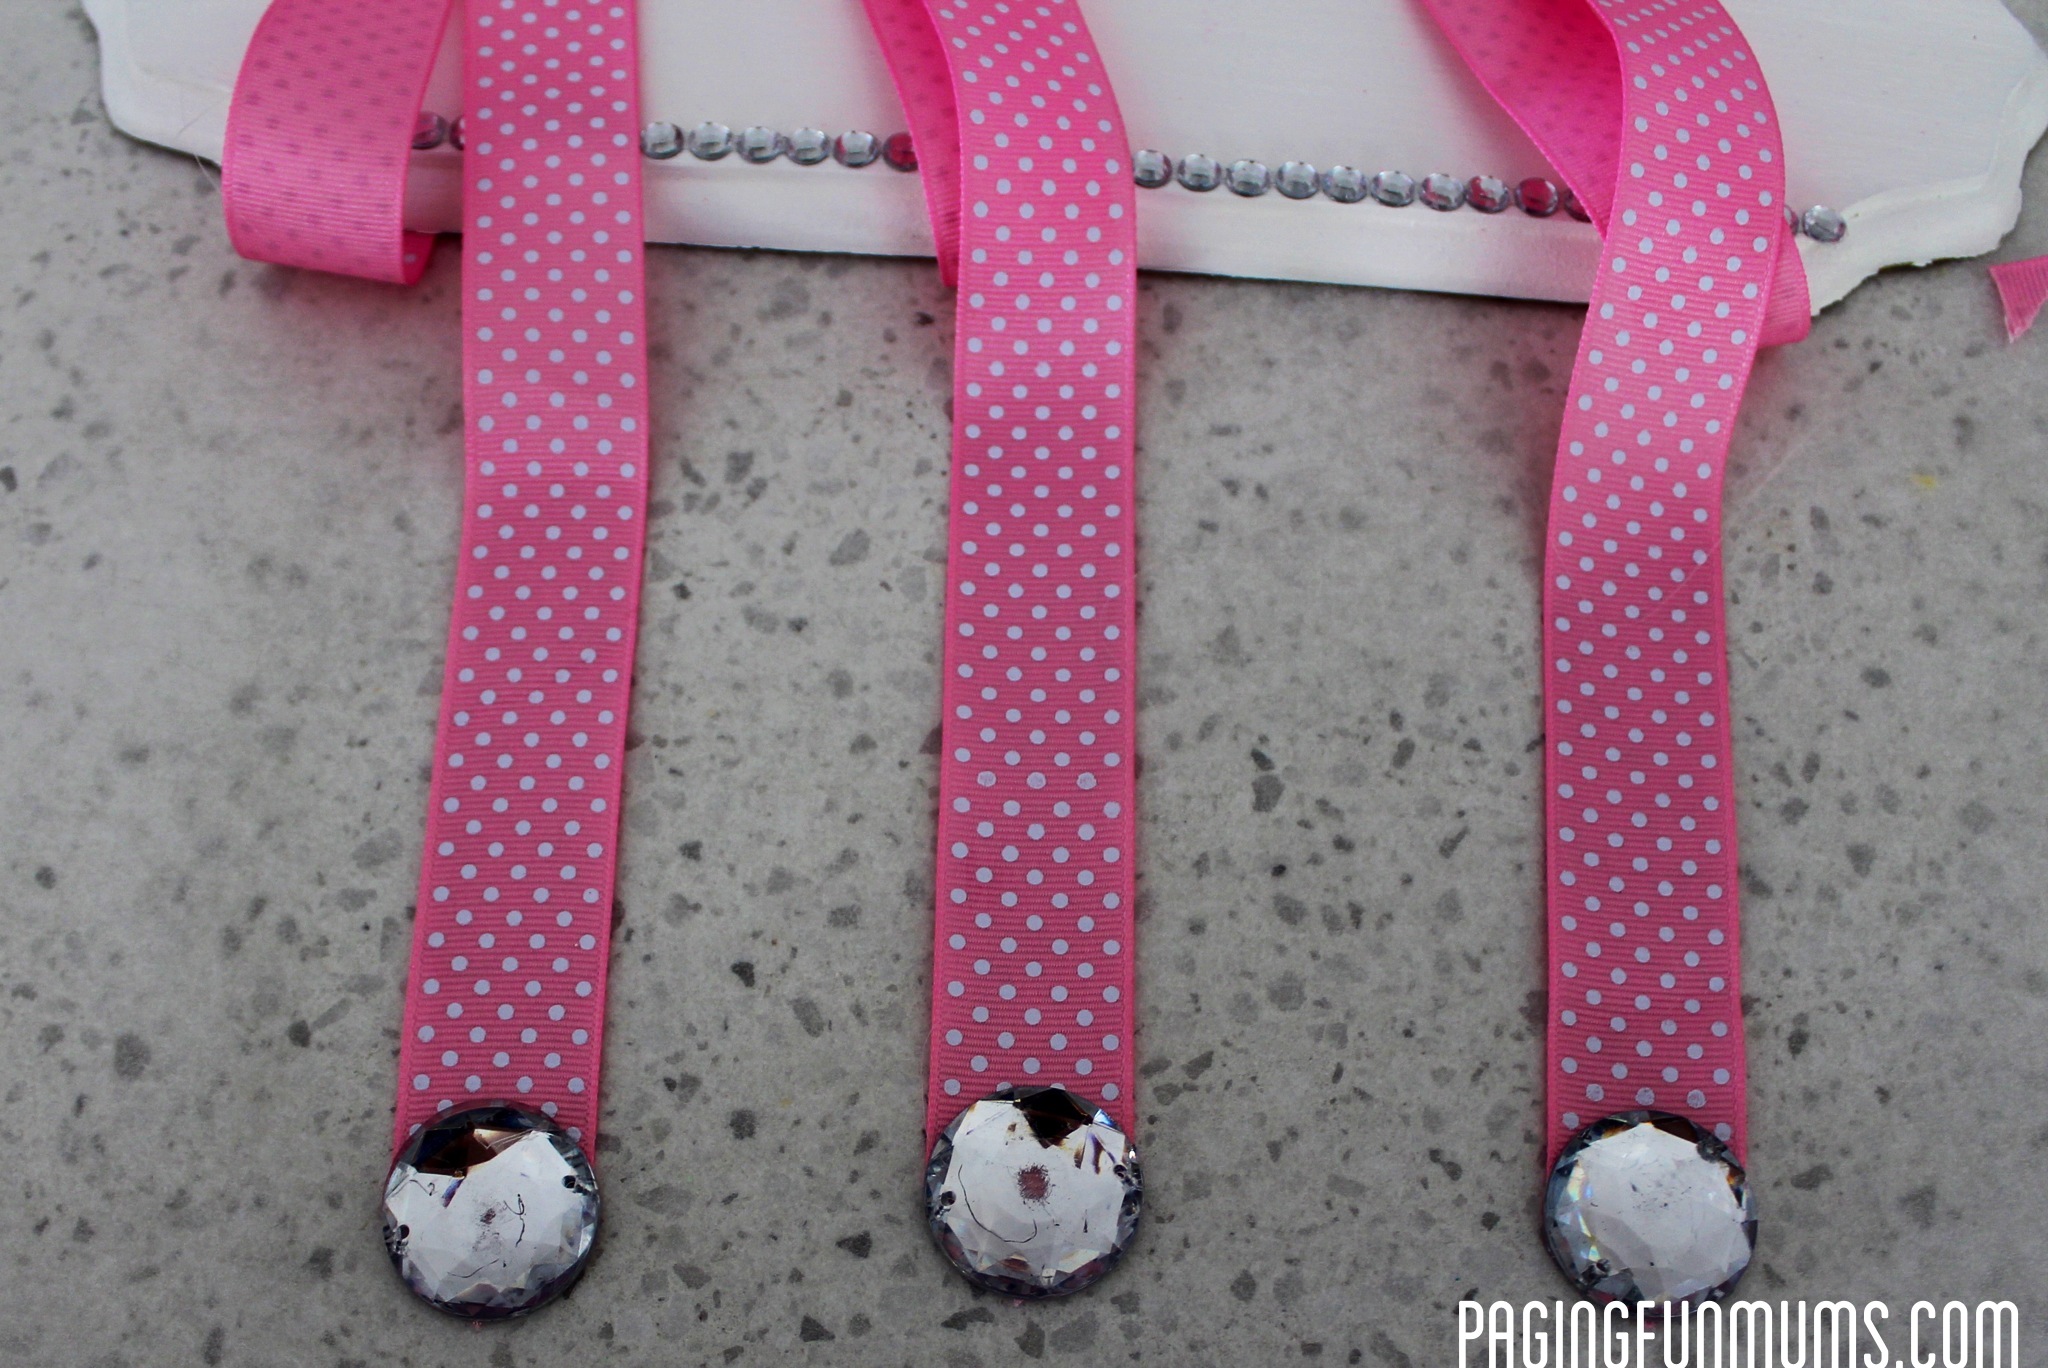
Now, glue down your bling embellishments or buttons to weigh down the bottom of your ribbons.
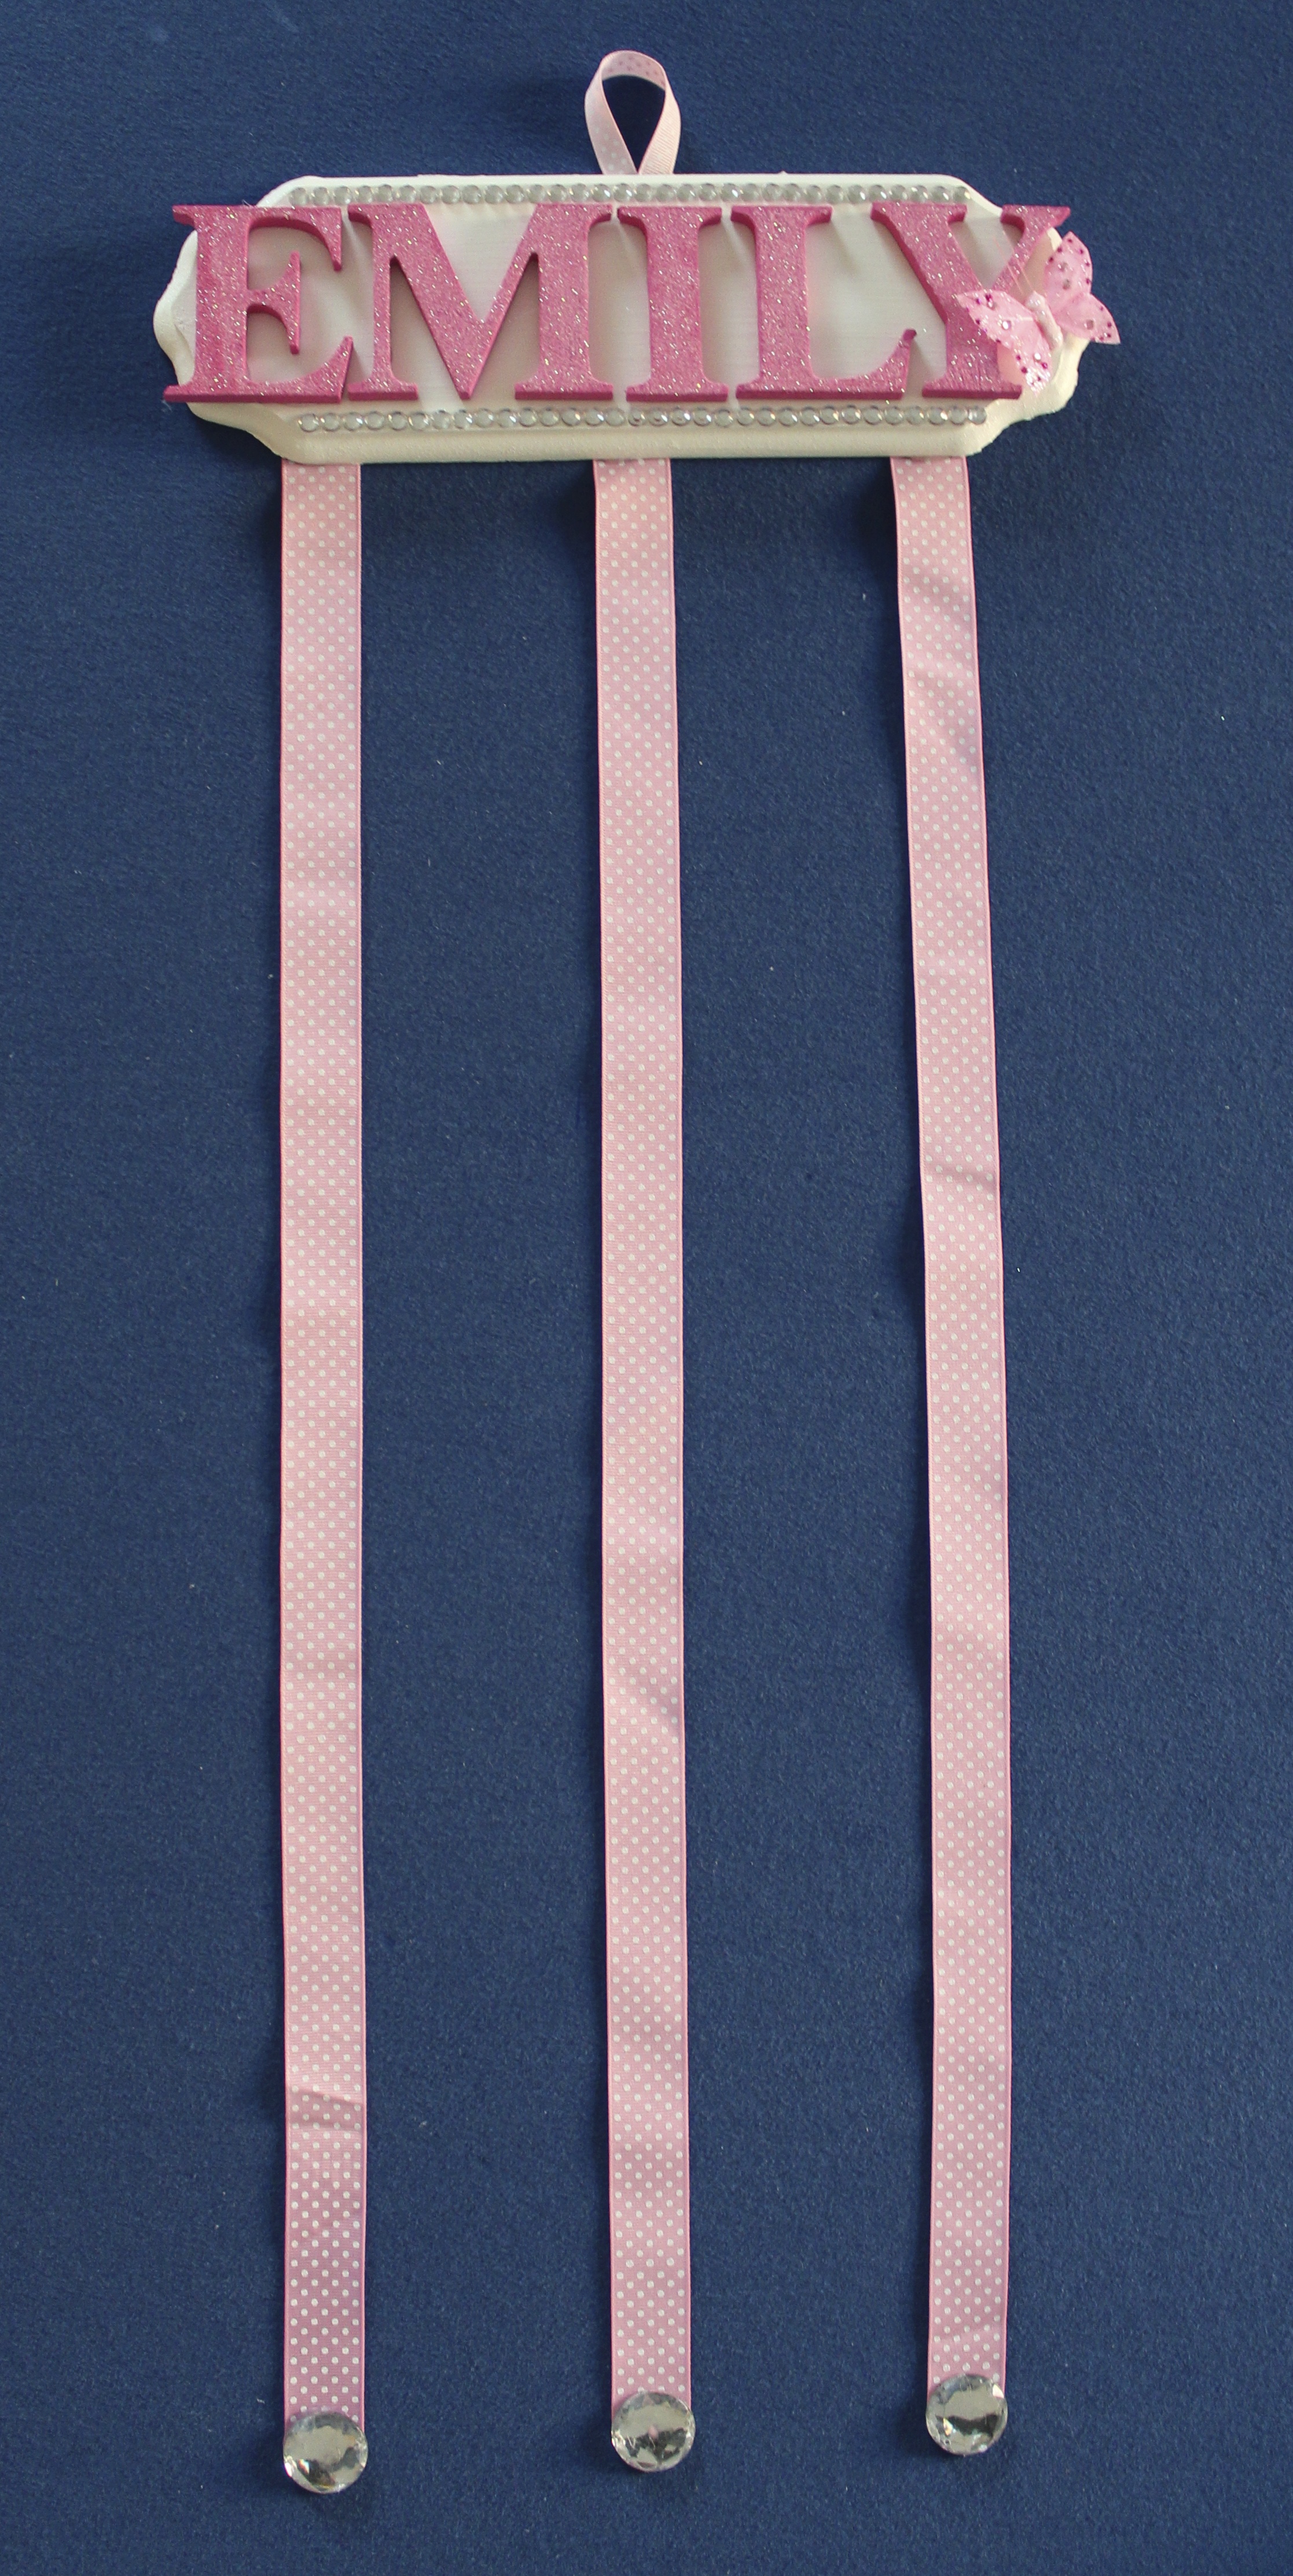
This is your finished product! These hold so many hair clips and make a beautiful wall hanging in any little girls room.
I hope you enjoyed this tutorial! Jenni x
Check out some of our other cool crafts whilst you’re here : )
We also have some fun videos for you to view too! You can check them out here.

Great job! Thank you so much for sharing this. It was like love at first sight for me, and I just made something very similar for my 2.5 year old.
Greetings,
Deniz